
To see if this custom-fit item will work for you please tell us what vehicle you'll use it with.


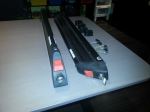
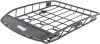
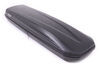
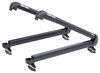
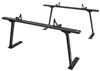
This Thule roof rack lets you carry cargo and gear on your vehicle. Aerodynamic crossbars with split rubber strips in top channels work with channel-mount and clamp-on accessories. Installs to raised rails on your vehicle's roof.
Features:
Specs:

California residents: click here
Videos are provided as a guide only. Refer to manufacturer installation instructions and specs for complete information.
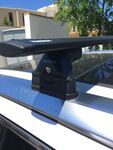
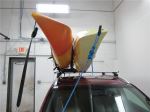
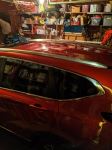
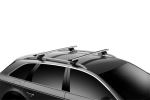
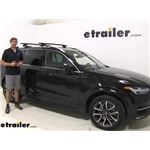
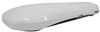
Zach: Hey guys, Zach here at etrailer.com. Today, we're going to be taking a look at the Thule Wingbar Evo-style raised rail roof rack system on our 2016 Volvo XC90. I have the black bars installed today, but it's also available in silver if you want it to match the raised rails. This is going to be a really nice, good roof rack system if you're looking to get some accessories on top of your roof, whether that's a bike rack, a cargo box, or maybe a kayak carrier.Thule does a really good job of doing testing and getting really good engineering to make sure that this works really nice and also has a really nice aerodynamic shape, because when you add something to your roof, you're going to get wind noise, you're going to get drag, and they do their best to try to eliminate that as much as possible. Now, regardless of what you put up here, no matter how aerodynamic it is, you're going to hear it. But when we've driven around with these bars before, we don't notice it over the radio, we don't get the whistling sound that the older style bars used to have.
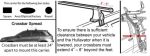
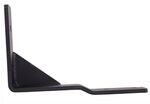
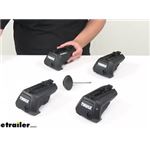
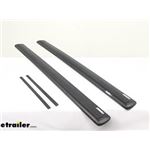
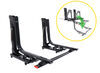
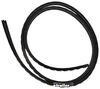
And that's because they have this really nice aerodynamic shape and they've done a good job of making these feet as aerodynamic as possible as well.The feet are going to be constructed of a really nice card plastic. So they're going to hold up for a long life. And the bars are going to be constructed of a really nice aluminum and they have a really nice finish on them. So they're going to hold up against rust and corrosion. Now, if you're carrying T-track accessories, the older style bars, they had this weather strip that you'd have to pull out and cut.
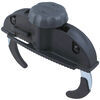
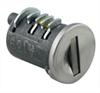
And this one is a nice upgrade because you don't have to pull anything out or cut it. It just feeds down in there and you can put your assessory in. And if you're not, it's just filled up. So it cuts down on that channel, picking up that wind noise. So this is a really nice feature that they've added to this bar.Something that I would consider upgrading is the lock cores.
They include these little plastic knockouts that you have to take a screwdriver to get these caps locked and unlocked. It's not the worst thing in the world, and that's how you'd access to tighten them to take them off. But if it's something you're concerned about, you can easily pick up a Thule lock core system and replace those so everything's keyed alike to your assessors as well. It has a 220 pound weight capacity. That's a pretty significant amount of weight, but definitely double check your owner's manual to see if your weight can withstand that amount of weight and go with whatever the lowest is, whether it's your roof, the roof rack, or your assessory.And I have the 53 inch bars on here.
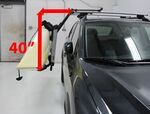
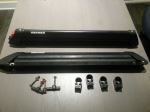
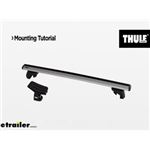
You can go a little bit further out. I wouldn't get any further than your side mirrors here. That's the benefit of this style is you can kind of add some longer ones. The longer you get, the more stuff you can get up there, but then you run the risk of hitting your head, getting in and out of your vehicle. But I think the 53 inch looks really good with this car. So you can see this is still going to work out with our sun roof opened up, and I'm going to give you a measurement there just to give you a better idea as to the clearance you have on that.And that is just shy of two and a half inches. That's definitely something to keep in mind if you have a clamp on your assessory that goes a little bit further down than that, that you don't want to do your sun roof if that's an issue. I'm going to close this up and then I'll give you a measurement to show you how much is this going to add to your roof as well. That is about four and a quarter inches. So not super tall. That's due to the nice low profile design of this foot pack. I think overall, this is a really nice setup. Thule does a really good job of making all of their products really high quality. I think that they're really quiet when it comes to roof racks and this style is super easy to install. So let's just show you how we got them put on.So I already had the front bar installed and the second one's going to install the same way. I went ahead and put one of the feet on, and this one's going to go on the same exact way. And you'll just flip it upside down and slide it into this slot right here. Just fit that groove into there. And then what we'll do once we get that there, I like to just put our end cap on. And if you have any problems where this maybe doesn't slide very easily, you can pull, squeeze that a little bit, and then you can move it around. Mine's fairly loose so I didn't have an issue with it with this one, but then we can get this right here. There's a bolt right there. I'm going to spin that out, get that expanded out a little bit more, and we can get this raised up and place this onto our rails.Now, we're going to gently lay this onto our rails. If you have somebody that can help you, it's a good idea to help them guide it on there, but this one's not too bad. So we're just kind of set this on there and we'll just get this set on top of our bars and we can space it out with our front bar. Now, there's no set measurement of getting these together, but I'm going to keep mine at about 30 inches. You do want to make sure that you're keeping it that at least more than 24 and a half though, but it all depends on the accessory that you're mounting to your roof. So then we'll go to the other side and we'll check that one as well.One thing to keep in mind is on this XC90, they do have these support beams in the middle too. So that kind of creates some interference with getting this on here, but that's the benefit of the raised rail style, is you can kind of shift this around to fit your needs. I like to have mine a little bit further back. You can see it kind of starts to slant down. You can have it mounted there, but I just prefer mine to have it a little bit further back. But once we get that even on our spacing, we need to get our crossbar overhang to be even so the bar sitting even this way. Then once we get that set, we can come back and start tightening with the included tool.You don't want to over-tighten it on one side because you don't want it to pull too far to one side. So we're just going to go back and forth and kind of tighten it down evenly as best as possible. And after we start to get it closer, the great thing about this tool is it has an included mechanism in there. And once you hear that clicking, you know that you've got it torqued down just fine. And you don't want to go any tighter than that, so we can just do the same thing on the other side. Then once we get that all tightened down, we can put in our end cap there, get that to its locking position. Then when we get all of our caps put on, we're good to go and start loading up our accessories. But that's going to do it for a look at the Thule Wingbar Evo raised rail style roof rack system on our 2016 Volvo XC90.

Do you have a question about this Roof Rack?
Info for this part was:
At etrailer.com we provide the best information available about the products we sell. We take the quality of our information seriously so that you can get the right part the first time. Let us know if anything is missing or if you have any questions.


Thank you! Your comment has been submitted successfully. You should be able to view your question/comment here within a few days.
Error submitting comment. Please try again momentarily.