
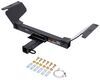
Inno Aero Roof Rack for Flush Rails - Aluminum - Black - Qty 2


To see if this custom-fit item will work for you please tell us what vehicle you'll use it with.


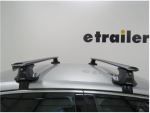
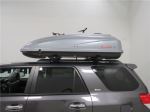
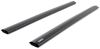
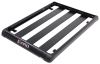
This sleek, aerodynamic roof rack provides space to carry gear on your vehicle. Crossbars with push-down rubber strips in top channels work with channel-mount and clamp-on accessories. Installs to flush rails on your vehicle's roof.
Features:
Specs:

Videos are provided as a guide only. Refer to manufacturer installation instructions and specs for complete information.
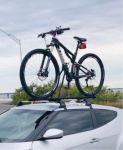
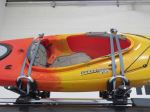
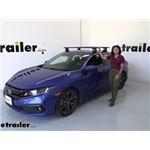
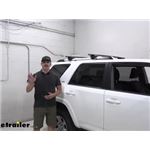
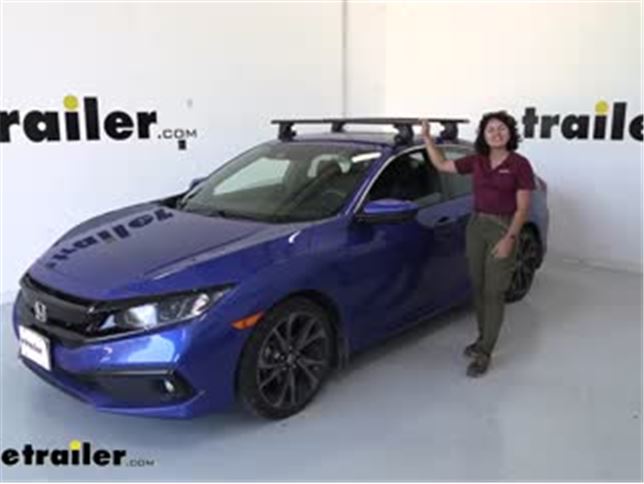
Hey everyone, it's Evangeline here at etrailer and today we're taking a look and I'm gonna show you how to install the Inno roof rack system with the Through feet and the 51 inch long crossbar and the custom fit kit for your 2019 Honda Civic. So this is the Honda Civic Sedan and it's a cool looking car, but what if you wanna use it for other things besides looking cool Maybe you wanna carry around other accessories like your roof box or your kayaks or your roof basket. What you then need is a roof rack system. So with this having a naked roof, you are gonna have to get the custom fit kit that fits around your doors as well as the towers and the crossbars that are the right length. So we'll talk about that and how well it fits your car and what other options you might have. So first there's a crossbar length and this is a 51 inch long crossbar, which I like because there's a good amount of overhang here.
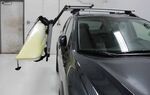
I get to maximize the length of having a crossbar measuring from the front to the end. By the end cap we have two and three quarter inches of overhang. Now the downside to overhang on the sedan is if it sticks out past your door you could also possibly hit your head against that crossbar. So if you want a shorter crossbar, that's an option for you or you can check out the flush feet options as well that Inno has. Next is gonna be clearances.
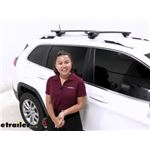
So that's two measurements. First is a distance from the top of the roof to the bottom of the crossbar. Here we have it at three and a half inches of clearance. So if you have accessories that have really large clamps that go around or you're gonna have to work with U-bolts and wingnuts you want a good amount of clearance. Three and a half is actually pretty good.
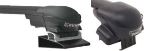
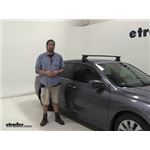
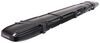
Next is the height added to the top of the roof. So here top of the roof to the top of the crossbar a bit about little past four and the half inches. And what that means is this is where your cargo is gonna sit if you're carrying around skis and snowboards especially those with extra large bindings you wanna make sure you have enough clearance and if you don't, you get to check out our accessories that give you that extra clearance. So this is actually the system that I have on my own car because I think it looks really, really good. This is the Through feet design, which means you have the end caps on the end, so you have that nice sleek look.
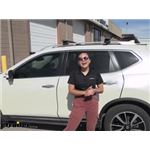
You can also see how it's an aerodynamic bar. So you have it where it's wider on top and it tapered towards the end and that way when you're driving down the road you have less wind drag and less wind noise compared to your traditional round or square crossbars. And if you take the end cap off, you actually have access to the T track channels. So if you once use your T track mount accessories, you just push down and then you slide the accessory through that way if you want your, let's say bike rack further towards the end, you can just secure it up top and pop that end cap right back on to cover it. I also like this because everything is included, including the metal lock course. Some other brands, they have plastic lock course and you have to purchase separately other lock cores that they're all key to like things like that. Here you have four key to like lock course and two keys. So that way if you want to secure your roof rack system you can just lock that up and you can now unlock it and that way you have access to the hooks to tighten it down. So is made of aluminum and not only does it look sleek, but it's also very sturdy. So compared to entry level roof reference where if you put all the weight in the middle it starts bowing a little bit. This is strong all throughout. Now with this being a naked roof though you do have a no given weight capacity up hundred and 20 pounds maximum. So while the bars themselves can carry up to 165 just because of how it sits on your roof you may have less than that. So double check your actual roof weight capacity, add up the weight of your cargo, the weight of your accessory, the weight of your roof rack, and that will help you stay within your capacity. Because you have to install this at certain points on your roof you have a fixed crossbar spread so center one crossbar two to the other it's gonna be 25 inch crossbar spread. Now that install process, let me show you how to do that. So the install process can look a little tricky but that's what this video is for. I'm gonna guide you through the process and everything you need is gonna be included with your kit. Now I already installed the rear crossbars. We're gonna install the front crossbar together. So first you're gonna insert this plate into your crossbar. So push out that tray until you can pop this through, make sure it's facing the right way, see how that open end is facing out. And then you're gonna push this inside, press that button in until it's visible. Then get your tower and see how there's a bolt as well as those little tabs you're gonna fit that onto the plate and no need to tighten down anything just yet. Just make sure it's seated there, so that you can push it through the crossbar. Now do the same thing on the other side. Now included with your fit kit is going to be the measurements for your vehicle. So for example, we have the four doors, Sedan Honda Civic here. So for the front crossbar the towers need to be 41 and a half inches apart. So you're gonna take your measurements, you can use the center line to measure for the towers, just make sure that you're going to the right spot on the tower for those measurements. Once you've gotten your towers to the distance apart just use the included tool to tighten down the tower. Then get the pad that matches your crossbar. So we're gonna do the front crossbar. So the pad number is gonna be 425 and we're gonna pop it onto that tower, making sure it's facing where the taller portion is towards the inside. Allowing you have a specific mounting position. So for your front cross bar it's gonna be 11 and three quarter inches from from the door seem. Go right there and you have an included sticker. If you wanna put this there as a marker now you're ready to very gently set your crossbar onto your roof. If you have those rubber pads on them, that's good because then you won't be scratching up your roof. So once you have it at the right measurement on both sides, you're then gonna put that hook on. Now the hook has different numbers too so make sure you get the right one for the right crossbar. Just set the hook on the tower, grab your bolt and feed it through so it threads to the back part and just tighten that down by hand first. So I say hand tighten because you want to evenly tighten down the towers, meaning you would partly tighten down this side, then you go to the other side and then tighten that down, then come back here, back and forth. That way you don't skew the entire system to one side or the other. So once you've tightened down both towers properly, then everything should be good. Everything should be secure. You'll even be confident enough to slam your door on that hook. Now let's just put those end caps on. So there's the end caps for the crossbars. Those just pop on there. And then there's the end caps for the towers. And then don't forget to lock them down. Just to double check that all forward towers are locked down and that everything's nice and secure. And that's it for the install, you're ready to pack this up and go. So my personal thoughts about the Inno roof rack system is you can see why I use it for my own car mainly because of that overhang is not too much where to bother getting into the car, but it also looks super slick. The silver accents match the silver accents on our Honda Civic here and I think that works out great. But not only does it look good, but it works great too. That 120 pound weight capacity could be a little struggle if you have your heavier items. So definitely keep that in mind. If you want less overhang, check out the shorter bar version or the flush feet version. And if you have Thule or Yakima or Rhino Rack accessories, there's also crossbars that match those accessories if you want them all key to like. I personally still think it's a great choice to go with your Inno roof rack system though. This is the 51 inch long crossbar with the Through feet with the custom fit kit for your 2019 Honda Civic. My name is Evangeline, and I hope you enjoyed the journey..


Do you have a question about this Roof Rack?
Info for this part was:
At etrailer we provide the best information available about the products we sell. We take the quality of our information seriously so that you can get the right part the first time. Let us know if anything is missing or if you have any questions.


Thank you! Your comment has been submitted successfully. You should be able to view your question/comment here within a few days.
Error submitting comment. Please try again momentarily.