


To see if this custom-fit item will work for you please tell us what vehicle you'll use it with.


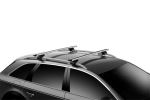
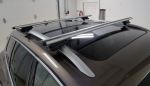
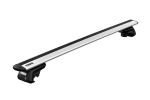
When you’re loading up for a weekend on the water or a long road trip, space makes all the difference. The Rhino-Rack Sportz Roof Rack gives you full-length 54" aluminum crossbars that offer plenty of room for all your channel-mount and clamp-on accessories. With two sturdy bars and four SX legs, you get a solid platform to carry bikes, kayaks, cargo boxes, or whatever your next adventure calls for.
Hauling heavy loads shouldn’t mean worrying about stability. This setup supports up to 165 lbs while staying secured tight to your raised rails.
Nothing kills the mood of a road trip like wind noise. These aero-style crossbars are built to cut through airflow smoothly, while the rubberized dual strips in the top channels help reduce drag and whistling. They also guide air over the bars for a quieter ride—no need to crank up the music just to drown out noise from above.
One rack that keeps up with every adventure. Whether it’s bikes in spring, kayaks in summer, or skis in winter, this rack works with most bike, watersport, snow, and cargo carriers. It’s even compatible with Rhino-Rack’s Zwifloc fastening system, giving you flexible mounting options that make it easy to switch between setups whenever your plans change.
Adventure can be tough on gear, but this rack is ready for it. The aluminum construction keeps it lightweight yet strong enough for daily use and long hauls alike. The black finish adds a clean look while resisting wear from weather and road grime. And with a 5-year warranty, you can count on it for plenty of seasons to come.
 Alternate Instructions
Videos are provided as a guide only. Refer to manufacturer installation instructions and specs for complete information.
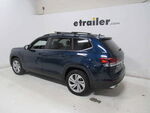
Hello, neighbors. This is Curt with etrailer, and today we're gonna take a look at the Rhino Rack Sports Roof Rack and see how it fits and how it installs on our 2026 Volkswagen Atlas. Now, the Atlas is a great vehicle to take with you out on adventures, plenty of cargo space in the back, but if you're using that third row of seating, you have almost no cargo space at all. Plus, sometimes there's items that either won't fit in the vehicle or you just don't want riding in the vehicle, and that's where a roof rack can come in really, really handy. There are all sorts of accessories that can go up here. There are cargo boxes.
There are cargo baskets, platform racks, car and kayak carriers, bike carriers, ski and snowboard carriers, all of which can be carried up on your roof because it's just too inconvenient to have it in the vehicle with you. Now this is an overhanging roof rack, and what that means is that your crossbar actually extends out beyond the towers here. And for a vehicle as tall as the Atlas, this is the style of roof rack that I would prefer. A flush roof rack where it dead ends in the middle, a lot of people like that look a lot better 'cause they think it's cleaner. The problem with it on a vehicle this tall, in my opinion, is that it forces you to put any items closer to the center of the vehicle rather than have them move to the side for a bit more convenience.
Overhanging roof racks also give you the opportunity to put two different items up here side by side. So maybe you do have a kayak that you're taking with you and you also want to take a roof box. You can put the kayak on one side and the roof box on the other, and be able to carry all of it with you on your next adventure. The weight capacity of this roof rack is 165 pounds. Now you always still wanna check your vehicle's rooftop capacity.
If it's under 165 pounds, you're gonna have to stick with that lower capacity. It's an arrow style bar, meaning it's got an aerodynamic shape. These are gonna be a lot quieter than your traditional round or square bars. Those tend to make a lot of road noise. The unique thing about the sports bar is that it keeps an open channel here across the top, allowing you to drop in rooftop accessories using Rhino Rack's Swift Lock Accessory System.
Now you could still use other brand's T-slot accessories, but the thing is you're gonna have to remove your end cap and slide it in from the side. So no big deal on that front either. And you may think that this open channel is gonna create a lot of road noise and whistling as you go down the street. The thing is, is this special weather stripping that we put on either side here from Rhino Rack actually forces air up and over that gap rather than across it, so it still ends up beinga pretty quiet roof rack. Let's take a few measurements, see how it fits up here on the roof of the Atlas. Now when we set this up, we are pretty free to put our crossbars anywhere because of these raised rails, but I specifically set this up in a way that I could stand in my second row door threshold like I am now and be able to manage any cargo that I have up here. We also made sure that we had a 32 inch crossbar spread, and that's the distance between our two crossbars. The reason it's such an important measurement to pay attention to is 'cause every rooftop accessory has a minimum and a maximum crossbar spread that'll allow it to work. And generally anywhere between that 28 and 32 inches is kind of the sweet spot that's gonna accept just about any accessory that you want to put up here. And with the size of the Atlas roof, I went toward the 32 inch range rather than the 28. These are 54 inch bars, so these actually give us enough overhang I think, in my opinion, without going too far out. You could technically get a longer crossbar if you wanted to, but I think these are just about perfect. They go right along with the door threshold, so even if you're a taller person, you're not gonna have any problems as far as this, you know, accidentally hitting your head on or anything like that. We're also gonna take a look at how much height this adds to the Atlas, and it's gonna add about three and a quarter inches of height. So if you know your overall vehicle height and accessory height, add that three and a half inches and make sure that you got enough rooftop clearance whenever you go into, you know, a low hanging area like a garage or something like that. One of the concerns might end up being this shark fin antenna toward the back, as far as putting accessories up here and clearing that. If you have an accessory mounted in the middle, that might be a problem, but if you have two side by side, I think you could split that and still end up being okay. But what we've got is a clearance underneath of about two inches. That's taller than the two inches, but because the rail's a little bit higher up here, the top of my bar is actually gonna clear that antenna. Barely, but it does clear it. So generally speaking, if you put something up on top of here and it's sitting on top of your rails, there's a good chance it's gonna clear that anyway. And that gap that we have underneath is still plenty of room to get any rooftop accessories up here and going around. It's also, if you have an Atlas with a sunroof, it's also important to understand what that height is and whether or not it'll function on that front bar. The thing about it though is that even though these are quieter than round or square bars, they're by no means completely silent. If you open up a sunroof with a roof rack on top of it, you are gonna hear a lot of noise and it might not make for a very comfortable trip. Now we talked a little bit about the installation, so let's go ahead and take a look at exactly how we got this on the roof of our Atlas today. Now from an installation standpoint, Rhino Rack makes it very, very easy. They provide you with everything that you need. Your crossbars, towers, the tool to put 'em on. The only thing you're gonna want to provide yourself is going to be a measuring tape. But we've got our towers here. What we're gonna start with is taking our crossbar and turning it over on its back like that, and go ahead and remove the end caps. Those simply just pull right off. Once you do that, grab your tower, and I like to get it loosened all the way up to get that bolt right to the end right there. And if I push this in, it's gonna give me some leverage in order to slide this through and then work it right into this T-slot right here. All I need to do now is do the same thing over on my passenger side. Now the next step is gonna be to get it up on our rails. So what we need to do next is make sure that our clamps are all the way open. It's gonna make it easier to grab that other rail over there. So I'm gonna open up my second row door, and I'm gonna use it as a step up to make sure that I get it on there. So I'm gonna get it right about in this neighborhood. We're not committing to this particular area of the roof yet, but this is just gonna be a means of getting it up there. Now we've already got our front crossbar installed, and where I installed that is where that bolt is in the center. I lined it up right with the first and second door seam. The next bar, with raised rails like this, I'm pretty much free to put it wherever. But I wanna give it a decent crossbar spread so that it can accept most accessories. Now you may have a specific accessory that you're gonna put up on the roof rack and use. If that adds a minimum, maximum crossbar spread like they all do, you can maneuver your bars however you want to. But as you see, there's a bit of an arch to it. I don't want to put 'em too close to where one bar is too much higher than the other. If I go way too far back, it's gonna do the same thing. Most crossbar spreads, if you get into that 28 to 32 inch mark, is gonna be good with just about anything you want to put up here. So I'm gonna go ahead and aim for that. But the way that I put my front bar on on that door seem, one of the things that you absolutely have to make sure that you do is you have to make sure that your towers are directly across from one another. So I didn't just use my eye on each side to do that. I double checked by measuring from here to the front of this tower, and I double checked to make sure that I got that exact same measurement over on the other side. If you do that with both your crossbars, that's gonna guarantee that they're installed to be perfectly parallel, and therefore able to carry your accessories safely. All right, so from my first crossbar, I went ahead and took a measurement to my second, and I picked the same anchor point. So in this case what I did was I measured from the front of my first tower here to the front of the second, and double check that that was the same on both the driver and the passenger side. Next thing I want to do is go ahead and just kind of get my clamps snug up on that rail, because the next thing I'm doing is measuring my overhang here. I'm gonna make sure that is equal on both sides. If you try to measure that before you tighten this up, as you're tightening this down, it's probably gonna be off. So I just like to kind of nest that to where it's going to be before I tighten it up before taking the measurement. And measuring the overhang is a simple process as well. You're just gonna, you know, double check here. I've got three and a half inches. I'm gonna check the other side. If I've got like two and a half inches there, I'm gonna have to maneuver it. But I want to have an equal amount of overhang on both the driver and the passenger side. Once you have your overhang measured out, go ahead and take the tool provided by Rhino Rack. And this bolt here on the inside of our crossbar, we're gonna use this to start tightening this down. Now I'm not gonna tighten this down completely, I'm gonna get it just to where it starts to get a little bit snug. And then I'm gonna go do the same thing over on the passenger side. So once you get those snug, start tightening the crossbars down incrementally. Meaning I'm gonna give it, you know, four or five good turns here on the driver's side, go over to the passenger side, do the same thing and work my way back and forth. The reason I'm doing that is because I've seen where if you tighten one side down completely before the other, it usually kind of knocks the other side out of place and what you end up having to do is loosen everything up, remeasure and start over. So to avoid that, work your way back and forth. And this is a torquing tool, but it doesn't make a click or a sound when you get it tightened down all the way. This little tab here is gonna start flattening out as you get it to where it's going to be tight, but just keep working both sides back and forth until you get it tightened down completely. Now in your kit with your crossbars, you're gonna have these little metric measuring sticks. Those fit in right underneath here where we put our towers in. And you can use these if you don't have a tape measure handy to mark your overhang. But I'd still recommend having a tape measure to get your crossbar spread. But we're gonna actually use this in the installation 'cause we wanna make sure that we fill this gap underneath to make sure that we reduce as much wind noise as possible. So what we're gonna do is slide this into that T-slot there all the way till it butts up. And I would grab a knife and cut it off right there. Now we're not doing a permanent install today, so I'm not gonna trim that, but that is how you're gonna fill this gap underneath, as well as this sliding tab up here in the back underneath the crossbar. I'm gonna move this all the way forward and close the rest of that gap under there. That's gonna be the best way to reduce any road noise that you might experience. And the last thing in our installation that we need to do is simply replace our end caps. So those are just gonna slide right back into place. Then I always like to give everything a really good kind of shake like this, make sure there's no shifting back and forth on the rail or shifting back and forth on the crossbar. And it looks like we got a solid install. So we're ready to load this up and hit the road. But if after watching this video you still feel like the this installation is a little bit more than you want to take on by yourself, allow us to help you find an installer near you that can help you get the Rhino Rack on the roof of your Volkswagen Atlas. Once again, this is Curt with etrailer. Thanks for stopping by.
Do you have a question about this Roof Rack?
Info for this part was:
At etrailer we provide the best information available about the products we sell. We take the quality of our information seriously so that you can get the right part the first time. Let us know if anything is missing or if you have any questions.

















Thank you! Your comment has been submitted successfully. You should be able to view your question/comment here within a few days.
Error submitting comment. Please try again momentarily.