


To see if this custom-fit item will work for you please tell us what vehicle you'll use it with.


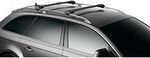
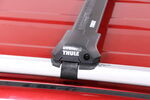
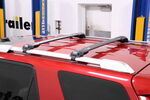
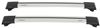
The flush design keeps the crossbars tight to the roofline, giving your setup a sleek, from-the-factory style. Nothing extends beyond the feet, so the rack blends in cleanly and keeps a low profile. The WingBar Edge looks like part of your vehicle, not something bolted on after the fact.
Long drives can get noisy with wind rushing over your roof, but these aero-style bars are shaped to limit that drag and sound. The top channels use split rubber strips that let you slide accessories into place without trimming, while also reducing vibration and wind noise while you’re driving. It’s a quieter, smoother ride whether you’re heading across town or across the country.
This rack is ready for whatever gear you want to bring along. The aero-style crossbars work with most bike, watersport, snow, and cargo carriers that mount in top channels or clamp around the bars. That means you can load up kayaks for the weekend, attach ski carriers for winter trips, or add a cargo box when you need extra storage space—all on the same rack system.
Strength matters when you’re hauling gear up top. This system supports up to 165 lbs (always observe your vehicle’s maximum roof load capacity) and uses aluminum construction for a solid hold without adding unnecessary weight. It’s tough enough for long hauls yet light enough to handle easily during setup or removal.
If you want to lock down your setup, this rack is compatible with Thule One-Key System locks (sold separately). You can secure both the rack and your channel-mounted gear using a single key, keeping your equipment safe when parked overnight or at the trailhead.

Videos are provided as a guide only. Refer to manufacturer installation instructions and specs for complete information.
Hello, neighbor, this is Curt with etrailer, and today we're taking a look at the installation and fit of the Thule WingBar Edge on our 2026 Volkswagen Atlas. So the Atlas is a fantastic vehicle for taking family and friends out on trips, but sometimes you run into a situation where even though there's plenty of cargo space back here in the back of the Atlas, if you have to use that third row, or you may actually have some items that just won't fit in the vehicle regardless. And that's where a roof rack can come in really, really handy. There are all sorts of accessories that you can use on a roof rack to get those items to and from your destination. There's rooftop cargo boxes and cargo baskets. There's also things like bike carriers, kayak carriers, and ski and snowboard carriers.
So the WingBar Edge is a flush roof rack. And what that means is that the crossbar dead ends into our tower right here. The other type that you might see is an overhang, where the crossbar comes out past it. And while the overhang might give you more bar space, a flush roof rack actually gives you a bit more of a clean, finished, OEM look. The WingBar is an aero style bar, which means it's got an aerodynamic shape to it.
It's a little bit wider in the front than it is in the back, and what that does is it offers less wind resistance. So there's not gonna be as much noise and vibration coming off of these as you would get from your traditional round or square bars. Now one of the things about a flush roof rack compared to an overhang is it really does kind of force you to put all of your cargo toward the middle of the rack. But as long as you set up correctly, like we did today, you could stand right here in the second row door threshold and be able to manage that cargo. Let's talk a little bit about how this fits specifically up here on the Atlas.
First thing I'll talk about is the weight capacity. The weight capacity on these bars is 165 pounds. However, you always wanna double-check your owner's manual for the vehicle's rooftop weight capacity. If that number is lower than 165, then that is gonna have to be your maximum capacity. And as you can see from up here, these are very low-profile.
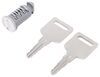
These are pretty close down to the roof. So if I take a measurement from underneath on the highest point of the roof here, we have only about one inch of clearance to work with. We also need to keep in mind that with clamp-mounted accessories, that's still gonna be room. But if you're somebody with a sunroof on your Atlas, these aren't gonna be able to stay on while you use that sunroof. There's simply not enough clearance. Not that that matters anyway, because I really don't recommend that you use an open sunroof when you have crossbar up. While these might be quieter than round or square bars, they're by no means completely silent. The other thing we're gonna take a look at is how much height does it add to the vehicle So this is only gonna add a little over 2 1/2 inches of height. So if you're concerned with roof clearance and you know your vehicle height and your accessory height, you could add that 2 1/2 inches and be able to determine if you can make it through some low-clearance areas. Now the other big concern other than a sunroof is gonna be this shark fin and antenna toward the back. Again, we're really kind of forced to put our cargo toward the middle and not to the side of it. So you're gonna have to kind of plan out where you want to put these bars when it comes to being able to get past that antenna in the back. Now it's pretty far back there, but if you've got a long rooftop box or you're carrying a kayak or something like that, you're gonna want to take some measurements and determine how easily you're gonna be able to use it. The crossbar spread that we have is predetermined in the installation, and we're gonna be going over that with you shortly. And we also have some freedom up here of where we put the bars because of this raised rail. Now, the instructions, again, are specific about how far apart they are, so putting your first bar on is going to be pretty important. I put it right on the door seam between the first and second row. That allows me to stand up here in the door threshold and be right in between my bars. The other concern that I have is with these rails that we have up here, they start wider in the front and they taper to be more narrow as you get toward the back. So we're really kind of reserved to the bar space on our second bar, and that's gonna give us a crossbar space of about 32 3/4 inches. So double-check the accessory that you want to use. Make sure that the crossbar spread of 27 1/2 inches and a total crossbar length of that 33 or so inches is gonna be compatible with that accessory. Now we touched a little bit on the installation, let's go ahead and show you exactly how we got these on the roof of our Atlas today. As far as installation goes, we have to start with our crossbar assembly. So there's several steps to this. First of which, what you want to do is go ahead and take your towers. You're going to remove the tower cover. And then what you want to do is, first, make sure that you've got this lined up correctly. So as you can see, there's a wider portion back here than there is in the front. That portion is going to be at the rear of your crossbar where it's more narrow. You're also gonna want to take this section here with this extended spring. This is gonna go into this slot right here, and you're just gonna push it all the way in, just like that. Now at this point, just slide your tower in. We have this little tab here that's going to depress, and that's gonna slide right in like that. The next thing we want to do is make sure our spring is lined up through this hole right here. So we're gonna just push it in, maneuver that right through there, just like that, and then we'll continue pushing it in until that tab pops up through that hole, just like that. Now we're gonna do that process again on the other side. So the next step is going to be to add our weather strip. You're going to need to separate it. And essentially, we're gonna have one end here that has these arrows. These are actually going to be pointing forward. And then we have our rear strip right here. So there is a blade end to it. That is gonna be facing toward the middle of the bar. This section right here is gonna go right through this groove. So I'm gonna line it up first 'cause Thule usually gives you a little bit more weather strip than length of the bar, which is fine if it extends over a little bit, like it is here. It's not that big of a deal. But I'm just gonna start from one end and just start depressing it into that groove. Once that's in, grab the end with the arrows. The arrow should be facing forward. And we're gonna depress that into the groove, the same exact way. Now at this point, go ahead and grab your instruction book. You're gonna find a metric ruler on the back back here. This is for measuring the circumference of your rails. So we're just gonna go ahead and wrap this around, just like this, and we're gonna see that we come to about the 13 1/2 mark. That's 135 millimeters. Now at that point, that's gonna tell us how we need to set our strap. Now, if we take our strap here, what we're gonna find is this kinda silver tab right here. And in our instructions, with the measurement we just got, that means we're gonna have to install it in tab 3, right there. So I'm just gonna slide this in, get it through the hole, that #3 hole, and latch it into place. Now we're ready to go ahead and get it up on our roof. So we wanna make sure that this is going to have the wider end of the bar facing the front of the vehicle, narrower end toward the back. If you have a friend to feed it over and have them latch on, that's great. You don't necessarily need it though. I'm gonna go ahead and open my second row door, stand up in the door threshold. And as I'm putting this in, I wanna make sure that I feed this strap underneath my rail. So I'm gonna move it, just like that. And if I can get it to where the ledge of these towers kind of sits on top of the bar, that's perfect. The spring loading, you're gonna have to push in on it to get it to fit. So I'm gonna go ahead and get that done. So as I've this under, I wanna watch this weather strip skirting that I've got up here and just kind of make sure it nestles in and over, just like that, with the strap going underneath. Now before we get everything secured down, let's talk a little bit about bar placement. The instructions from Thule specifically ask for 700 millimeters, or 27 1/2 inches, in between our crossbars. That's just the way that this roof rack is gonna fit best. But with that being said, we do have a little bit of freedom as far as where we put those crossbars. So our front crossbar, I put right at the door seam right here, but I didn't want to just eye it out. I took a measurement from the support here on our rail to the front of the strap, and I made sure that that measurement matched on both the driver and the passenger side. It's really important to make sure that the towers on your bars are directly across from each other. That way when everything is installed, your bars are perfectly parallel and you can carry your accessories up here safely. So with that being set, we measured from the front of the strap to the front of our second strap to 27 1/2 inches. Once you get that on both the driver and the passenger's side, you can go ahead and latch your strap in. There's two holes here at the top along with two hooks on the tower. You're just gonna wrap it around and latch it into place. Now there's a bolt right here that you can use with your Thule tool, and what we're gonna do is just get that in there and we're gonna start tightening down our strap. Now it's important to know that you don't want to tighten one side down completely and leave the other side loose. You can kind of overtighten one side and knock the other out of place. That means you gotta undo everything, remeasure and restart. So what I'm gonna do is I'm gonna get this down until it's just snug around here, basically just touching the rail, and I'm gonna go and do the same thing on the passenger's side. Once I do that, I'm gonna give it two or three turns on the driver, then two or three turns on the passenger, and back and forth until I get it tightened down completely. That's really the best way to make sure it stays in place as you're tightening it down. Now as you're working your way back and forth, this is a torquing tool, so it's gonna give you a loud pop, just like that, once you got it tightened down to spec. Now, once you get that on both sides, we're ready to move on. Now the last step of our installation is to install our tower covers, and it comes with a lock core. The ones they provide you outta the box are plastic like this. These can be open with a flathead screwdriver or a coin, but I encourage you to take advantage of Thule's One-Key System. That allows you to get metal lock cores for all of your towers, and they could be key-to-like to other Thule accessories that you may own. So if you do have a Thule roof box that you're wanting to use with these crossbars, you can order your keys to be key-to-like to that roof box and just keep organizing your key ring simple. So to put this in, there's an open slot at the bottom here and a tab right there, the hole for that screwdriver is going to be vertical, and all you're gonna do is just pop this right into place, just like that. At this point, we've got these little hook latches here. These are just gonna glide right into place, and we're gonna be able to push it all the way in. It'll snap in a little bit. And then at that point, we can take our flathead screwdriver and get it locked up. And that wraps it up for the installation. But if after watching this video, you decide that this is still a little bit more than you want to take on by yourself, allow us to help you find an installer near you that can get these on the roof of the vehicle. So that was a look at the Thule WingBar Edge roof rack on our 2026 Volkswagen Atlas. I'm Curt with etrailer. Thanks for stopping by.
Customer Satisfaction Score:
89% were satisfied with this product
11% of customers were not satisfied
Ratings & Reviews

Needed the Thule bars fast before leaving for a trip. Showed up right when they estimated it would when I ordered. Tutorial video was super helpful. Thank you!!
I received all the required parts in excellent condition. The installation went very smoothly as planned on my 2022 Subaru WRX!
Kit fit great. shipping was supposed to be overnight but ups didn’t do their job. Really nice kit easy to install high quality
For XXX bucks I thought it would include the keys. Not plastic plugs. Instructions say it should have key. They even talk about how to store the key. My advice to anyone is buy it directly from dealer.
Directions were easy to follow and I was able to put the rack on my 2024 Lexus RXh in about 30 minutes.
One year in, this fit kit and the whole system have worked very well on my Kia EV6.
I miss the simplicity, in terms of cost as well as installation and removal, of the old Thule rectangular-bar racks, but this system looks better, is quiet, won't sag, and seems more robust.
Initially I was worried that I good not get a good Roof Rack configuration to match my 2022 Kia Telluride. When I asked etrailer for some assistance on the configuration, Jon was quick to reply with an excellent solution. He definitely knew the products. Unfortunately, my initial shipment was damaged but Gwen and team quickly got me replacements in the mail. I have received and installed all components and couldn't be more satisfied.
This "fit kit" from THULE does not impress me much. It does not sit flush with the roof rails of my 2021 Toyota highlander, doesn't really line up with the openings on the flush mount rails, and only attaches to the vehicle via one bolt at each of the 4 mounting locations. In that sense it's inferior to even the OEM toyota roof rack mount.
Great experience, fast shipping, great selection. Would buy here again.
Niiiiiice! Is what we say when we see the car now. The roof rack is well built. Instructions were easy- the letter specification to tighten the rack were a bit much. We had to adjust based on how things looked and jived with the car. Some soft cushion edging would not flush over the roof indentation edge, so we had to re-loosen and tighten the rack few times until all settled well. Bottom line, we wanted a solid rack that did not have overhang, did what it is suppose to, was low profile, and make the car look hot- check!!!! We are very happy! Best part about the entire experience however is etrailer. I swear, one might never need customer service or any help with their purchase, until they do. And what a customer service it is. Wow. It’s worth returning to etrailer for more business, purely because you want this business to do well and to remain in business and to show them how much we appreciate their excellent customer service.
Fits with fast shipping.
Super fast shipping. Correct fit and quality product.
Put this on a 2025 Audi A6 Allroad. Seems very well built/sturdy. Looks great as well. Ni wind noise on highway. Fits my vehicle very well except that sunroof cannot open once in place. Maybe that is assumed with these type of things but still would have been nice to know in advance. Come with two different length cross bars but there is no mention of this in the instruction so no clear what the intended positioning is or if there is preference( i.e. longer one in front, shorter in back.
Overall seems like a great product that I look forward to using in the years to come.
Many thanks for the efficient shipments.
All parts arrived and were easy to fit.
I trust you had a great Christmas.
My Christmas morning was spent fitting all the stuff to the new Benz and adapting the roof rail for the tandem... see attached image.
It works really well.. very stable & secure.
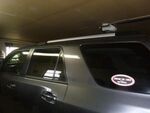
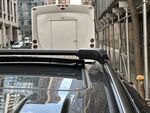

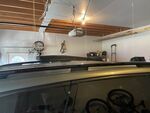
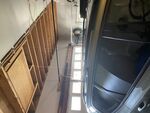
Do you have a question about this Roof Rack?
Info for this part was:
At etrailer we provide the best information available about the products we sell. We take the quality of our information seriously so that you can get the right part the first time. Let us know if anything is missing or if you have any questions.

















Thank you! Your comment has been submitted successfully. You should be able to view your question/comment here within a few days.
Error submitting comment. Please try again momentarily.