
 Product Experts Available Now!
Call 1-800-940-8924


Thank you! Your comment has been submitted successfully. You should be able to view your question/comment here within a few days.
Error submitting comment. Please try again momentarily.
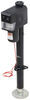
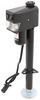
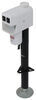
Replaces the cover on your etrailer or Ram electric A-frame jack (EJ-3520-BBX).
Features:
Videos are provided as a guide only. Refer to manufacturer installation instructions and specs for complete information.
Hello neighbors, it's Brad here at etrailer and today we're taking a look at the black replacement cover for the etrailer and RAM electric A-frame tongue jacks that are rated at 3,500 pounds. These jacks are very reliable and a great addition to any trailer, but as your trailer sits outside many times, this cover is just simply made of plastic and over time, that can get brittle and break down while being in the sun and all the elements. So whether your light has cracked or your motor cover or the top portion, doesn't matter, you're able to replace this entire cover and get your jack looking new again. We're gonna start by taking our old cover off and it's just gonna take a Phillips head screwdriver to accomplish this. We have a screw here. There's one gonna be on the other side and there's also one on the back.
There's also screws on the bottom that we're gonna be getting to as well. So I'll start on these top ones first. The back screws are actually gonna attach to the mechanism that raises our jack up and down. Now we do have our wires here, so we are gonna separate this. We have our LED board, we'll just slide this out and our switches should pop out fairly easily here.
There's just a tab up top. We're gonna press in as well as the bottom, and then we'll push this out from the front. And to get this motor cover and lower section out, there's just the two more that bolt into the plate where our motor's mounted. And this is gonna slide down. Now you will have some wires.
You can see our power wire is zip tied on here. We can get this separated. It's got a split here in the back, and it's flexible enough to where you should be able to just slide this down and out of the way here. The trickiest part to get all this separated is getting these spade connectors separated from our controls. And this, the spade connectors are pretty tight.
So since you're replacing it, just kind of be careful. You don't want these to kind of wear out and make it not bite well. I also recommend take a picture of this and that way you have a reference as to which switch it goes to. And if you need to pop these out, which you will to put your new one on, you can simply pinch on the top and bottom. It's gonna take a little bit of force here to kind of get this to pop out, but there's little tabs. The top one is hard to get your fingers on, but if you press those down, you should be able to get this switch to pop out. Now if you can kind of get a portion of it popped out like that, you can use a flathead screwdriver to kind of put it in that slot there and just kind of twist. And that should pop it out. And this is probably gonna make it a little bit easier. You could probably do one switch at a time, but just separate your spade connectors and make sure they go back in the proper orientation. Your new replacement cover is gonna have the cap for the motor. It's also got our clear plastics for our lights. It does not come with hardware, so you're gonna want to retain the hardware from your old one. It does come with the cap, which is nice. You get a new one there, but pretty much you're just going to be popping those switches back in. So I recommend running your spade terminals through here, putting those in place, and then you can snap those back in place before putting all your hardware back in. Now, make sure that when you separate the power wire from its spade terminal that you're feeding it back through this access hole. That's something that you're gonna want to do before putting this all back together. And we'll slide our circuit board back in place as our LEDs, and I recommend getting these back ones back in place first so it's mounted up and then we can get the rest of 'em in place. Now you may need to kind of play around with the bottom portion to be able to slide the top portion onto it, but it will sandwich over it. It's pretty flexible, so just kind of make sure that it's all pressed in place. Now, something I will recommend before getting everything back in place is testing to make sure that these are all plugged in properly. That way you know that you hook them all up. You don't have to take this all back apart again. But now that we know that everything works, we have a brand new cover on. So if you have anything that's cracked or worn out, this is a great way to get it back looking like a new jack again. And that was a look and installation of the replacement black cover for your electric RAM or etrailer jack.
Customer Satisfaction Score:
98% were satisfied with this product
2% of customers were not satisfied
Ratings & Reviews


Gwendolyn Y.
4/1/2025
Its never fun when we break our own stuff so I'm glad we had just what you needed, Stephen!


Do you have a question about this Accessories and Part?
Info for this part was:
At etrailer we provide the best information available about the products we sell. We take the quality of our information seriously so that you can get the right part the first time. Let us know if anything is missing or if you have any questions.





























Brooke M.
5/2/2025
All excellent tips! Thanks for sending in the photos, too, Bud!