
 Product Experts Available Now!
Call 1-800-940-8924


To see if this custom-fit item will work for you please tell us what vehicle you'll use it with.


Thank you! Your comment has been submitted successfully. You should be able to view your question/comment here within a few days.
Error submitting comment. Please try again momentarily.


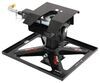
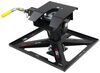
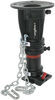
This hitch is made for serious towing, with a 16,000-lb gross towing weight and a 4,000-lb vertical load limit. The sturdy steel frame and carbide powder coat finish give it lasting strength and protection against wear. You can count on the interlocking 2-jaw system to grab the king pin tight for solid, rattle-free towing on long hauls. It’s a strong, steady foundation that makes heavy trailers feel secure and predictable on the road.
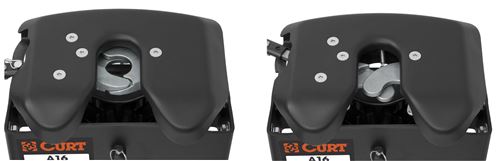
When you need extra clearance for sharp, slow-speed turns, the S20 slider gives you 12" of fore-and-aft travel to keep the trailer clear of the cab. It slides easily in both directions and latches automatically, so you can stay focused on maneuvering instead of hopping in and out of the truck. The design helps prevent contact during tight turns while keeping movement quiet and controlled.
The fully articulating torsion head self-aligns for easy hookup and smooth towing. It suppresses road shock and cuts down on noise so both truck and trailer ride more comfortably. The cushioned head combines with 360-degree jaw-to-king-pin contact to reduce chucking and vibration on uneven highways or rough campground approaches.
With the built-in color indicators, you always know what position the jaws are in: red for uncoupled, yellow for ready to couple, and green when locked for towing. The indicator is visible from the cab, so you can see at a glance that everything’s secure before rolling out. The handle locks with a padlock (sold separately) for added peace of mind when hitched.

Installation is straightforward—drop the base into your factory prep package receivers and pin it down using the included adapter rails. Built-in zerk fittings make lubrication easy, and when it’s time to clear your bed, pull one pin to remove the head fast. The hitch height adjusts from 17-1/2" to 21-1/2", giving you the flexibility to level your setup just right.

Videos are provided as a guide only. Refer to manufacturer installation instructions and specs for complete information.
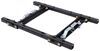
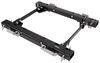
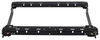
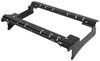
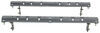
Hello neighbors, it's Brad here at eTrailer and today, we're taking a look at the Curt Adaptor Rails for 5th Wheels. Now, this is gonna work for the OEM prep package that we have here on our 2023 Chevy Silverado 3500. The puck system or OEM prep package, as they call it that a lot of newer trucks are seeing are really nice because you can simply drop in a 5th Wheel, but, if you already have a 5th Wheel and it's not compatible, it's normally in a rail system. Well, you can pick up this adapter to make that fifth wheel head work. Now, these are standard rails as far as the industry goes so it's gonna work with most 5th Wheel heads. The only one that really has compatibility issues, is gonna be the BMW Sliding Companion and that's just because of the clearance as it slides.
But that really opens it up to whatever 5th Wheel you may have or be looking at and still be able to hook this up. Now, something to keep in mind, this is gonna add height to the overall height of your 5th Wheel while in the bed, about two and a half inches. So, just something to keep in mind when adjusting your 5th Wheel and checking your trailer to make sure that it lines up perfectly. Now, while we have this on a Silverado it's also gonna work with GMC trucks. So, your Sierras are gonna work perfect as well, but also it has the adjustability to be able to work with the Ford ones, which you sit a little bit wider.
So, if you ever plan on getting a different truck and you still want to keep your same 5th Wheel you can adapt this and drop it into those OEM prep packages. (metal scraping) The handles just lock this into the puck system pretty easily. So, these will just unlock by sliding these out. (metal clanking) (boot thumping) And the great part too is there is some adjustability. So, not all prep packages fit exactly the same little bit of tolerance differences, but with our castle nut and cotter pin system here, we're able to actually adjust it to where you have that perfect tolerance.
Now, the black powder coat finish is gonna be nice, especially if you plan on leaving this in the bed especially uncovered, because that will hold up long term. Keep this from corroding or rusting at least give it a fighting chance for that. Now, this is a pretty heavy-duty kit rated at 25,000 pounds. So, while this is pretty heavy-duty, you also wanna make sure that you're checking the vehicle to make sure that it can handle the weight, and also you're only as good as your 5th Wheel. So, between all of those three components take the lowest of those numbers so you stay safe.
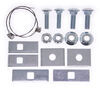
Now, this is pretty easy to assemble. It's pretty straightforward and can be done about 15 minutes with minimal hand tools. So, let's take a look at that so you can get yours installed. Gone ahead and laid out my parts and that way we can start assembling this. And it looks like, as far as tools go, it's gonna be pretty simple. A 3/4 inch socket, a 15/16 socket, a torque wrench, and a plier for our cotter pins. So we're gonna start here on the left side and I've just laid these out. So you'll see that one edge goes all the length of it. That's gonna be the inside of our rail. So, the way I have it laid out is the way that it's going to sit once we have it mounted up. We're going to slide over our spacer and you'll see that one side is gonna be thicker than the top side here, as I have it laid out. So, we'll slide, (metal clanking) we'll have the larger portion down here by the head of our bolt. This is going to fit right here. (metal clanking) We're gonna grab our side-specific handle, and you're gonna know that it's the proper one. You want the handle kind of to where this top portion faces or is at the same height here of our rail. And, there's this little notch that's our stop. So you should be able to move this, and this will kind of go in this center portion, that whole line up. Now, if it's not able to move, then you're gonna wanna swap that handle to the other one, and then we'll finish this up with a flat washer and our castle nut. I'm gonna go ahead and get this threaded down. And you don't wanna go too crazy here. I just hand did that. And so you still want to have some mobility here so you can kind of, loosen it up a little if you need to. (metal scraping) You wanna be able to slide this pretty easily and if you crank it down, you're gonna lose that. So, we do need to align it with the hole in the bolt. So find that sweet, happy medium of being able to move the handle, but still get your cotter pin through. So, I'm gonna go back one here And I'm happy with that. So, we'll go ahead and grab our cotter pin. (metal scraping) I may have to turn this here, but we'll feed this in and then pry out our ends, and that way it's gonna hold that in place. So, normally just a set of needle nose here will work well. Slide this down (hands tumbling) (metal clinking) and then as we bend both ends back, that should lock it in place. So with this one in place, we'll just go ahead and repeat for the other remainder ones again. Just making sure that our handles are able to actuate. Now, if you have your puck covers, you're gonna want to go ahead, take those out, and we're gonna drop this in. So with my handles kind of at a 90 here from our rail (metal clunking) we'll go ahead and get these tightened down (metal scraping) and then we'll align this hole here. And then we can put our linchpin in place, (metal clanking) and we'll just snap this in place. And then we'll go ahead and get our other side in as well. So now grab one of your rails, and you'll see the slots here for the 5th Wheel. You want that facing towards you. And then we'll line this up. (metal clunking) And on the GM trucks they're gonna be using the third and fifth hole. It should line up pretty well centered so you should know you have it in the right spot. We'll then take our carriage bolts and pass it through. (metal scraping) (metal chinking) Now in getting these in, if the tolerances are pretty tight and it's not wanting to pass through perfectly. What you can do is take that linchpin off. I loosen this side up and you're gonna want to get your outside ones in first. And that should align the middle ones a little bit better because if you do these two first, you might be a little bit off here. (metal clanging and scraping) Now once we have both of our rails in the front and back with all the carriage bolts passed through we'll go ahead and take our serrated flange nuts, and I'm gonna just hand tighten these on for now. (metal screw scraping) So, now we're gonna come back with our 3/4 inch socket and using the torque settings found in the instruction manual, I'm gonna torque all of these down properly. (socket crunching) If you need a torque wrench we have them available here at etrailer. You can generally go to an auto parts store and rent one for free. (socket crunching continues) Now, we'll just go ahead and repeat for the remainder of the hardware. So, you can see I have my Curt E16 5th Wheel that we just dropped into the rails, and I can go and grab a different 5th wheel and do all the same. All that's left to do is pin it in place through the rails and then we're ready to hit the road. And that was a look at the Curt Adapter Rails for OEM prep packages on a 2023 Chevy Silverado 3500.
Ratings & Reviews



Lazer S.
10/27/2026
Glad you are liking it so far, Lawrence! What kind of hitch are you going to using it to adapt?
Lazer S.
3/17/2026
Glad you like it, Richard! These are definitely a nicer option than having to buy a whole new hitch! And what did you need to use the hammer for? I'm usually a fan of any percussive maintenance and am definitely curious here.

Gary

8/23/2025
While I used this with the PullRite hitch it worked very well. I have since sold the hitch as the adaptor to buy a a different hitch no longer needing this adaptor. Worked great.

Heather A.
10/15/2026
Hey Tim! looks like the adapter worked out well for you. How do you like your B&W hitch?

Gwendolyn Y.
4/27/2025
Hey Paul. I'm glad that Jacob got you all hitched up. What kind of 5th wheel are you towing?

Brooke M.
5/19/2025
Wow, I don't think I have ever seen a 23 year old hitch, before! That's awesome the rails worked for you. I'm impressed! You really had no issue and didn't have to finagle it at all?

Keith
9/28/2025
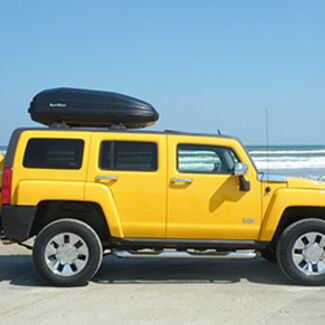
This setup for my hitch works great!
Brian
3/12/2025
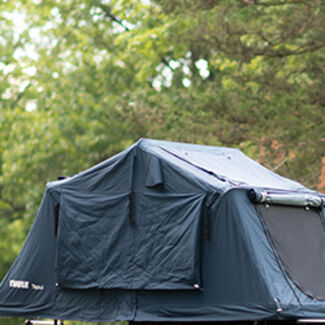
After a year of use, I have no complaints. It does its job just fine. I will also add for others in the market, my father and law has a 2025 Sierra 3500 that he upgraded to, and upgraded his standard 5th wheel hitch to a Andersen Ultimate for the factory puck system. I was able to compare side by side the puck style Andersen to the rail Andersenadapter I have. The height of the hitches are the exact same.

Mark
5/16/2026
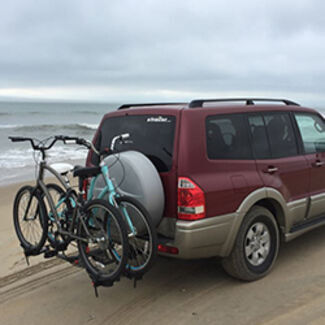
The CURT 5th wheel rail assembly works great. It is easy to installremove as required. I have towed over 8k miles without issue.


Don
12/31/2025
After a year of use, this adapter is still working great and I have had no issues with it all.

Larrys
4/1/2024
Still satisfied, still recommend. Easy to move hitch in truck as one unit when I need more of the bed available, no further adjustments needed.

Victoria H.
4/1/2025
It's great to hear everything is working flawlessly for you Jon, and we appreciate your recommendation! Any fun upcoming adventures planned?
Todd
4/6/2026
Continues to work well. No issues at all.


Do you have a question about this 5th Wheel Hitch?
Info for this part was:
At etrailer we provide the best information available about the products we sell. We take the quality of our information seriously so that you can get the right part the first time. Let us know if anything is missing or if you have any questions.
















Kate F.
8/31/2026
I am glad we had the right rails for you Greg! More importantly, where did you go for the first trip?