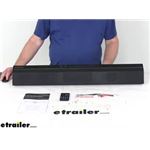
Bring fuller, less-tinny TV audio to your rig with a sound bar for RV speakers. Match it to your setup by checking your TV's RCA, aux, optical, or HDMI ARC outputs, and confirm 12V DC power if your coach uses it. These bars can replace factory units and tuck into tight cabinets for a clean upgrade.
Some RV Sound Bars use 12 volt DC only. Verify you have a 12V DC power source at the install location before you commit. If you plan to use a Sound Bar with a house TV, confirm its power requirements first so you don't end up with the wrong type for your setup.
Try a factory reset: switch to AUX IN mode, then press and hold the MODE button for more than 6 seconds. If it's stuck on a welcome or paused screen and won't change modes, look for a removable front "net" cover to reveal mounting screws so you can access the unit. Reconnect and test after the reset.
Wiring colors can vary by brand, so don't rely on color matching; look for individually labeled wires. Some units are passive with left/right quick connects and require outside amplification. For a credit card style remote that won't work, find the small push lever to open it and check the watch battery orientation or protective wrap.
Confirm the space where you want the Sound Bar to sit and how it lines up with your fireplace, shelf, or TV. Check the included bracket's stability; thinner brackets can flex, so you may need to reinforce or fabricate a sturdier mount. Verify that the mounting hardware location is accessible for install and future removal.
Yes, as long as the connection types match. Check your TV for RCA (red/white), a headphone-style aux jack, optical audio, or HDMI ARC and confirm the Sound Bar supports the same. Measure the space around your TV since RV cabinets can be tight. If you're unsure, a quick photo of the TV's ports helps you verify before you buy.


 RV Speakers Parts or Accessories
 Filters