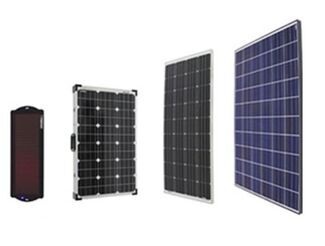
Built for plug-and-play camping, these portable solar panels pair with rv solar prep ports that commonly use MC4 connectors, so hooking into your existing system is simple. As panel only units, they let you use your RV's controller and choose the wattage you need; add a longer cable if your setup calls for it, and keep panels outside for best output since a windshield can cut performance by about 50%.
You can, but performance will suffer. Expect about a 50% drop when the panel is behind glass. If you must use the windshield, park so it gets direct sun for as much of the day as possible. For best results, place the panel outside in direct sunlight and angle it toward the sun.
Typically yes. Panel Only means no controller is included, so you'll need one in the system. Some RV Solar Prep setups route to an onboard controller—confirm your RV's wiring before plugging in. Never connect a panel directly to a battery without a controller. Check controller input voltage and wattage limits.
Often, yes, to place the panel in full sun while your RV is in shade. Use extension cables with the same connectors (commonly MC4) and appropriate gauge for the run length to reduce voltage drop. Keep cable runs as short as practical and check polarity at the RV Solar Prep port before connecting.
Pick the wattage to match your power needs. Portable options range from around 100 watts for light use to higher outputs for heavier loads. List what you'll run and for how long to estimate needs. Make sure your charge controller can handle the panel's wattage. If you add multiple panels, confirm total input stays within controller capacity.
Yes, if your RV Solar Prep uses a standard MC4 solar connector. Most solar-prepped RVs have MC4, so match the panel's leads to the port or use an adapter if yours is different. If a panel has a proprietary plug meant for a power station, it won't hook up directly. Verify polarity on the port before connecting.


 AGM
AGM
 Filters