
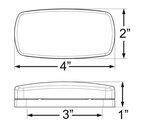
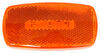
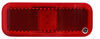
4" x 2" Rectangle. Trailer light serves as either a clearance or side marker light. Built-in reflex reflector. Durable black ABS plastic base. Surface mount to trailer - hardware not included. 2-Wire pigtail. P2 rated.
Features:
Specs:
A P2-rated light produces a 45-degree angle of light to either side of its centerline for a total of 90 degrees of coverage. This beam pattern can be seen straight on, but it cannot be seen clearly from the side. So this type of light can be used as either a side marker light or a clearance light, but it cannot function as both. If you need both functions, then you must install 2 separate lights on your trailer - one as a front or rear clearance light and one as a side marker light.
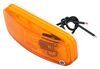
Surface-mount trailer lights install using a flange or bracket with mounting holes. These lights lay flat against the trailer surface and only require a small, often pre-existing hole, for wiring. Mounting hardware is used to secure the light to the trailer.
California residents: click here
Customer Satisfaction Score:
99% were satisfied with this product
1% of customers were not satisfied
Ratings & Reviews

Info for this part was:
At etrailer we provide the best information available about the products we sell. We take the quality of our information seriously so that you can get the right part the first time.


Thank you! Your comment has been submitted successfully. You should be able to view your question/comment here within a few days.
Error submitting comment. Please try again momentarily.