
Thank you! Your comment has been submitted successfully. You should be able to view your question/comment here within a few days.
Error submitting comment. Please try again momentarily.


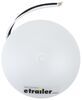
Want sufficient lighting in your RV hallway for those nighttime bathroom trips? We got you. This warm white puck light has a built-in dimmer - so the light can be bright enough for you to see, but not so bright that'll wake everyone up.
Features:
Specs:
This puck light has warm white LEDs that give you extra light underneath your kitchen cabinet for meal prep, in the hallway for nighttime bathroom trips, or over a chair for reading. And the integrated dimmable button on the front lets you increase the light's brightness to play a card game or decrease it to remove screen glare for movie night.
LEDs are energy efficient and draw minimal power, so the light won't drain your battery, overload your circuits, or produce too much heat. And unlike incandescent lights, you won't have to worry about replacing bulbs that have brittle filaments.
To access the bolt holes, pull the lens off the housing. Using the included screws and wire nuts, bolt the housing onto the surface of your RVs ceiling or wall before snapping the lens back on. The 2-wire design hooks up to ground (white wire) and power (black wire), and it has built-in polarity correction that'll make sure the light will operate consistently, even if its accidentally wired backwards.
California residents: click here
Videos are provided as a guide only. Refer to manufacturer installation instructions and specs for complete information.
Hi, everybody. Andy here with etrailer.com. Let's take a look at the surface mount 12 volt RV LED puck light. Now, this puck light is gonna be perfect for underneath an RV kitchen cabinet or inside a closet in your RV. And this dims with the push of a button. As you can see right here, I'm just gonna hold that center button down and this is going to get dimmer as I hold it down, just like that.
And then I think I'm at the dimmest setting, so let me turn my studio lights off there just so you can see. And then when I want to brighten it back up again, I'm just gonna do the same thing. I'm gonna hold that center button down, again while the light is turned on, and you can see it getting bright just like that. Let me go back to my wide view here and you can get a better idea of what this looks like. So it's very...
For the size of light it is, it's very bright. I'm shining this on the wall behind me and then I'm just gonna put this overhead on my tabletop. So it does emit quite a bit of light. And then lemme go ahead and dim it while it's in this orientation just so you can see the range of dimness and brightness that this has. So this does include energy efficient, warm white LEDs with a maximum light output of 260 lumens.
I'm gonna go ahead and zoom back in and turn my studio lights back on. We're gonna go ahead and disconnect from power as well so I'm not continuing to blind you. This has a two-wire design that features builtin polarity correction. So the white wire here is going to be for ground. And the black wire, you can see it's indicated by the plus sign or the positive indicator there.
This is gonna be for power. The wire length looks like it'd be pretty close to about 11 inches or so. I guess I could pull out my ruler here real quick and see. So yeah, it looks like we're right at about almost 11 inches on that wire length. And obviously, this is going to wire into your 12 volt DC system and it does include hardware and so this is gonna be very easy to bolt into place. All you'll need to do is take something like a straight slot screwdriver and just pry the back off like that. And then you can see the LEDs there. And then you'll just run the screws, the hardware through here and then you can just replace the cover. So I think this is gonna be a pretty easy installation, but then you'll just pop that lens back on like so. Lemme go ahead and give you some measurements. I'm gonna find my ruler here and let me give you the overall diameter. So I'm gonna measure from the back. It'll be easier that way. So you can see we're at 3.5 inches in diameter. That base diameter is gonna be a little bit shorter, probably closer to 3 inches. And then the thickness overall, probably close about 3, 3/4 quarters of an inch from the front there, where it curves out to the back. So about 3/4 of an inch. And then another measurement that you might be interested in is the spacing of the mounting holes on center. Lemme see if I can do that without getting the wires in the way. So lining that up right at 2 1/4 inches, it looks like, if you can see that. So like I said, hardware is included. I think it's gonna be a very easy installation. And like I said, for the size, it's going to give you quite a bit of light and it's gonna be outta your way and it's gonna be a nice light to install, especially if you're looking to light up a dark corner of your countertop or in your closet or something like that. Well, I think that's gonna wrap up our quick look today. I do hope that it was helpful for you. Again, my name is Andy, thank you for joining me.
Customer Satisfaction Score:
99% were satisfied with this product
1% of customers were not satisfied
Ratings & Reviews

Just installed - worked fine- exactly what I needed
The delivery of the Puck lights was right on time and installation was very easy. We replaced 4 standard (and very bright) puck lights with these and are very pleased!
worked perfect for the one I had go bad. I got extra just in case another one goes out.
service was excellent, I was notified right away you were out of the item I needed, made a phone call and the lady I spoke to was VERY helpful in finding a replacement part.
Work great, great communication, reasonable time for delivery.
Info for this part was:
At etrailer we provide the best information available about the products we sell. We take the quality of our information seriously so that you can get the right part the first time.


James
4/30/2026
After a year our thoughts are still the same - excellent quality and very easy to use.