
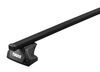
Rhino-Rack Sportz Roof Rack for Flush Rails - Aluminum - Black - Qty 2


To see if this custom-fit item will work for you please tell us what vehicle you'll use it with.


Thank you! Your comment has been submitted successfully. You should be able to view your question/comment here within a few days.
Error submitting comment. Please try again momentarily.


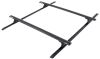
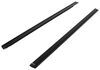
When you’re loading up for a trip, space matters. These 50" full-length aluminum crossbars give you plenty of room to mount your favorite gear—kayaks, paddleboards, cargo boxes, or skis. The aluminum build keeps things strong but lightweight, supporting up to 165 lbs while standing up to the elements. You get solid carrying power without adding unnecessary bulk.
Nothing ruins a road trip like constant wind noise. The aerodynamic shape of these Sportz crossbars helps air move smoothly over the roof, while the dual rubber strips in the top channels guide airflow and cut down on drag and whistling. You’ll notice a calmer ride when cruising to the campground or heading out for a long drive.
Whether you’re hauling bikes in the summer or skis in the winter, these bars make it easy to switch setups. The top channels accept channel-mount accessories, and you can also clamp gear around the bars. That means your existing carriers from popular brands fit right in, and you’re free to mix setups depending on your plans.
Once your gear is loaded, you want everything to stay put. The SX legs include lockable cover plates that secure the rack to your vehicle’s flush rails, giving an added layer of confidence when leaving your setup parked at a trailhead or campsite. It’s a sturdy connection that keeps your investment right where it belongs.
Every trip puts gear through its paces—rain, heat, and heavy loads—but this system is built for it. The aluminum construction resists corrosion while keeping weight low, maintaining performance through years of travel and recreation. Backed by a 5-year warranty, it’s ready for countless adventures ahead.
 Alternate Instructions
Videos are provided as a guide only. Refer to manufacturer installation instructions and specs for complete information.
Hey, everyone. I'm Evangeline here at etrailer. Today, we have our Rhino-Rack's roof rack Sportz system, and we're taking a look at how it fits, and I'll also show you how to get it all installed on your 2024 BMW X1. This is adjustable, so we're gonna have some tips and tricks on where you might best install it depending on what you are planning on carrying. Now this system is designed specifically for the BMWX X1 with its flush rails. If you have a different type of roof, there are other fit kits available for your vehicle.
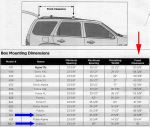
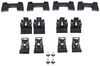
So I do recommend that you use our fit guide here on our website, put your year, make, model, and then select which type of roof you have, and that gives you all the different fits and colors and options available for your vehicle. Now of all those different options, I really like the Rhino-Rack Sportz bars if you are looking for something that's heavy duty, looks great, but it also is super easy to install. This is gonna be a full kit with two bars and four towers designed specifically for your car. These are gonna be 50-inch long bars, which is the recommended length for your X1 car. I like it too because it does sit semi-flush against your vehicle where it still sits out a little further so you can add more things on top of it, but not too far where you're hitting your head against the bars anytime soon.
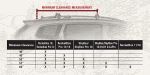
You have a little bit of overhang, and that's measured from the tower to right before the end cap, about an inch, an inch and a quarter, depending where you have it installed. So if you have accessories that require more length, we do have those options available here on our site, but in most situations, this is the length that will work great with your vehicle. Another measurement I like to look at is clearance with the bar. Now this bed is clear with the sunroof open. Currently, for the back, if I measure from the glass to the bottom of the crossbar, I have about two inches and maybe about two and a half inches.
There is a curve to the roof, so that number may change a little bit. My recommendation here, since it is a little close and the windows not even open, look into T-track or channel-mounted accessories. That way you don't have any clamps going around. If you do get an accessory that uses clamps, you know, the ones that have those rubber metal straps instead would be ideal. The next thing I measure for is the height added to the roof.
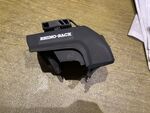
So from the glass to the top of the bar, I have it at around three and a half inches, maybe close to three and three quarters. And that's gonna be still sleek, low profile. This does lock, so when the towers are locked, you're unable to flip open these levers. To unlock it, you just use one of the keys included and now you're able to bring this up and open. And this is how you would loosen or tighten down your towers around those clamps. And the bar up top, you get access to channel-mounted accessories by simply pulling out this end cap. Or if you're using Rhino-Racks with lock accessories, you don't even know need to pull out the end cap. If you're curious about how I got this installed onto this car, I'll stick around. So you have your towers here, and then you have your Sportz bar. Underneath, you're gonna have this plastic piece. So we're gonna take that out for now, but later on we're gonna replace it, cut to size around your tower. You are then going to remove your end cap. So this has a little tab on the inside, and it may require a little bit of force to remove. Do this on both sides. And then you're gonna get your tower, and this will slide into that opening. If you feel like it isn't sliding into that opening, just press down on that lever and that will adjust things. If you can't press down on that clamp, you may need to unlock the tower and loosen it a little bit. Once both towers are on there, make sure your end caps are back in place. And you could loosen up the clamps a little bit. It really doesn't need much for your BMW before putting it onto your flush rails. Look at how nicely those clamps fit around the rail. Your BMW will have a little bit of a divot here up top. So the tower has a clamp up front that pushes up against that divot. So make sure as you push it up against the divot and you go on both sides, you can adjust this crossbar back and forth. You wanna measure for about an equal length on each side of crossbar space. As for the location of where you install these crossbars, totally up to you. My general rule of thumb is I usually go for around where the door seams are just because then you're less likely to hit your head on crossbars if they are sitting pretty long. Also, this gives them a good distance apart to work with most accessories. When you wanna measure for that distance, I like to measure center to center, and I have it at 26 and a half inches apart. That's awesome. That fits within that versatile line. Tighten down both sides until you feel a good amount of resistance, making sure both sides are secure. You can then flip this lever down like that, and then you'll lock that lever in place using the included keys. You'll get two sets of keys. So once everything is tightened down, secured, locked into place, I always throw one key in the glove box, the other key on my key chain. And that's gonna be it for the installation. If you ever need to take this roof rack off, you just unlock those towers, loosen those clamps, and take the whole system off. By the way, do not forget about replacing those plastic strips underneath. That will help a lot if you happen to hear wind noise as you drive. Now you have this whole roof rack system, you can put all kinds of gear on. Whether you have your roof boxes, your kayaks, your skis, and snowboards, your BMW X1 is now ready for that adventure.
Ratings & Reviews



Doug H.

2/13/2020
Another year on and these legs are holding on strong. Locks are not rusting and all mechanisms move freely. My Discovery Sport is uncovered in the elements 99 of the time and these things are holding up beautifully. And theyre quiet to boot! I recommend them whole-heartedly.
Mike
7/11/2022
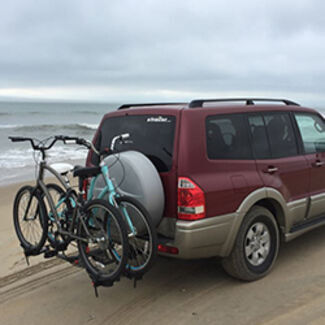
Numerous road trips and no failures from this rack. Typically carry a Tule XL carrier fully loaded. The rack is always on the car.
Lauren
8/2/2024
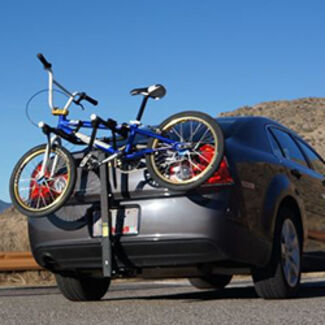
Still great!


Mike L.
6/29/2019
If assembled and installed according to the instructions, the Vortex Aero roof rack kit from Rhino Rack has a 220 lb weight capacity which is the highest available capacity roof rack we offer for that vehicle.


Do you have a question about this Roof Rack?
Info for this part was:
At etrailer we provide the best information available about the products we sell. We take the quality of our information seriously so that you can get the right part the first time. Let us know if anything is missing or if you have any questions.

























Francis
7/23/2023
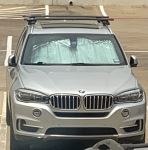
No issues. Pretty simple to install and has stayed in place without requiring any adjustment. We took a trip to Florida last summer and trapped a cargo carrier to the top. It was pretty heavy but the Rhino held up great. Even through the auto car wash no issues. Would definitely recommend.