
Summer Starts Here - Save up to 70%
To see if this custom-fit item will work for you please tell us what vehicle you'll use it with.
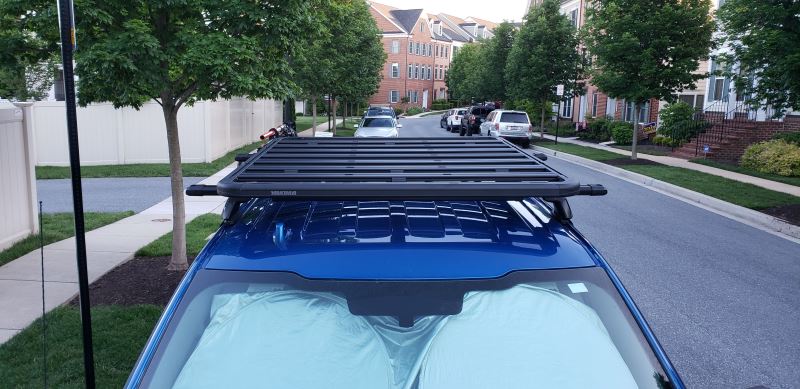
Designed for use in the Australian Outback, this rugged platform lets you bring whatever gear you might need for your next adventure. Compatible with many Yakima off-road and traditional roof rack accessories.
Features:
Yakima LockNLoad Platform B, 60x54:Videos are provided as a guide only. Refer to manufacturer installation instructions and specs for complete information.
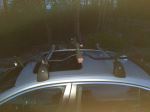
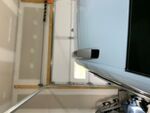
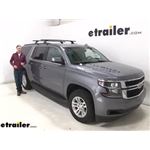
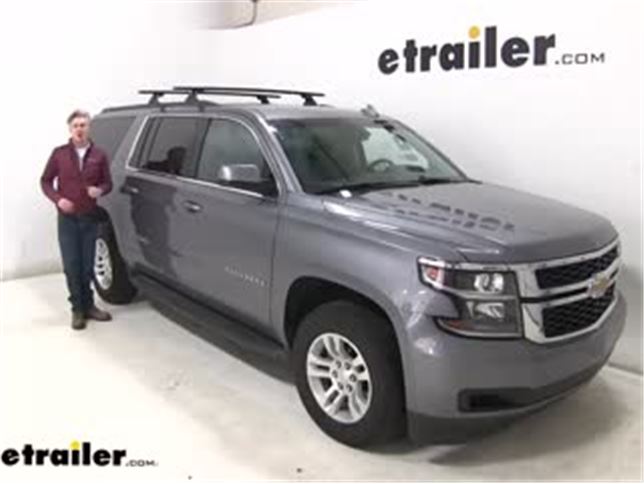
Today on our 2019 Chevrolet Suburban, we're gonna be doing a test fit on the Yakima JetStream CrossBar roof rack system. This system is specifically designed to fit your flush-mounted rails on your Suburban. We've already got it in place, as you can see, just to give you a good idea of what it looks like. But it's gonna allow you to carry roof-mounted accessories, things like bike racks, kayak carriers, cargo boxes and much more.It features 60-inch-long aluminum crossbars. You can see how they stretch across the entire roof of our Suburban. So we'll be able to carry a lot more than just one or two accessories.
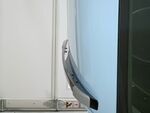
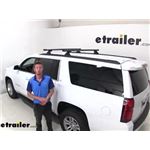
We can put maybe even three or four bike racks up there if we wanted. Now, these are available in black and silver. If silver is something you're interested in, see etrailer.com, and we can get you set up with that.Now these JetStream crossbars are also very aerodynamic. You can see how they have that shape there. These are gonna be a lot quieter than your traditional round or square bars.
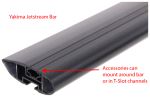
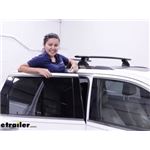
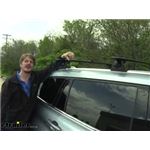
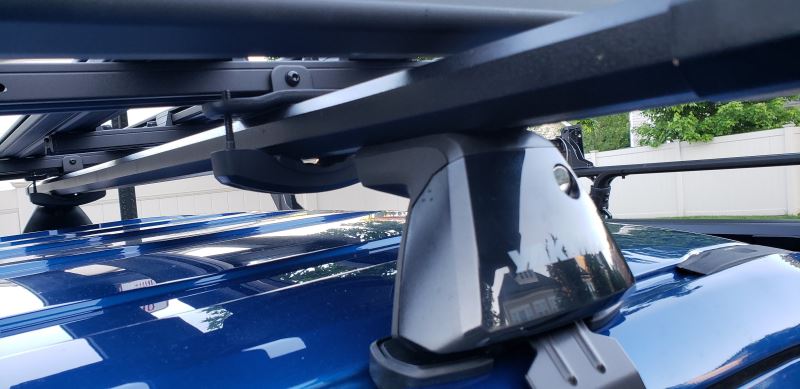
These are gonna work with your standard clamp-on accessories as well as your T-slot accessories. To access that you'll just wanna remove that end cap, and rather than having to remove or trim that rubber strip, all you need to do is press down and slide that T-bolt across to your desired position, and you've got that nice, clean look.Now the crossbars are held in place by four SkyLine towers. These are specifically designed to fit the Yakima landing pads that attach to your flush-mount rails. Now what's unique about this system is, if our roof rack system is not in use, or we wish to take it off, it's easy to do so. We'll open up that cover, and then we can lift them off.
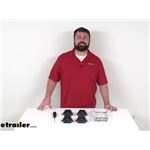
Instead of leaving the landing pad open like that, we can then put on our included cap. That way we've got a nice, clean look, and it protects the inside of our landing pad.To give you a closer look at that landing pad, the bottom is rubber-coated. That way it doesn't harm or scratch that flush-mounted rail. Now it also does use stainless steel hardware, so we don't need to worry about any rust or corrosion to that either.When you're ready to install it, just simply pop off those caps, set it in place, and close up the ends. And then it's nice and solid.
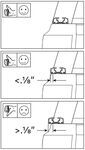
Now if you'd like to add more security, you can pop out the plastic lock core here and add some Yakima metal locking cores. This'll prevent anyone from removing your crossbars from your flush-mounted rails.Now this roof rack system has a weight capacity of 165 pounds. You do, however, wanna check with your Suburban's owner's manual to see if the roof can support that much weight. Now I'm gonna give you some dimensions. This'll give you an idea how much you've added to the roof of your Suburban, and it may help you when clamping on the accessories around the crossbars. But from the top of the roof to the top of the bar is about 4-1/2 inches. From the top of the roof to the underside of the bar is about 3-1/2 inches.Now that we've gone over the features, I'll go ahead and show you how to get it installed. I've already got the front crossbar in place, mounted to my flush-mount rails on the Suburban. The rear one installs the same way. I've got one of my landing pads installed on this side. Let's do the other side together. So you're gonna need the landing pad here, two bolts and the tool. Now we're gonna be mounting our landing pad right here. That way it's even with the opposite side.But I'd like to point out all of the options that we have on top of our Suburban here. We've got this spot here, here and here. You wanna position out your crossbars to where they're gonna work out best with your accessories. Well with that being said, let's go ahead and take out our two screws here. Now they are just plastic. Could use a coin or a flathead screwdriver. What we can do is just kinda start taking that out and then twist it the rest of way out with our fingers. You can see here they're just kind of a pushpin style, and you can either put those in your glove box or throw them away, whatever you'd like to do. Then we can take that landing pad. You wanna be sure that the rubber is lined up with the holes here, and we'll set it in place and line up our holes on our flush-mount rails.Then we can take our included hardware and go ahead and get those started. Another thing you wanna be sure of is that the rubber padding is not bunched up on one side or the other. Make sure it's seated on there properly. Take our included tool and tighten these down evenly. Perfect. Now let's head back down to the cart and assemble our crossbar.So I have one of my SkyLine towers attached here. We'll just need to assemble and slide on the other side. So let's go ahead and do that. We'll start off by grabbing one of the Skyline towers, and we'll need to put on our plastic clip just so it will attach to our adjusting crossbars. Then we'll wanna take our metal T-nut here, put it down over the top, and we wanna turn it over so we can take our included tool and tighten up the bolt here. Now this one we can go ahead and tighten down all the way. Now one unique thing about our tool is that it will click once we've got it properly torqued down. Just like that. Then we can turn it back over and we're ready to slide it onto our JetStream CrossBar.So we wanna be sure and turn it over, and if you haven't removed your end cap yet, go ahead and do that. And all we need to do is slide it onto the channel here. Now sometimes it likes to get bound up with that rubber portion on the other side, so we can just kinda push that in a little bit and push it on the rest of the way. Now we don't need to worry about setting this to an exact position just yet. We can worry about that when we set the whole thing in place on our Suburban. Let's go ahead and replace our end cap. And then we're ready to bring it up to our roof.Now when we set our crossbar in place, we wanna be sure that the rounded portion is facing towards the front of our Suburban. Now we also wanna be sure that our cover here is opened up. By doing so it's going to draw in the two pegs on either side. That way we can set it into our landing pad. So we'll gently rest it down, making sure that those SkyLine towers set right on top of the landing pads. Now you may have to adjust that tower slightly forward or backward to do so, but it just rests down in place.Now the next thing we need to do is adjust our bar overhang. We need to make sure it's the same on each side. So I can already tell I need to go that way a little bit, so what I'm gonna do is pick up on my Skyline tower just a little bit on the inside and give it a good push. I'd say that actually looks pretty close. Now we can take our included tool and tighten down the bolt right in here. And what that's gonna do is it's going to tighten the JetStream CrossBar to our Skyline tower. Now we're gonna be tightening it down until we hear the click within our tool, same as before. From there we can close up that cover, and it's gonna push those two pegs out, locking it in place. Let's go ahead and do the same for the other side.With everything in place I can give it a good shake test. As you can see, I'm shaking the entire Suburban, and it's not going anywhere. You can rest assure your roof rack system and your accessories are gonna be safe. But with everything installed, you're ready to load up your favorite roof-mounted accessory, or accessories, and hit the road.That's gonna complete our look at the Yakima JetStream CrossBar roof rack system on our 2019 Chevrolet Suburban.
Average Customer Rating: 4.9 out of 5 stars (62 Customer Reviews)
Designed for use in the Australian Outback, this rugged platform lets you bring whatever gear you might need for your next adventure. Compatible with many Yakima off-road and traditional roof rack accessories.Fit our Subaru Forester perfectly. Install was a breeze. For the money I wish they came with the core locks.
Very nice quality towers. Very heavy duty! They have a cool "snap" on / off mechanism for quick removal and installation.

You guys provide great products and excellent customer service.
Thanks
These crossbars were easy to install and adjust. Be sure to get all the pieces you need. There is no mention of the Landing Pads necessary to use these.
Yakima SkyLine Towers are well-designed and well-executed. They easily fit into the Yakima Landing Pads and form a tight fit when closed. And they also fit nicely into the Yakima JetStream Crossbars when following the Yakima instruction manual and various YouTube videos. I did run into a snag at first where I found the rubber seal on one SkyLine Tower getting caught on the JetStream Crossbar track, but after that I was careful not to let that happen with the other towers.
I find the appearance of the Yakima SkyLine Towers to match their level of quality in materials and design.
Great company. Fast delivery.
Lots of wind noise. Good rack overall
These really look so much better then the factory racks! Easy to install. Easy to order! Great product!
Easy Install.
But, the instructions tell you torque bolts to 48 in lbf or 5.4 Nm, with the L shape security wrench.
How do you apply a specific torque to a L shaped wrench?
Can't put a torque wrench on it.
My question and reason for 4 stars is for Yakima. Why not supply a preset torque driver like the one supplied for the Skyline Tower installation?
Overall I'm quite pleased.
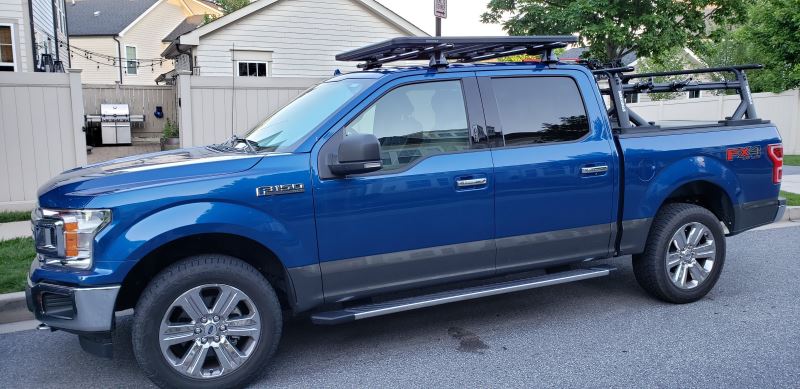
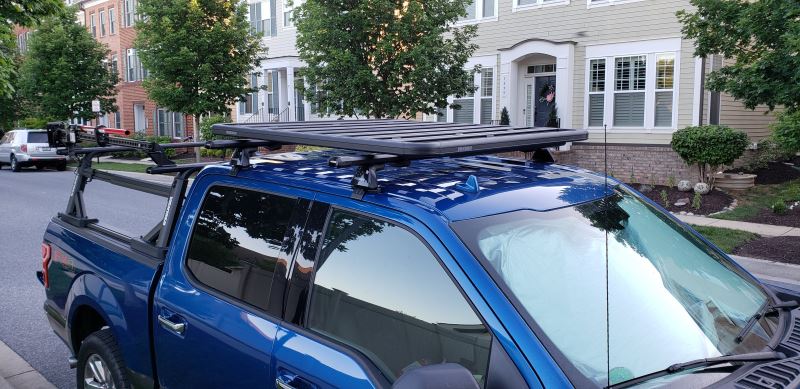
Mounted to the top of my 2018 F-150 Super Crew Cab. Had Yakima Baselines, with HD Bars, HD Bar Adapters and the locknload crossbar adapters. Wished I was able to install it without crossbars as it requires that I buy them, also adds a bit of height to the the locknload as well.
Very well built, had my wife (125lbs) walking around on it after I mounted the locknload. Took about an hour to assemble the locknload and maybe another hour or two of adjusting the bars to where I wanted the locknload to sit on the roof. Other than it looks a bit too high I do love them. Will probably see what I can do about lowering the locknload in the future.
It was exactly what I ordered
They were more helpful than Yakima identifying the correct part, arrived a day early. Nothing to complain about, great service.
I am going to include the Landing Pads, Skyline Towers, LockNLoad adapters, and Pivoting Mounts that are all required for my vehicle in this review of the 84" x 54" LockNLoad Platform. First, I had done months of research trying to figure out what would work and meet my needs for a 2008 GMC Yukon XL. Without the help of etrailer's agent, Ashley, I'd probably still be trying to figure things out! Ashley was patient and thorough, she made sure I had all the parts I needed for a fairly complex (and large!)project. I cannot thank her enough!
On to the assembly and installation: Ashley confirmed that following instructions was key to efficient building - I found that combining online instructions with the included hard copies worked best. As an example, the online fastener images and descriptions are far better than the paper ones. Then, having the paper instructions in hand made "in the moment" progress much faster. All of the Yakima parts fit together perfectly, and by methodically following the instructions (I cannot stress this enough!), including pre assembling Landing Pads, Towers, and Pivoting Mounts, there was no need to backtrack. Once I had a day to devote to the project, everything went very smoothly. Placing the large Platform on the mounts does require two people, but the rest was easy for one fairly handy person to accomplish. Making adjustments to be sure the Platform is centered and square to the roof took some time but it's worth it in the end. Again, thanks to etrailer and particularly Ashley! It was a pleasure doing business with you!
This thing added a great deal of flexibility to my 4Runner. Rock solid and almost limitless options for roof storage allowed me to customize it to transport a kayak and roof box that would never have been possible otherwise.
Great product... love that fact that I can take the bars on and off without having to disassemble the system. Very convenient when not its not being used.
They fit perfectly and we’re easy to in stall
Installed very easy on a 2017 Chevy Tahoe and the hardest part was pulling the existing plugs. These seat very nicely into the flush mounts and have a good secure and weather tight fit.
Love it.
Fast delivery. Yakima roof system for my 2017 Tahoe was perfect.
Do you have a question about this Roof Rack?
Info for this part was:
At etrailer.com we provide the best information available about the products we sell. We take the quality of our information seriously so that you can get the right part the first time. Let us know if anything is missing or if you have any questions.


Thank you! Your comment has been submitted successfully. You should be able to view your question/comment here within a few days.
Error submitting comment. Please try again momentarily.