
To see if this custom-fit item will work for you please tell us what vehicle you'll use it with.


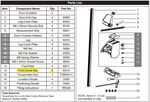
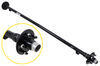
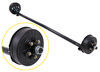
This custom fit kit lets you mount 4 Rhino-Rack 2500 legs to your vehicle with a naked roof. Clamps mount to legs with bolts. Includes 4 clamps and 4 pads.
Features:
Specs:

California residents: click here
Videos are provided as a guide only. Refer to manufacturer installation instructions and specs for complete information.
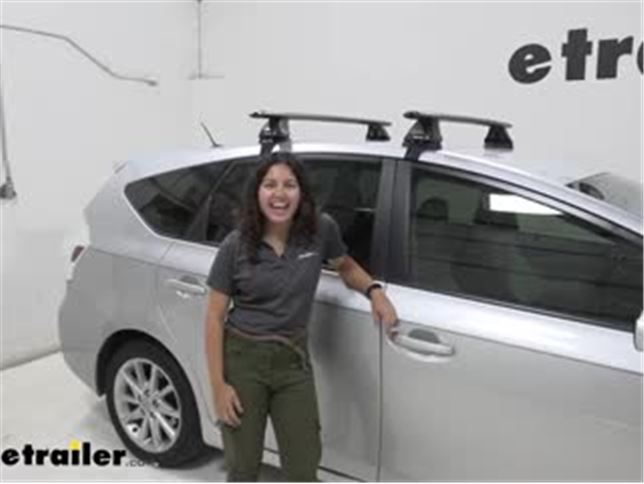
Hi everyone, it's Evangeline here at etrailer. And today we are looking at our Rhino-Rack Roof Rack System here on our 2014 Toyota Prius V. Which has the Rhino-Rack Vortex Aero bars, the 2500 series legs and a custom fit kit for our car right here. So roof rack is really useful, especially when you need a little extra cargo space on your vehicle. Now, our Prius V does not come with a hitch and sometimes it might be a little bit difficult to add a hitch to it. Now, what is not difficult to add is a roof rack.
So you can see here, this is a great addition to your vehicle. It fits onto your naked roof, and it adds that cargo space, as well as an option to add roof rack accessories, like bike racks or cargo boxes. So this has the Vortex Aero bars, and that's going to be really important, especially for your Prius V. Because I know you're trying to get the most out of your hybrid system and keeping those MPGs high. So as that aerodynamic bar is on there, that's going to create less wind drag and less wind noise, especially compared to your traditional square or round crossbars.
The Rhino-Rack Aero Vortex bars are designed to have these T-tracks here at the top. And that's going to be something useful for your T-track mounted accessories. I highly recommend taking advantage of that design, rather than clamps that go around. Try to get the channel-mounted ones that we can use as much of the bar space as you can. And it's more effective that way.
This has a weight capacity of 165 pounds. Now, as you are loading up these bars, though, please be mindful of your roof weight capacity. Especially as you have to add up your cargo, maybe your accessories, so your cargo basket, plus the weight of this roof rack. Add that all together and follow whichever is lower. Be it your roof weight capacity or your bar weight capacity.
Rhino-Rack is pretty good with being low profile, which means that their rack sits a bit closer to your roof compared to others. With the way this is designed, it isn't as low-profile, since it needs to compensate for the slope. But we'll take some measurements just to see exactly how much clearance we have. So measuring from the roof to the bottom of the bars, we have a clearance of four inches. That's a measurement to keep in mind. Especially when you're carrying things like skis and snowboards, which have bindings that sit below. Also, if you have accessories that need clamps, that's going to be the clearance you get to work with. As for how high this sits off of your roof. We have it at from the top of the roof to the top of the crossbar, it's going to be 5 1/4 inches. Now your car is lower compared to let's say, a truck or a large SUV. So that's just going to be a little extra height. You don't have to be too worried about it when you're going into a garage or under a bridge. Now we're going to talk about overhang. So overhang is how far past the foot is the crossbar hang. So measuring from underneath, right where that foot is to the end of the crossbar. We have it at five inches to the end of the end cap. Now for usable bar space, it's going to be four inches. Because that end cap is an inch thick. This uses 2500 series legs or towers, which we say here in etrailer. So that's going to be locking, allowing you to lock each and every tower with just one key. It also has a custom fit kit. So that fit kit fits perfectly onto your Prius's roof. And it has a slope just to compensate for this lamp on your car's roof. Whole thing with roof racks for naked roofs is that you do not have adjustability in terms of crossbar spread. This is designed to be positioned right at this point. If you need it further apart or closer together, it's not going to move like that. So your crossbar spread is going to be about 28 1/2 inches. And that's measured from the center of one crossbar to the center of the other crossbar. Now, this is a naked-roof roof rack, which means you have to be precise with your measurements as you put this on. So that process is actually pretty simple once you get your measurements right. Let's take a look at that process. Before we start the install, I'm going to walk you through the process of making sure you get the right parts on the right towers before you put them on your vehicle. So I already did my back crossbar and we can do the front one together. So first, let's take a look at the towers and the foot packs. Underneath the foot packs, you're going to find some letters which are going to explain which goes where. So down here, you see FR, which means front right, as well as an arrow. That's going to go onto our front right tower or our passenger tower. And it's going to clip onto that piece as well as onto the tower. So, fit the pad on to your plate and then put that plate onto the tower. So follow the arrows as well. And that's going to guide you to which direction it's going to face. So on our Prius V here, the arrows are going to face out. Because of the slope of the roof of your Prius, getting those footpads on correctly is really important. So again, make sure the pad has the arrows facing forward. And then the foot pack has the arrows facing out. And once those are in place, you can then place it onto your crossbars. So, when your instructions are going to tell you how much of the strip underneath you need to cut out, I took it out completely just to show you what it looks like on the inside. And then you're going to cut out a piece just to cover it back on when you have your tower in place. So first, loosen this bolt which is holding this plate at the end of the tower. Just enough, so you have enough space to slide it into the T-tracks of your tower or your crossbar. And once you have your tower in place, you going to have to make sure you got into the right spot. So your instructions are going to give you the length for the inside. You're going to use that measurement strip. Now, make sure to use a measuring tape that has meters on it. So for our vehicle here, we're going to have it at 14.1 or 141 millimeters. Get that flush with that tower on the inside, and then tighten it down with the included tool. Now, make sure you have the arrows facing the right way. Remember forwards and outwards. You're then going to place it onto your roof. This part is actually the easy part compared to other roof racks, because you have that rubber pad on the bottom. So other roof racks, you're going to be needing another person on the other side to catch it, but here, you can just scooch it along till you get it in the general location. Now you're going to measure from the middle or where that door is 250 millimeters out, and that's going to line up with the arrow right on your tower. So make sure you get them lined up on both sides. Finally, you're going to place your hook into your door jam and just get that lined up. These are custom fit, so you're going to follow the curve of your door. And then in order to secure it, you're going to put this bolt through and line it up with another in the back. So after you put the hook on the other side, you're then going to use the included tool to tighten down that bolt in the middle. I highly recommend going back and forth on each side, just to make sure it's tightened down evenly and you don't have it skewed to one way. So once you've made sure that all four towers are tightened down, nothing's loose or missing, you can then put your end caps into your crossbars and then the caps, onto the towers. These are going to come with keys and that way you can get them secured into place. Lock all four of your towers, as well as lock your end caps. And once that's done, you are done with the install. And that was a look at our Rhino-Rack roof rack with Vortex Aero bars 2500 series legs, and a custom fit kit for our 2014 Toyota Prius V. My name is Evangeline, and I hope you enjoy the journey..

Buying this fit kit allowed me to reuse my Rhino Rack roof racks on my new vehicle. Thanks to etrailer for confirming this would work.

Do you have a question about this Accessories and Part?
Info for this part was:
At etrailer we provide the best information available about the products we sell. We take the quality of our information seriously so that you can get the right part the first time. Let us know if anything is missing or if you have any questions.


Thank you! Your comment has been submitted successfully. You should be able to view your question/comment here within a few days.
Error submitting comment. Please try again momentarily.