


To see if this custom-fit item will work for you please tell us what vehicle you'll use it with.


Thank you! Your comment has been submitted successfully. You should be able to view your question/comment here within a few days.
Error submitting comment. Please try again momentarily.

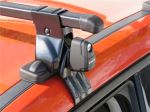
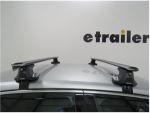
When you’re loading up for a trip—whether it’s kayaks, canoes, or a heavy cargo box—you want crossbars that won’t flex or give under pressure. These Inno square bars are made from hardened steel, giving them the strength to handle up to 220 lbs of weight while staying solid on long drives. The elastomeric coating adds a protective layer against rust and corrosion, so they’ll hold up through years of outdoor use.
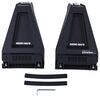
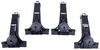
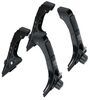
No need to piece together parts or guess what’s missing—this system comes ready to mount with 2 square crossbars and 4 rain gutter feet. Everything you need for a stable setup is included in one box. Once installed, the rack provides a sturdy platform for clamps, carriers, and other gear attachments without extra adapters.
Leaving your gear on the roof shouldn’t mean worrying about theft. This rack includes lockable leg covers that help deter unwanted tampering or removal. When you’ve got expensive kayaks or camping gear on top, that added peace of mind goes a long way during overnight stops or parking at trailheads.
From kayaks and paddleboards to cargo boxes and ski carriers, the square bar design works with most clamp-on accessories. The 54" long x 1-1/4" wide x 7/8" tall crossbars give you plenty of usable space for securing brackets and mounts, making it easy to swap between setups for different adventures without changing your rack system.
Rain, salt spray, and sun exposure can take a toll on metal gear over time. The elastomeric coating on these crossbars helps prevent corrosion even after years of use in wet or coastal environments. That means you can keep exploring without worrying about your rack wearing out before your next trip.

Ratings & Reviews


David M.

5/11/2020
After 1 year, I am quite happy with my roof rack. I have used it for many cross-country trips, camping trips, and one move. It continues to perform well. I am glad I bought it. I have made marks with a dark red marker on the door frames to mark where to align the clamps. You cant see them without a bright light at the right angle, but they make alignment fast and easy. Now I can rig the bars and carrier in about 20 minutes, and be certain everything is in the right spot.
Linda S.
7/21/2022
Love this product -they still look brand new after a year - stored them over the winter and they are so easy to put on and take off. I am ready for paddle boarding.

H. B.
8/21/2018
Still satisfied… good buy… definitely recommend.

James
7/12/2025
after a year all is well, in fact I added the Thule hulavators and they work great. Im a happy customer
Jay
2/11/2025
Its been a year and Im still loving my roof rack. Everything is holding up sturdy and strong!

Brian K.
4/18/2024
No problems whatsoever. Great product.


Heather A.
1/26/2019
The inno fork mount bike rack part INXA391 that was purchased is for aero bars. The one you need is for square bars inno part # INA391. I have attached the link below.
Helpful Links

Jenny N.
3/4/2022
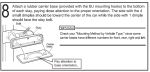
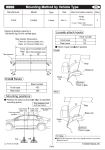
There are a lot of factors involved when installing and using a roof rack. For the 2018 Ford Focus Sedan the roof rack capacity is 120 pounds although you would want to also check that the manual says for the vehicle. Before tightening anything down you will want to look at the instructions to find the proper spread between the bars and also the feet. Once that is down you will take the included Allen tool and tighten down the bolt. Next you will install the fit kit which will have you start with the foot pad. The foot pad will line up with the holes at the bottom of the foot. These will push into place and are numbered so that the right pad lines up with the right foot. To install the clamp you will remove the screw from the outside and loosely tighten it up to hold the clamp into place. The next step is to measure from the center of the doorjamb you will get the measurement to the center of the bar. You will find this in your instructions. Repeat on the other side. Then you will take the tightening tool and snug it up against the door. You will do this on the passenger side as well. Then you will go back and forth from drivers to passenger side giving about five or six turns each time until its completely tightened down. When it makes the clicking sound you will know its completely tied down. You do not want to over tighten it.



Do you have a question about this Roof Rack?
Info for this part was:
At etrailer we provide the best information available about the products we sell. We take the quality of our information seriously so that you can get the right part the first time. Let us know if anything is missing or if you have any questions.














Kate F.
5/14/2026
Glad we had the other parts you needed as well Eli! Looks great! What do you mainly plan on using the roof rack for?