
 Product Experts Available Now!
Call 1-800-940-8924


Thank you! Your comment has been submitted successfully. You should be able to view your question/comment here within a few days.
Error submitting comment. Please try again momentarily.


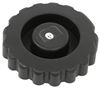
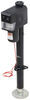
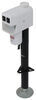
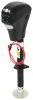
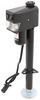
Replaces the cover on your etrailer or Ram electric A-frame jack (EJ-3520-WBX).
Features:
Videos are provided as a guide only. Refer to manufacturer installation instructions and specs for complete information.
What's up everybody It's AJ with etrailer.com. Today we're gonna be checking out this replacement cover for a RAM electric jack. It's gonna replace your existing cover that maybe takes some damage. Maybe the sun's faded it, maybe it's got big ole crack in there. You can replace it and make it like new again. Let's check it out.
The longer a jack stays on your trailer, the more abuse it's gonna get. Now 'cause there's a plastic top covering it, it can get damaged pretty easily. The sun can just get to it and you wanna make sure that you can replace that and not have to buy a whole new jack if that bothers you. I like that you can buy this replacement part put this back over there and it looks like new again. It's gonna have all the same functionality that your original one did.
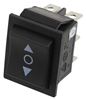
You're just gonna have to use the existing hardware. It comes with your cover. It does not come with your hardware so hopefully you still have that in place. It doesn't come with the switches. You're gonna need the switches from your jack.
There's just a little bit of disassembly. Check out how I did it. Now to install our new cover, we gotta remove the old one. So I'm gonna go through that process of removing all the screws. There's gonna be three screws on each side here.
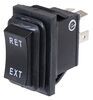
I'll just get a normal screwdriver. We're just gonna back those out. Now let's head underneath. We're gonna have two silver screws here at the front and then towards the back there's two gold screws. It's important to remember when we have to put 'em back on. So I'm just gonna back those out with the screwdriver Just like we did top side. Set that aside. And do the other one over here. Now with those screws removed we can remove the top portion of the jack. Now on the inside there's gonna be some wiring we have to pop out as well. So the switches is where I'm gonna push them through the front. Be careful where you're pushing. You should be able to push the plastic switch out on both ends. Watch out for the connectors on the back. Now you will have to disconnect those to get the switch out Just do 'em one at a time and remember what they go to. You're gonna go and reconnect them on the other side so they stay in place. This switch has more wires on it, so I used a paint marker and just made some notches to let me know what wires go where. So the plus sign's gonna be red, and then the one one line there just represents negative. The two is gonna be for the two wires. You can do whatever system you want. If you can remember, that's great. This is just one me. I wanna do this to help me when I undo this. I can put 'em right back where they go. Something I figured out as we we're disconnecting these wires is you can push down on this tab with a screwdriver and then you have an easier time of sliding that right off. Sometimes they're up like this and it looks like sometimes it's underneath so you can find that tab to push that to easily disconnect all these wires. With this switch removed, now we can remove the top section as the wires now fit through. Now remove that and set it aside. The bottom section's easy, which it's got a cutout here already so you just push one flap up and one down and we'll get off of the jack and then we'll run our wires through that hole. Now we'll install the new one just like we did before in reverse order. So that comes up there. We'll want to run this through that hole like it was before. Right here. Now as we add our new cover on the top, let's just go ahead and run all the wires you need through that section. That way I can set the cover in place. I'm gonna rewire the switches so I can push 'em back into place, but before I push it back into place, it's a good idea to test them to make sure you've wired everything correctly. Push the switch, you see lights we'll know it's wired correctly. Push our buttons back into place and then we can put together the rest of our assembly. Now we're gonna attach both parts together and start putting those screws back in the bottom. Overall not too bad. It was only a few screws to take a part the cover. The part that is a little difficult is the wiring process. I highly recommend taking pictures of the switches before you start unplugging things. That way you can put everything back to where it was the first time and not be stressed about it. Well, I think that does it. Thanks for hanging out and hope this helped..
Customer Satisfaction Score:
99% were satisfied with this product
1% of customers were not satisfied
Ratings & Reviews


Do you have a question about this Accessories and Part?
Info for this part was:
At etrailer we provide the best information available about the products we sell. We take the quality of our information seriously so that you can get the right part the first time. Let us know if anything is missing or if you have any questions.





























Lisa
8/23/2022
Wonderful