


Thank you! Your comment has been submitted successfully. You should be able to view your question/comment here within a few days.
Error submitting comment. Please try again momentarily.


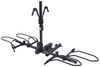
Add a ramp to your Swagman Current (S64678), E-Spec (66689), or G10 (S64681 or S64682) bike rack. Easily load your heavy bike onto the rack. Rests between wheel trays, making it easy to finish rolling your bike into place before securing it.
Features:
Specs:
Note: Do not leave ramp on rack when not in use.

Videos are provided as a guide only. Refer to manufacturer installation instructions and specs for complete information.
Hey everyone, it's Evangeline here at Etrailer. Today we have these Swagman ramp and bridge attachments. This is gonna be an add-on product for your Swagman bike racks. We're gonna take a look at some of its features right here. This is gonna be something I highly recommend considering if you have your heavier electric bikes. Now, while this still isn't a foolproof solution, it's still an improvement compared to lifting your bikes up and onto your rack.
So we'll talk about those key things right here at etrailer.com. The tray is gonna look like this when you have it all put together, and it is designed to be stored inside your vehicle when not in use. Now there are different ramps available from Swagman for their different racks. So the main thing you look at is do you have a Skaha or Escapee series that has a tray Because the ramp for that will have brackets on the ends. This one is designed for the other bike racks, like the E-SPEC, which is what we have here, and you'll see this open hole on the end, which is designed to fit onto the square tube of your bike rack.
The bridge nests onto the compacted ramp. So you can see this tab in the back and you can see these knobs. So the bridge has that tab, you just pull that bridge out and it detaches from the ramp. And then it easily fits onto the center base of your bike rack, creating a straight-across platform now. Each side of your ramp is gonna have this opening, so you don't have to worry about which side goes on which.
Now, what you do have to look at though is when you do put the ramp on, if you have it at an angle, it's gonna look like this where it sits over the lip. That's gonna give you an easier loading angle. But if you're more concerned about the stability and you feel like you need a little extra support, you can have it fit underneath the tube. This is gonna have a sharper angle though, so just pick and choose what works best for your bike. You adjust the angle of the ramp by extending the ramp out.
So this can go from 37 and a half inches in its shortest position, all the way out to 57 and a half inches. And this is adjusted by the knobs underneath. So once you've picked your spot, tighten down those knobs, and you're good to go. This will have the same capacity as your bike rack with a tire with capacity of up to five inches and a weight capacity of up to 80 pounds. You saw me load up this second bike in the beginning of the video, and that's just to show you the interaction of two bikes together. You're always gonna have some kind of conflict with your handle bars, your pedals, your seat posts, things like that whenever you work with multiple bikes. But the good news is that the ramp can be used on whichever side of the rack, whether it's the front, the back, left, or the right. Another thing that I would recommend doing is removing those hooks for the center mass whenever you do use this ramp and bridge. You can always put the hook on afterwards once you have your bike in place. (hook cranking) As someone that isn't always the strongest or struggles with lifting up super heavy bikes, I always appreciate having the option to get a ramp, and in our case, a bridge installed on the rack, just to make things a little bit easier. Hopefully this video explained how the ramp and bridge works and which ramp and bridge to get for your different bike racks. If you have any questions, you can always give us a call or ask me a question here on the website. But today, this was a look at the Swagman ramp and bridge add-on for your Swagman bike racks right here at etrailer.com. My name's Evangeline and I hope you enjoyed the journey.
Customer Satisfaction Score:
93% were satisfied with this product
7% of customers were not satisfied
Ratings & Reviews


Richard

4/10/2026
Works great and is essential to loading and unloading our ebikes. Really glad I bought it!



Claire H.
5/15/2026
I reached out to Swagman to confirm the fit for your E-SPEC Pro bike rack, and they advised that this is currently the only ramp available that’s compatible with the E-SPEC Pro. They also mentioned that the outer assembly is made thicker for added support, so the bracket will not sit completely flush and will appear tilted like shown in your photo. I'm sorry it's not a perfect fit, but I hope one will be available for you in the future.

Do you have a question about this Accessories and Part?
Info for this part was:
At etrailer we provide the best information available about the products we sell. We take the quality of our information seriously so that you can get the right part the first time. Let us know if anything is missing or if you have any questions.
































Gwendolyn Y.
12/22/2024
Hey William. I absolutely love the ramp on this Yakima rack so I am glad it has come in handy for you. Is there a spot or location that you love to bike at?