


Thank you! Your comment has been submitted successfully. You should be able to view your question/comment here within a few days.
Error submitting comment. Please try again momentarily.


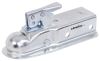
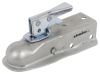
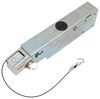
Coupler repair kit contains all needed replacement parts for your etrailer or Ram straight-tongue coupler with a 2,000-lb capacity (CT-2001-Z, CT-2003-Z, and CT-2002-Z), except for the coupler housing.
Features:
Videos are provided as a guide only. Refer to manufacturer installation instructions and specs for complete information.
Today we're going to be showing you how to install Coupler Repair Kit CT-2000-RK. This is designed for engine 7H straight tongue couplers with the 2000 pound capacity. Works great on E Trailer and Ram couplers and many other styles of straight tongue couplers with the same ball size and capacity. This is what the repair kit for our coupler's going to look like. As you can see we've got a brand new completely zinc coated kit of hardware here. This is going to come with everything with the exception of the coupler housing. We've got our new handle and latch, this is a very typical point of failure on them.
That latch will fail. We've got the part that that latch is going to come down and connect into. Got the spring located here just below it. The actual part that's going to come up and hold our ball. You can see that little pocket, that's the way it's designed.
When we close our latch that gets drawn up grabbing that ball from underneath. See, we've also got the new nylon locking nut here. The holder for that to prevent any accidental backing off of it and even this spring and washer there in the middle. All together complete kit, the only thing that you're really going to need is your coupler itself. This is one of our E Trailers. To do the replacement, you can see that we've got that nylon lock-nut right down here that we're going to have to remove.
You may get lucky, yours may be completely missing. Typically they're not going to look this nice, so there's probably going to be some grease and stuff in here. A set of gloves is a good idea. You want to make sure our coupler's fully open. Then if we reach in right here we can just squeeze that tab down, just like that.
That's going to allow us to release that locking catch. That keeps our nylon lock-nut from backing off. At that point it's just a matter of removing the nut there. I'm using a 19 millimeter or a three quarter inch socket for this application. Once that nut's off we can remove the keeper, the spring, a little washer that that rides on. You see that flat spot, that faces towards the rear, just keep that in mind. Then if we pull up on our latch mechanism we should be able to slide that right out and we'll have the part that makes contact with our ball, that internal spring and the rest of out latch mechanism there. It's not really that difficult of a process to take this out and get a new one that's going to work properly put back in. Just take our coupler, basically reverse that process. We're going to slide this through just like that. We need to get our spring put on there now, like that. Now we'll back that out some. The part that engages the ball, you can see it's got a little hook on the back of it, that needs to go around the pen 00:03:09. Put that around our pen 00:03:12, kind of compress that spring a little bit and bring that right in and through, just like that. Washer with the flat spot towards the back. Got our spring that's going to go on. The keeper for our nut there and we'll start threading on our lock-nut. We want to tighten our lock-nut down until we've got a thread or two showing from the underside. That keeper will rotate that way where it sits perfectly inside of both edges there and then we just need to rotate our nut just far enough to where that's going to go down there in position. You can see our coupler's back there as we pull down that latch, we see that jaw comes up to make contact with that ball and hold it in place. Once I've got it put together, what I like to do at this point is hook it up to the ball on my truck. I want it to fit down on the ball and I'm going to lift up and down on it. I shouldn't have any movement there. I don't want it to be so tight that it's going to bind but I don't want there to be any movement up and down. If I do have any movement, we just tighten that up just a little bit more, check it again until we have it just where we want it. We put a little bit of grease in there to help keep everything moving freely and help to keep any kind of binding or anything like that to a minimum. This should last us for a very good long time. Now with everything reassembled that's going to complete the installation of the repair kit for the E Trailer, Ram or other straight tongue couplers with a 2000 pound capacity and an inch and seven eighths ball. Part number is CT-200-RK.
Ratings & Reviews


Gwendolyn Y.
3/4/2025
Hey Neal. I just had some tracking information sent to you via email. The coupler repair kit was shipped in a separate box and is out for delivery today 3/3.

Andy

1/22/2024
Am still loving it! It was so nice to be able to get the part I needed instead of having to replace the entire hitch!!

Nick P.
7/7/2020
IT WORKS WITHOUT A PROBLEM

Chris
3/5/2020
Very well, I am an etrailer cheerleader now!
Do you have a question about this Accessories and Part?
Info for this part was:
At etrailer we provide the best information available about the products we sell. We take the quality of our information seriously so that you can get the right part the first time. Let us know if anything is missing or if you have any questions.












Darryl W.
1/6/2019
ONLY THE BEST NEVER BEEN LET DOWN, FAST SERVICE AND YEA Ill BE TELLING ALL.NO BETTER PLACE TO BUY FROM. THANKS