


To see if this custom-fit item will work for you please tell us what vehicle you'll use it with.


You tow a 5th wheel but still use your truck bed for lumber or pallets. This system gives you a complete 5th wheel hitch with a B&W underbed mounting kit, then breaks into three pieces when you're not towing so it takes up less space.
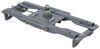
This Demco Recon Stealth separates into three sections when you need to remove it from the truck bed. That changes the job from pulling one large hitch to lifting smaller sections one at a time. The base also folds down when the hitch is not assembled, so it does not leave the same upright profile in the bed. The included MOLLE panel mounts at the front of the bed so you can strap the components in place instead of finding space for them in your garage.
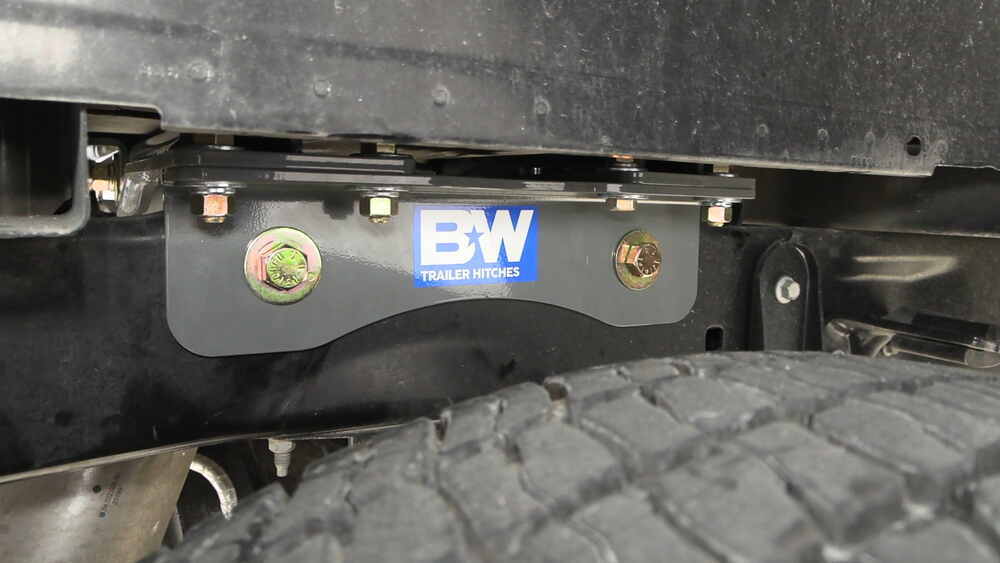
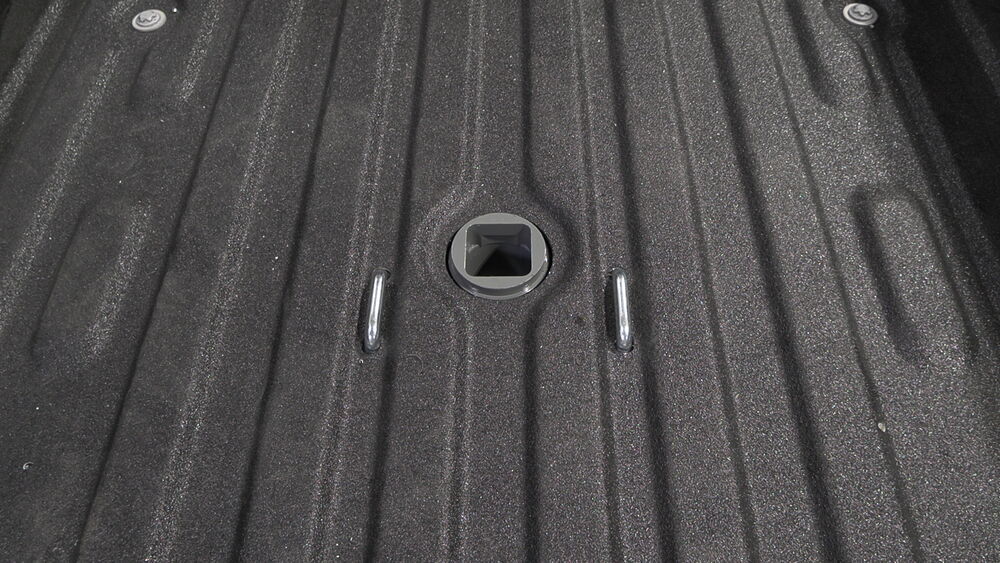
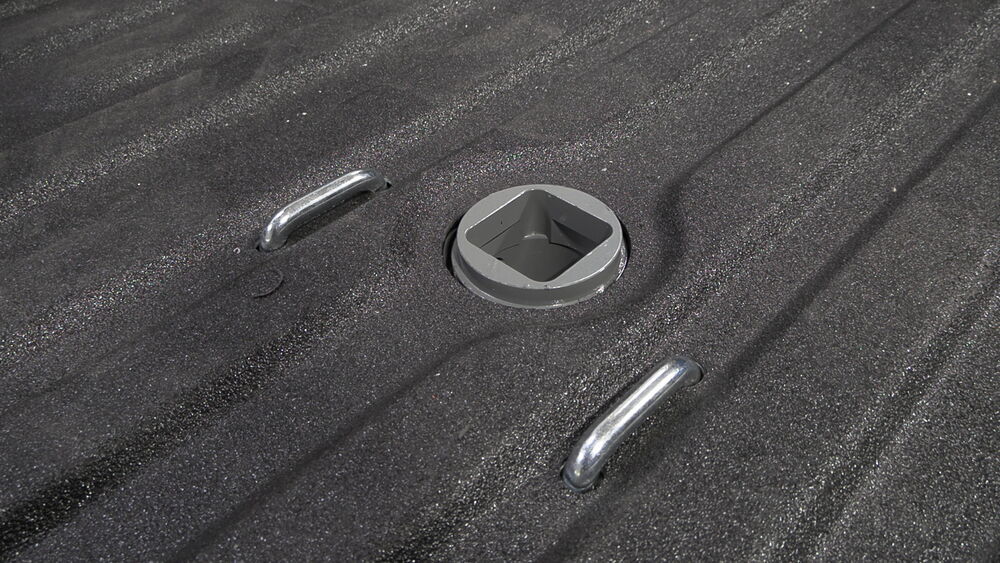
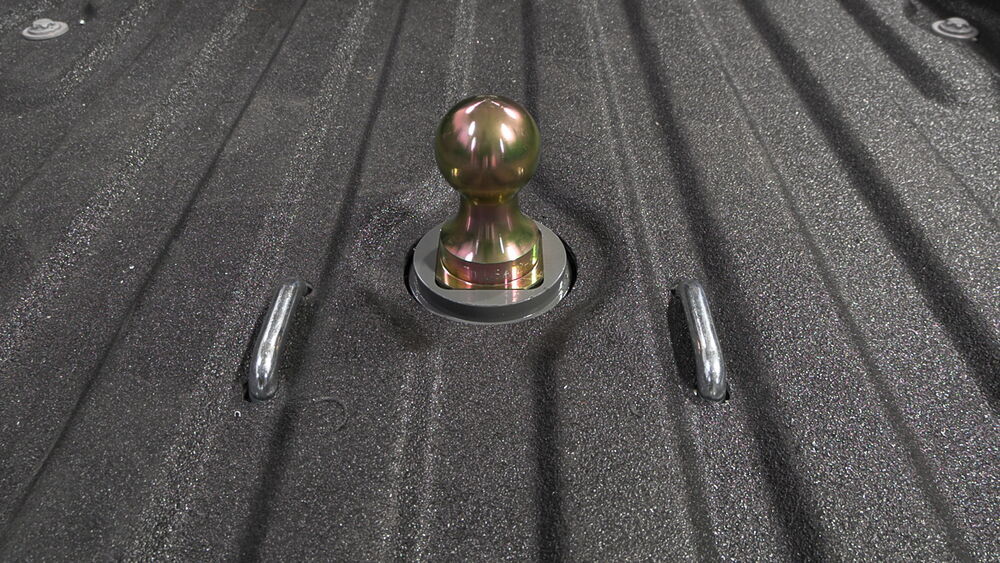
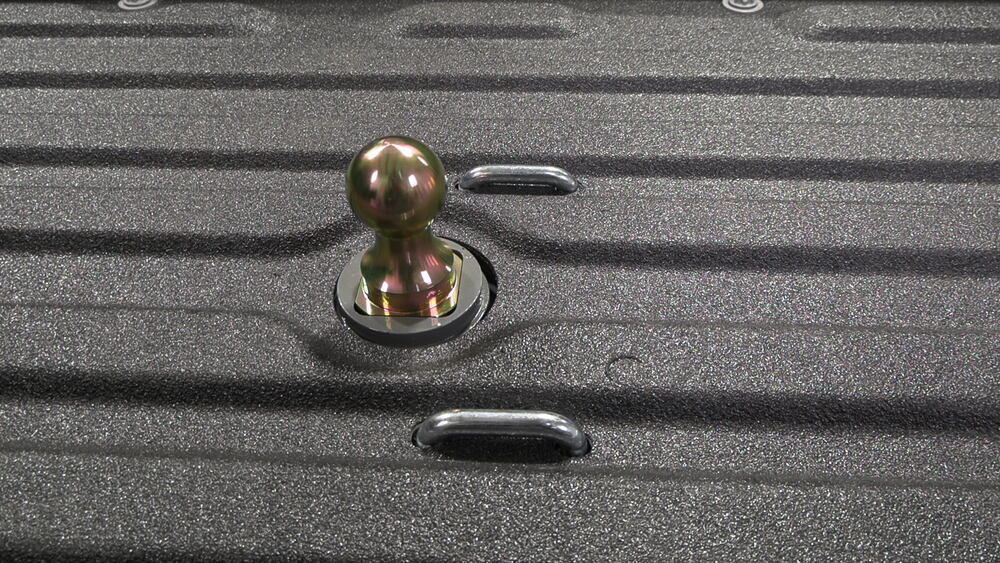
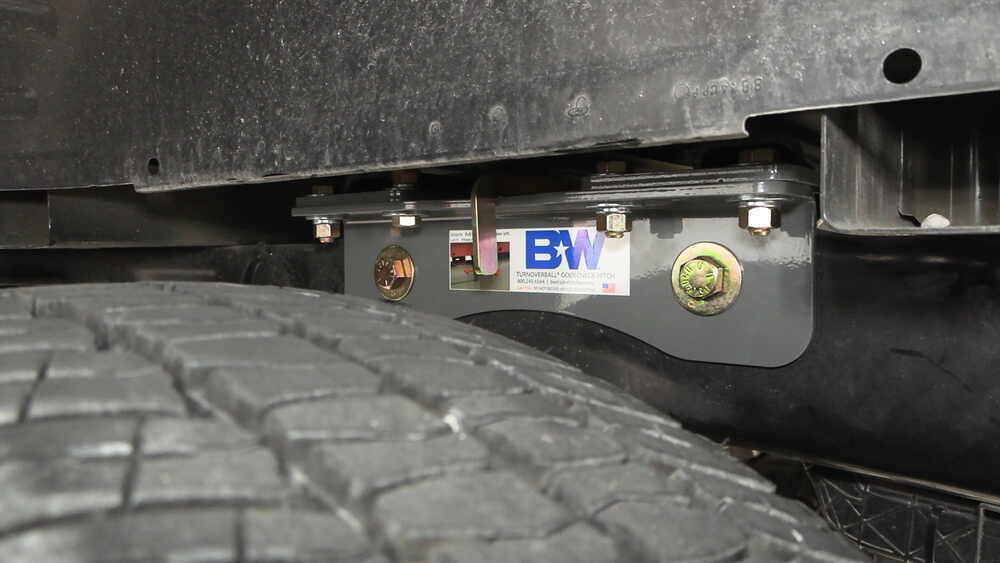
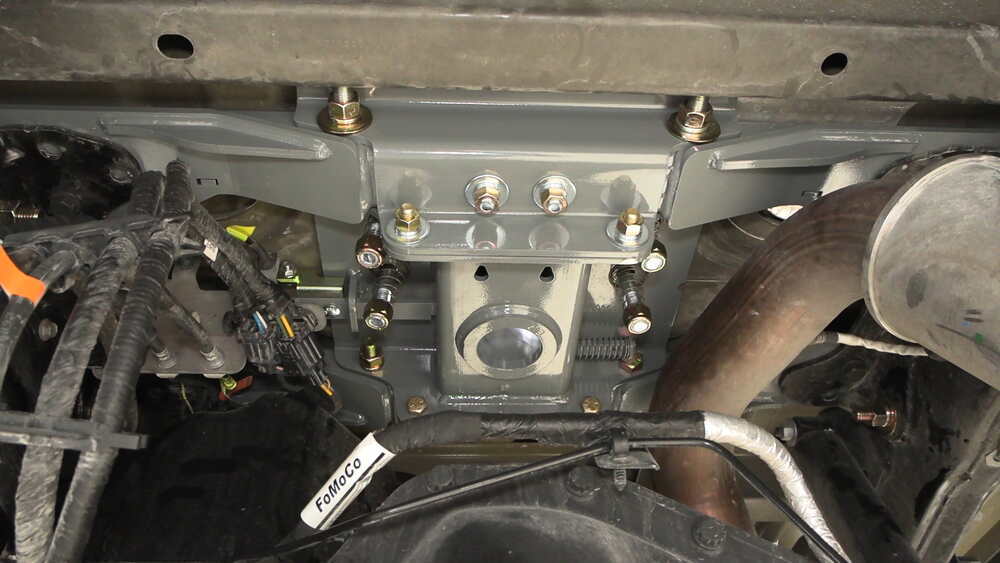
The included B&W underbed kit installs beneath your truck bed and gives you a solid mounting point for the Recon hitch without adding above-bed rails. This is the Turnoverball system, one of the most widely used gooseneck setups, and it doubles as a complete gooseneck hitch when the fifth wheel is removed. A single hole in the bed serves as the connection point, keeping the surface clear when you're not towing.
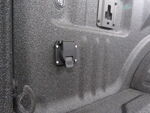
Once the fifth wheel hitch is removed, the bed is open for hauling materials or equipment. The gooseneck ball can be flipped upside down and stored in the hitch, leaving a flat surface for cargo. Safety chain loops sit flush in the bed, so nothing sticks up or gets in the way when you're using the truck for other jobs.
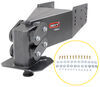
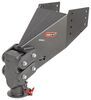
The hitch head uses a wraparound jaw and locking bar that fully enclose the kingpin. That tighter fit cuts down on the movement you can get from looser coupler styles at the hitch. The head pivots front-to-back and side-to-side, which helps it stay aligned as the truck and trailer move through turns, dips, and uneven ground.
This hitch is not compatible with rotating pin boxes, since it is designed for a standard fixed kingpin connection.
The upright uses stacked pin holes so the hitch head can be set at different heights. That lets you match the trailer to the truck more closely instead of towing nose high or nose low. The hitch connects directly to the underbed mounting point, so the adjustment happens at the hitch without changing the setup underneath.
Note: Not compatible with rotating pin boxes.
Videos are provided as a guide only. Refer to manufacturer installation instructions and specs for complete information.
Hello, neighbors, it's Brad here at etrailer, and today we're taking a look and installing the B&W underbed gooseneck kit for the Companion fifth wheel on a 2023 Ford F-350 Super Duty. B&W is definitely one of the brands that I highly recommend if you're looking at getting an underbed gooseneck kit. And really it comes down to the fit, finish, quality, and just overall longevity of what you're looking to do. So if you're hooking up quite a bit or you just want the best out there, the B&W is definitely my pick. And the part that I really like about a gooseneck kit like this is really when you're not towing anything, you can take this ball and stow it upside down and you can latch that in place and it's gonna hold in. It's got a nice little finger grab.
For whenever you do need to use it, you'll just undo your latch, drop this in, and latch it back into place and then you're ready to tow. You also have spring loaded safety chain loops here, which are really nice because those springs keep it nice and tight. It actually sits just about flushed with the corrugations of the bed. And when you have this in a stowed position, you maintain pretty much your entire bed space. This is the only portion that might cause issues no more than a bed bolt.
So you get to maintain the full use of your bed. And then you also have high capacity when you need to tow that gooseneck trailer. And this is a very heavy duty kit. In its gooseneck configuration, you have a 2 5/16-ball and this can handle 30,000 pounds of gross trailer weight rating, which is pretty heavy duty. A truck like this shouldn't be a problem, but you wanna make sure that the components like this are just as heavy duty as the truck.
Now you also have a vertical load limit of 7,500 pounds of pushing that pressure down, which is pretty heavy duty. So gooseneck configuration, super great, it's gonna do a great job. And as far as latching this in, it's also super easy. Your spring loaded latch is just here on the driver's side wheel well. So when you need to pull that back, it can lock in place.
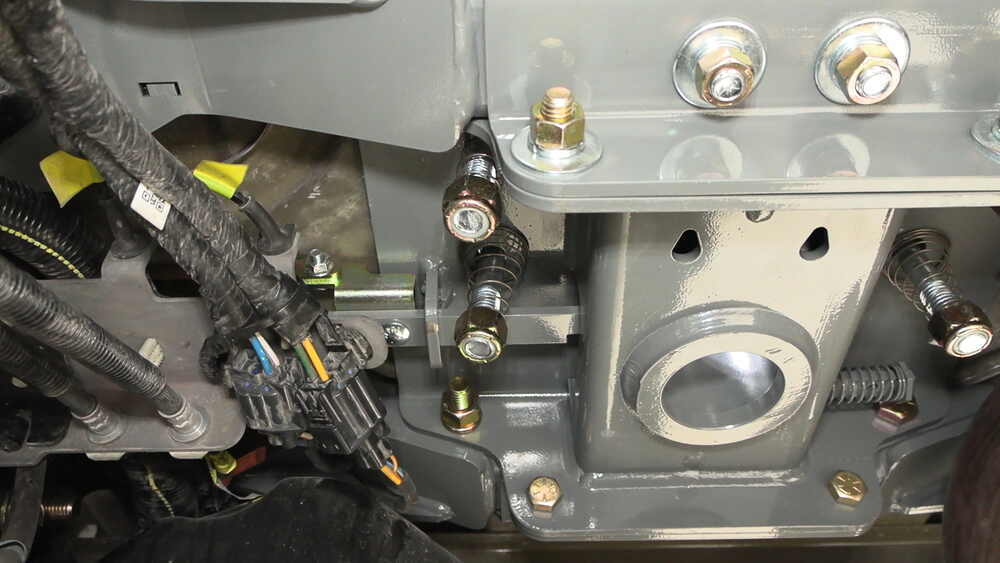
And whenever you drop the ball in, whether you're stowing it or getting ready to tow, you can then just slide this in. It's gonna pull in place and lock it in. Now the glory of this gooseneck kit means that you can drop in the B&W Companion that is specifically designed for the underbed gooseneck kit, and it drops in just like you would the turnover ball. It latches into place, but you tighten that down and then you're able to drop your fifth wheel. So not only can you have the availability for a fifth wheel, but you also have a gooseneck. And then if you take everything out, you have your bed back to normal so you can use your truck as a truck. Now as far as installation goes, this is a job that you're gonna wanna set aside, I would say, at least a full evening to do, maybe a full day, maybe have some extra set of hands. None of it's particularly hard and none of it really requires any special modification. The only drilling and cutting that you're doing is a 4-inch hole saw to get, obviously, the receiver to go through. You do have to drill for your safety chain loops as well. But everything else is bolt in place, and it's not terribly hard to do. It's just heavy and you're underneath the truck in a few small tight spaces. But I'll walk you through all the steps to make sure you get yours installed. So let's take a look at that. Now to begin our installation, we're gonna go ahead and get our spare tire lowered down and out of the way. That's just really gonna open it up as far as real estate when getting all of our parts put in place. Now we do need to determine where we're gonna be drilling out with a pilot hole 'cause eventually we need to put a 4-inch hole saw and get that cut out for the opening of our gooseneck. And there's a few different ways you can do this. Now if you have a spray-in bedliner, it can get a little bit tricky. What you're looking for is a dimple in the corrugation. It should be in the center, pretty much where that gooseneck is going to drop in. But again, that spray-in bedliner does kind of fill that void, so it's hard to find. You can go underneath the truck and find the dimple, or there's also a measurement that you can use in the instructions. Now on the underside, you're gonna see. You might not be able to see the dimple. I can feel it right in the center here. So again, I'm gonna be drilling through this, just making sure it's nice and centered up as I do that. (drill bit whirring) So now, using that hole as a pilot hole, we're gonna be using a 4-inch hole saw to get this cut out. So take your time here. Sometimes it's gonna wanna walk around especially on this surface with that spray-in bedliner. So just center it up nice and start making your hole. (saw whirring) (metal thuds) So now we're gonna come back with a file and just get all of these burrs that we may have, just kind of sand that down nice and easy. Go ahead, vacuum up any of the shavings that you may have. (vacuum whooshing) And we do have raw aluminum here and we're gonna want to coat that, just kind of protect it from corrosion long term. The aluminum holds up pretty well, but also this is a good chance to kind of give it a cleaner look here. So I'm using a paint marker. You can also use spray paint and just kind of spray around that edge. Now we're gonna go ahead and remove our exhaust bracket on the passenger side frame rail. And we're really just gonna be dropping it down. So we have the new brackets as well as some small carriage bolts and flange nuts. This is just gonna drop down on one spot, but that's gonna give us that clearance for when we put the rest of the gooseneck in place. So to get the factory ones removed, it's gonna be just a 10-millimeter. You're gonna have four of 'em, so two on each side. Keep those handy 'cause we're gonna be bolting up our new bracket here shortly. So now take one of your brackets and we'll do one side. It's gonna be the same on the other. And this is just moving down one slot. So where we had our factory spot, this is just gonna go down here and our carriage bolt is gonna be what bolts that all together. So what I'll do here is I'm gonna try to get my bracket kind of in place first. If you need to, you can move this isolator back or forward, just kind of move it along here. And we're gonna take that factory bolt and that's gonna go in that top section there. Now make sure you don't have the exhaust bracket in there. And you might need a pry bar here. It might help to also get both sides set up first. But as we kind of move this down, that top hole is now gonna become the bottom hole. And it is gonna take a little bit of pressure here on the exhaust. I can pull this down. Now before you tighten it all down, at least with the factory bolts, you do still have some wiggle here. So let's go ahead, we'll get our carriage bolts passed in from the frame side towards the outside, and then we'll just get our flange nut kind of put in place here. But at least those will be all lined up, so when we tighten it down, it should cinch in a little bit better. And then once you get those tightened down, our flange nut is going to be a slightly different size, it's a 7/16, so just make sure your carriage bolt is properly in that square slot before tightening down. Now while under your truck, you're also gonna wanna check to see if you have factory side plates already installed, and that's gonna slightly change the installation, not by much. The main thing is you can omit the inner side brackets. So what you're looking for, we have 'em here on our truck. So we already have these plates that are welded onto the frame that create a flat surface right underneath our bed. So now we need to look at our driver's side and we have this wire bundle that's on a bracket and obviously our underbed gooseneck kit is gonna stick right in this area. So we're gonna wanna move those. We're just gonna kind of move it under the bracket for now. I think once we everything's installed, then we can tidy it up. So we have this large plug here and it's just like a Christmas tree plastic style connector. So just kind of pry that up. We also have these lines here. It seems as if those are gonna stay right about here, but we have this plug that's also kind of tucked in. So get this one removed. And if you need to, what we're gonna want to do is get these tucked underneath. These plugs they didn't say for sure, but if we need to we can move those. But these brackets, it's pretty well flushed with this. So the main thing is we have the clearance. Something else you're gonna wanna look for is this large wiring bundle. If it happens to be tucked up, you're gonna want this underneath that side plate. So just make sure that it's kind of underneath here, not causing any issue. In fact, I might just kind of release this clip as well, and that's gonna give us a little bit more room. You know, it's easier to have this all loose, ready to go. That way when we do slide any heavy parts up, they'll be out of the way, or we can at least move them. Now I mentioned if you have those factory side plates already in place, they're gonna look like this. These are gonna be the ones that we omit. Easy way to tell is it kind of has just the two holes up top. But also the ones with the B&W sticker, these are gonna be ones that are going to go on the outside that we will be using. So if you need to set these aside, go ahead and do that. Get our outside plates installed, make sure you have the proper side. So the one that has the handle instructions, it's gonna go on the driver's side. And then we're gonna get our bolt with the large diameter of washers here. And this is just gonna pass through the factory holes that are already in the frame. So just get that front one lined up and that back one should drop in. And just kind of push those in to hold 'em in place, and we'll hop back on the inside to tidy up or tighten those down. Now with the threads exposed, we'll just take another one of those flat washers, we'll then put a split washer and then a nut. And we're gonna snug these down. We don't want it tight-tight, we want it flush against the frame rail, but we still want the ability. I'm able to move our bracket up and down and that's kind of what we're looking for. That way when we get our cross members and our main section in place, we'll have that adjustability. Now we'll go ahead and we'll do the same thing for our other side on that outside bracket. Now you're gonna grab your four crossmembers and then your threaded bushing and we're gonna be hammering these in place. So make sure that you have this tube section here facing towards you as you hammer these in. So there's a little notch here, this is like a D style cut out and we're just gonna kind of lightly press that in to where there's a little bit of tension. And then taking a hammer, you want this flush. So just kind of give it some nice (bangs) decent (bangs) hits here as to where you get that collar to sit flush with the metal. (hammer banging) And just go ahead and repeat that same process for the other three crossmembers. We're gonna get our crossmembers in place. You are gonna want to grab these flange nuts that have the thread locker on them and we're gonna be threading those in loosely to those bushings that we just pressed in. So slide this up over our inside rail. And what we're looking for is to align this with that slotted hole. Now the instructions make it seem like you're using the furthest outside holes, but physically that is not possible here. So the larger slotted hole there is gonna allow us to kind of get this threaded in. So just a few threads here to hold it in place. This is where we're having that wiring kind of moved outta the way really comes into play. But what you're gonna be looking for is. You can see this starts to taper in, so do that on both sides, front and back. And then we have our gussets here. The gussets should be on the outside towards the tailgate and then the front ones will be facing towards the cab. So just make sure those gussets are on the outside and you get these loosely threaded in. So I'll go ahead and get our front one, which is gonna be a little bit tricky just because the hole's back here, but we'll get those loosely in place. So with these loose enough, they're holding in place but I can move them out of the way. We're gonna take our carriage bolts and just pass these through all four of our crossmembers. We're gonna take our center section, that's gonna kind of tie this all together, and these bottom holes here on this bend are gonna go where our carriage bolts are. And these plates are gonna sit on the same side as these gussets. So make sure the longer side is on the same side as the gussets and this shorter portion should be facing towards the middle where our gooseneck is gonna go. So we'll just kind of align these up here. You might have to move those brackets around a smidge. And you'll see that that kind of just locks into these brackets, which is a really nice fit here. It's pretty typical of B&W to have some good quality here. So that kind of holds that in place. So while holding it, we're gonna go ahead and get some hardware in place. So we have a flat washer, split washer, and then we'll get our nuts started. And we're just gonna kind of keep that loose for now. We'll go ahead and do the same for this one and then also the front. So as far as tightening this goes, I'm just gonna hand tighten it. Just make sure that these are in place here on both sides. It's gonna start to kinda level these out. And then now's a good chance to. You can kind of pull down and make sure that carriage bolt's seated properly. And we just want these kind of aligned here 'cause we'll be passing hardware through this section. So at this point, we're gonna be temporarily putting our large bolts in place. Now these eventually will bolt up in our center section, but this is gonna really get everything nice and tidy. So looking at this one, you can see our gap is not particularly great here. We want it as flush as possible. So the way we're gonna do that is pass our bolt through. And you can put a nut on here just to kind of snug that up if you'd like. But having these in place means that it's gonna line everything up for us to be able to to tighten down our carriage bolt hardware. So that's really what we're looking to do here. So we'll go ahead, we'll get those bolts passed through on all four. So with our bolts holding that in place, we're gonna come back and tighten these down. And what we're looking to do is get our split washers flatten out and that's gonna be tight enough for us. So it's gonna be a 3/4-inch socket to accomplish that. So I'm just gonna zing these in, then I'm gonna come back with my ratchet and really hand tighten these down, make sure that this is flattened up. (socket ratcheting) We'll go ahead and do that on the front one as well. And then once we get these tightened down, we can go ahead and take our large hardware out. Now we're gonna prep our center section. So we're gonna have our latch pull mechanism, we're gonna bolt this in place. So slide this back and then go towards the shorter end, that should lock it in place. And our bracket, you can see there's this notch, that should be facing up and towards that center section. So we'll just pass our carriage bolts through here. And then we'll take our flange nuts and just kind of tighten these down. Now these do have a torque setting associated with them, so we're gonna need a torque wrench to get that accomplished. So I'm just gonna kind of hold this as centered up as possible. And then with our torque wrench, we'll get this set up to the instruction manual settings. If you need a torque wrench, you can get one of those here at etrailer. You can generally go to an auto parts store and rent one for free. And this is gonna be a half-inch socket to accomplish that. There we go. Now we're gonna raise our center section in place and you're gonna want your latch that you just installed on the driver side, so make sure you have in that orientation. And we're gonna slide it up in place and have those 5/8 bolts that we had previous that we removed ready to go 'cause we're gonna push that through and it's gonna line through the holes in the front. And then once we get those kind of in place, we'll be able to come back here and get these ones in place as well. So you might want an extra set of hands here to lift that up as you pass the hardware just to make it a little bit easier. So when raising this in place, we're really just gonna focus on the driver's side front here and we're gonna pass it to where those threads will face towards the center section. And once you get that passed in, it should kinda hold that up in place. We'll just finish that up with a split washer and a nut. And we're just gonna loosely tighten that just to kind of make sure it stays secure. So on the passenger side, you're gonna realize that the locking mechanism is gonna be in the way. So we'll push this up and get that kind of slid into place. And we're gonna be passing the bolt in through this way. Now you can't use the flat washer just because the diameter isn't gonna work here. So get this passed through. And then on the backside, once you get that pass through, you can take your flat washer, your split washer, and then your nut and get that hand tight in place. Now in the instruction manual, they say to put this brace up now. I think that's mostly just for clearance issues for getting the center section in, but we we're able to do that, no problem. So you can go ahead and do that if you need to. But from here, we're just gonna go ahead and get these bolts in place. We're gonna go from the middle, going back towards this corrugation here. So again, just kind of feed this through. Now we aren't gonna be putting the flat washers on the head, we'll be putting that on the backside here. So you may have to kind of, again, wiggle it around to kinda get this to align. And then if you need to, you can back this out just a hair, but we'll put our flat washer and our split washer and then our nut, again, just kinda leaving this hand tight for now. And then we'll go ahead and do the same on this side. Now we're gonna take our smaller cap screws and these are gonna bolt through the bottom holes on the front and back. So same thing, pass that through. You're gonna go ahead and put a flat washer, a split washer, and then, again, loosely follow that up with the nut. And we're gonna do the same thing on the remaining three. So just make sure that these are facing towards the cab on that front section there. So now we need to get our side plates kind of in place as well with our hardware. So take your flat washer and one of your bolts, pass that through. We're then gonna finish it up with another flat washer, a split washer, and a nut. And we're gonna have three of these that are gonna go in this orientation with that bolt facing down. We do have one here just because of the corrugation that we're not gonna be able to pass that bolt up in the same direction, so what we're gonna do is just do it in the opposite, but the other ones are gonna be like this. So go ahead and do that on both sides of the truck. Now at this point, we're gonna get our center. Now at this point, we're gonna get our center section exactly where we want it. There is a little bit of play in here. I am able to move this around, so try to get it as centered up to where we cut. And as far as a lifting device to kind of pull this up, what I've found that works really well is if you have two jack stands and a pipe, or you could use a pry bar or the handle of a jack, it doesn't really matter, and a ratchet strap. Just make sure you have your pin engaged and you can hook onto that. And then as you put pressure on it with the ratchet strap, that should draw it up, putting that tension exactly where we need it to. And that's gonna hold in place while we get it tightened up. Now if you do need to shift it, once you have that tension on there, you can kind of bump your stands a little bit and you can get it to move a little bit. Ours is looking actually pretty well spot on. So once we have that tension on, we can go down and start tightening down our hardware. So there is gonna be a sequence as to what we tighten. And the first ones we're gonna do are the long bolts that we pass through our center section into those crossmembers. And to accomplish this, you're gonna need a 15/16 wrench to be able to kind of get on the corrugation side and then also a socket. So go ahead and snug these down. And what we're looking for is that split washer to flatten out. So tighten it down until we have those all flattened down. (wrench ratcheting) Now we're gonna need to do a quick visual reference before we continue tightening things down and you may need to loosen up your lifting device to move it if you need to. But what we're looking for, there's a notch on the outside here and you can see that should line up just directly with this bed corrugation. It's just kind of a ridge here. It should go right into that. You can also feel in the section where our safety chain loops are. You should have a bump at least on those forward ones. Just make sure that it's all squared up, and that's really the best way to check. Checking both sides, making sure everything's nice and even. So now at this point, we're gonna go ahead and tighten down those bolts that are vertical. So go ahead, snug those down. You should start tightening everything up together. (wrench whirring) Now throughout all of the steps that you're tightening it down, you do want to go back and just reference those indicators to make sure that we're squared up, because if that shifts, you're gonna have to go back and loosen things up to get it back in place. And unfortunately, if you continue on, you're gonna have to go back all the way till you get to those. So just double check, make sure that everything's good. And with our four bolts in place that have that thread sealer, now we can move to the outside plates where we have the eight total bolts, we can start tightening those down. Now to get these tightened down, I think your best bet if you have a really long extension, you can kind of go from the other side of the leaf springs. You will need a wrench on that other side. But these are gonna be a 3/4-inch socket and wrench combo. So go ahead, get these snug down. (wrench whirring) So now with a 15/16-socket and wrench, we're gonna go ahead and get the bolts that are horizontal through our two plates on the side. So there's two on each. Go ahead and get those tightened down. Now this is tricky with the exhaust. So I normally try to tighten on the nut side. Unfortunately, it's gonna be a lot easier to get it from the head of the bolt. So we'll go ahead and get these tightened down. (wrench whirring) Now we'll get the four that are attaching our center support bracket to the center section, and this one's gonna be 3/4-inch. (wrench whirring) Now at this point, we have everything snugged down. Again, double check to make sure your fitment is good underneath. You might wanna also check up top. And at this point, we're gonna be torquing down all of that hardware, and there is a sequence in the instruction manual that'll lay out exactly where it's at. There's gonna be two different torque settings. So depending on the hardware, your larger hardware, your smaller ones, so you got 5/8 and half-inch, those are gonna interchange with those torque settings. So just keep an eye on that as you're torquing these down. Some of these are gonna get really tricky. Do the best you can. A crow's foot attachment sometimes will work in here, but really it comes down to just making sure that you get it snug down as possible and torque the ones that you can get to. Now at this point, we can go ahead and get our lifting device taken out. And we have a few more attachments as far as our latch, as well as our safety chain loops that we need to accomplish. So we'll hop back under and get those knocked out. Grab your latch handle and we're gonna slide this through the side on the driver's side. So eventually, the handle will be facing down. But to get this in, we're just gonna slide this through the middle here, and then that should kind of drop in place and then we'll head back to where our latch is and we can get that attached. So just gonna slide this in place and then we're gonna take our carriage bolts that we have here and we're gonna pass. We have two of 'em, just make sure they're aligned with each other here. There's one. And while I have that in place, go ahead and take our flange nut and just kind of get that started so it holds it. And we can get our other one in place. To get these tightened down, it's gonna be a half-inch socket, and there is gonna be a torque setting with these as well. So once we tighten these down, go back and torque 'em. (wrench whirring) Now it's gonna be important that this actuate, it's nice and smooth. As we saw earlier as we moved all those wires, there's quite a big bundle there. So pull the handle from the side, make sure that everything goes in place nice and smooth without making contact with anything. And the plugs that we removed previous, we can just go ahead, and that plastic Christmas tree, you can kind of snap back in on the underside here and that's gonna kind of hold that in place. And if we need to, we can zip tie anything up, including this large bundle. We just wanna make sure we have clearance and it's not rubbing against it. So there's a hole here on the frame, if you need to, you can go ahead and zip tie that down. Now for our safety chains, we have those holes that we use for the alignment. We're just gonna drill a pilot hole. Now these back ones, it's kind of a weird stepped part, but basically what we're gonna do is get the hole through the top, and that way we can really drill this out to the perfect size to get those through. So just try to make it as perpendicular and centered up as possible. (drill bit whirring) And you will be going through some corrugation potentially, so just make sure it goes all the way through. (drill bit whirring) And then just repeat for the remaining three. With those pilot holes in place, we can enlarge it from up top. I'm using a step bit, you can use an 11/16 drill bit. But the step bit's really nice 'cause you can kind of work it a little bit bigger, or you know, kind of step it as necessary, and then test to see that these drop in nice and easy. Just remember, it's gonna be spring loaded, so you're gonna wanna make sure it's not catching. You also don't want to get too terribly big. So I'll go ahead, start drilling these out. (step bit whirring) So the step bit does a good job of getting through the first layer, but there is a corrugation here, so you're gonna want a drill bit that's going to be able to pass through all of that. And then again, just drill out as necessary. If you need to enlarge it, you don't have a larger drill bit, you can use a burr bit, something along those lines, to just make sure that it's large enough to get these to pass through. So I'll go ahead, I'll get these drilled out. And just as we did before, just vacuum all this up and get some paint on that exposed edge. (drill bit whirring) Now once you get these to drop in, this is kind of what you're looking for, nice and easy to be able to lift these up. It's not catching on there. So now we can head underneath and get our springs attached. So take your spring, just slide this up. And I'd suggest really pushing this up a decent amount and kind of holding that in place. 'Cause as you put the nut, sometimes those wires will want to get in the thread and kind of mess things up. So I'm gonna get these all started at least. And when it comes to tightening these, there's really no torque specification. Mainly what we go for is that the bottom of the bolt, of our U-bolt, is gonna be flushed with the bottom of the nut. So at this point, you can go ahead and get your spare tire put back up. You can drop your ball in, latch it in place, and hit the road. And that was a look at installation of the B&W underbed gooseneck kit for the Companion fifth wheel on a 2023 Ford F-350 Super Duty.
Info for this part was:
At etrailer we provide the best information available about the products we sell. We take the quality of our information seriously so that you can get the right part the first time.
















Thank you! Your comment has been submitted successfully. You should be able to view your question/comment here within a few days.
Error submitting comment. Please try again momentarily.