
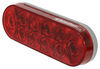
Gel Cell Breakaway Kit for Dexter BrakeRite Systems - 2 Batteries
(7 reviews)
Price: $111.57
Gel Cell Breakaway Kit for Dexter BrakeRite Systems - 2 Batteries
Item # T4822100
Retail:$149.99
Our Price: $111.57
You Save: $38.42


Need help with installation?
Locate installers near me- All Info
- Reviews (7)
- Q & A (0)
- Videos (1)
- Photos
Dexter Trailer Breakaway Kit - T4822100
- Kit Only
- Dexter
- Tandem-axle
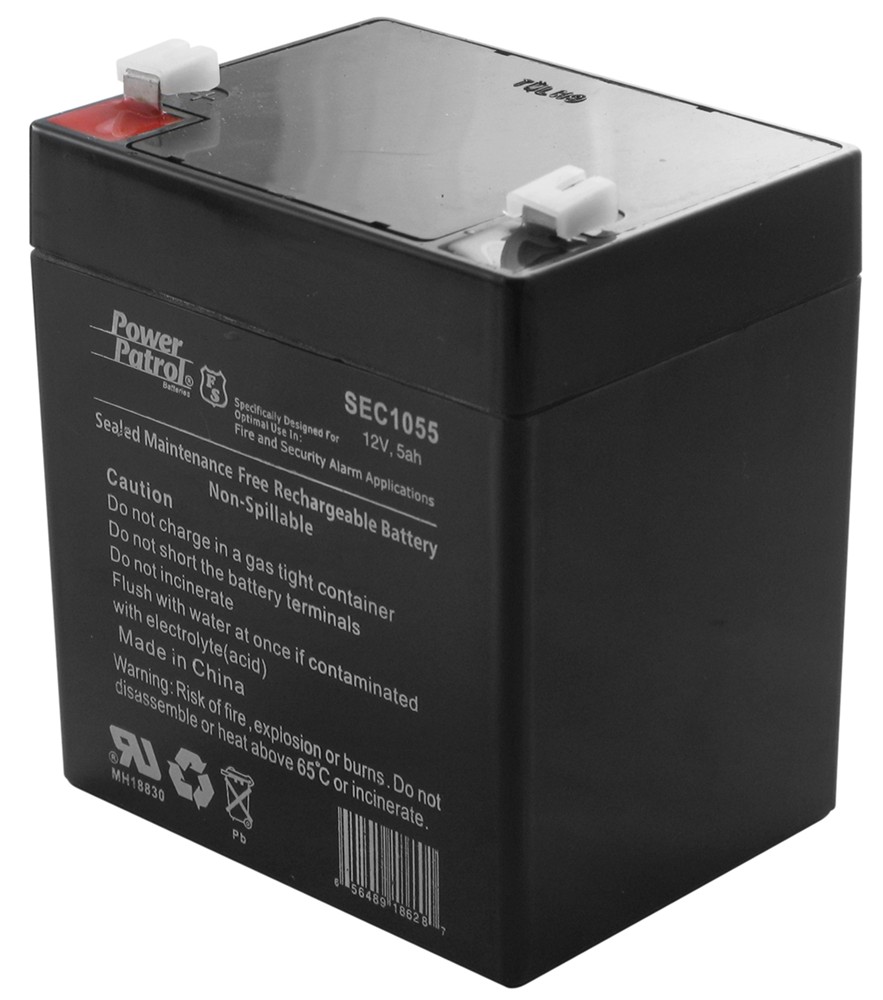
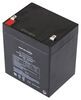
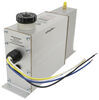
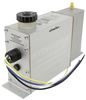
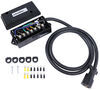
Designed for use with Dexter's BrakeRite EHB or BrakeRite II systems, this gel cell kit includes (2) 5-amp-hour batteries to be connected in parallel with the included breakaway switch for a simple, effective breakaway system.
Features:
- Gel cell kit provides simple, effective breakaway system for your trailer
- Designed to provide adequate power to meet or exceed the 10 amp/hr requirement of the BrakeRite EHB and BrakeRite II SD
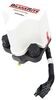
- Breakaway switch ensures that trailer brakes are applied if trailer becomes disconnected from tow vehicle
- 2 5-Amp-hour batteries connect in parallel to provide the 15 minute breakaway required by Department of Transportation
034-361-00 Dexter Axle BrakeRite Gel Cell Breakaway Kit with 2 Batteries
Replaces Titan 4822100


Video of Gel Cell Breakaway Kit for Dexter BrakeRite Systems - 2 Batteries


Videos are provided as a guide only. Refer to manufacturer installation instructions and specs for complete information.

Video Transcript for Titan BrakeRite II SD Electric-Hydraulic Actuator Installation - 2015 Flagstaff Classic
Today we're going to be showing you how to install the Titan Disc Brake Kit and BrakeRite II SD Electric-Over-Hydraulic Actuator. This is going to work for tandem axles with 3,500 lb capacity. Part number is T4843700. This Titan kit's going to allow you to easily change over to disc brakes from your standard drum brakes. This is going to give us a very noticeable increase in our braking performance. You can see both the hub and rotor here have a dichromate plated finish for superior corrosion resistance. The advantage to disc brakes is that we're going to have a faster response time to begin slowing down our trailer, and it's going to be a much more smooth and even braking process. To begin our installation, we're going to get our breakaway switch mounted up here to our pin.
You can see it's just going to use a metal tab there. There's a hole in it, and the self-tapping screw we're going to put it right up into the bottom here. You can see that pin will put out there, just in case we have an accidental disconnection, and operate our brakes for us. Now, this plug is going to have to eventually wind up being plugged into our control module. We're going to be mounting that well back in the trailer, so we're going to extend this.
I'm going to show you how to do that in a few minutes. Let's get the plug that was provided mounted up underneath our trailer pin also. Now, to mount the plugin wiring harness up here in the front, we're going to be using part number 18138, and what we've done typically, right there on that line this is bent over at 90 degrees. We've just straightened that out. That'll allow us to connect it to that good sturdy steel that we've got up here just like that. Again, we're going to use self-tapping screws for this job.
Mark where we want them to go and then get them in place. Now we can bring our new 7 volt provided with our kit and get it in position here, and we'll use the provided hardware to attach it to our bracket. Now we can use a flat blade or Phillips screwdriver and just get those secured down. Like that. You can see that's going to allow us to still have a plug here, and what we're going to do is just store the original fifth wheel wiring plug up above the pin box here. There's usually an opening.
You should be able to get it all up in there, then we can just zip tie off whatever we have extra. This is going to be plugged right in just like that. Now, this is going to give us our new plug that will plug into our truck like we normally would. They're the same length as what the one that was on here was, but it's spliced in here for the plug that we'll need for our ground, our 12 volt power, and also our brake signal coming from our vehicle. This is also going to run to the control module, so we're going to run both our breakaway plug and our power, ground, and brake signal plug back to that control module, but we're going to have to extend them. You can see they're not all that long, so we'll be splicing in extra wire to get where we need to go. Now we're going to use a loom clamp here. Another self-tapping screw. We're going to get that secured off to the underside of our trailer there. Now, for our breakaway switch we're going to bring this back. Now, if you do have a rotating pin box, like in this case it's designed to rotate instead of having to have a slider, you want to accommodate and make sure you have enough slack there for that. I'm just going to zip tie it right off to the bottom of the bracket there. Now inside of the wire loom here we have our two breakaway wires. Let's get those pulled out of there. Give ourselves enough pigtail here but we also want it to be long enough so where we can join it together with the three wires in there, so we can trim it off about right there. We'll be taking that inside with us. Now we're going to strip back each of the wires from the breakaway kit here. We're going to add on part number DW05744 onto the end of each one of those. It's going to be a heat shrink butt connector. Standard butt connector will work but these are going to give you superior moisture resistance. We'll use one more of those on the blue wire once we get it stripped back. Now for our white wire and our black wire, we need to go up a size with the butt connector, so instead of it ending in 44, it's going to end in 45. Now, we've made a wiring harness here. This is going to get all of our connections back to the back where we need them. Every application is going to be a little bit different. You'll just have to make sure that you make the connections the same way that we make them. We're using the white wire out of our extra harness that we've built here to connect to the white wire. It's going to create our ground back in the back. Our blue wire's going to be the blue wire. The only real change is going to be that our black wire, our power wire, we're using a yellow wire for that because that's what we had. Then the two black wires that come from our breakaway switch, we're just switching those over to green. Good news there is there's not a polarity issue so you don't have to be sure that you have the negative here, positive there. Now we'll use our heat gun and get these all shrank down. You could also use a lighter or a mini torch if you don't have a heat gun handy. Just want to be careful not to burn the connector. You just want to melt it. All right, now I'm going to use some electrical tape and get those connections taped up really well. This is going to be on the outside, of course, on the camper here, so we're going to try to make it as clean looking as possible. All right, now this is going to run pretty much straight back, and we're going to be going through the front of the camper right here, so it's time to get our hole drilled out for that. Now, I've drilled a small pilot hole out from the inside just so we can ensure that it goes where we want it to. I'm going to use a 3/4" hole saw to drill this hole out, and we've got a grommet that's going to fit in there. The grommet that we're using, in case you do need some, this is part number A11GB. We'll place that right in there like that. Now we're going to pass our wiring in and through there, and we'll pull the majority of it through, but we're also going to be using wire loom. It's going to be our 1/2" diameter wire loom. That'll give us a cleaner look up front here. I'm just going to slide that wire loom up and around. You can see that'll be cleaner looking than just the wires. I'm going to use enough of this to go through my grommet, inside, and down to our other hole location. Just tape the end of that wire loom off there. Once we've got enough on there, we're going to tape that up. You want to compress it to get it started through the grommet. The hole in the grommet is large enough to accept it. You want it to be a nice, tight fit, and it can give you a little bit of trouble. Now we're going to use a couple of loom clamps here, and that'll just help keep it up and out of the way. We're going to use a few more loom clamps inside here. We're just going to run down with that major brace, come across, and down to the hole that we're going to use to get on back in the RV. We're going to come on down, and in our case we've got a small pilot hole that we've drilled here. We drilled that from the underside of the camper out. We want to go above that plastic liner that you typically see underneath your fifth wheels and things like that, just to keep our wires up and from sagging down underneath. We've drilled that hole in an area to where we know that's where it's going to go. Now again with the 3/4" hole saw, we get it drilled out. Now we'll just pass our wiring through there, and you see I've got my grommet right up here. We'll place that in. At the end we'll be able to push that in. Now we're ready to get our actuator mounted up. You've got a couple options with this. You can see the option we chose is using three 5/16" by 18 thread pitch bolts. These need to be 3/4" or shorter. We've only got 5/8" to work. We've just used a 90 degree plate. Drilled our holes in there with our template. This could just as easy be the frame of your trailer or wherever you decide to mount your actuator. Flat washer and lock washer behind it just to keep it nice and solid. As a second option, you can see what we've done here. Two 1/4" by 20 bolts. You have two here and then there are two further back here that you could use to mount it if you want to mount it down, if you want to use the bottom to mount it. The reason we've put these bolts in here is because of the way our plate sits. We've got a little bit of a gap, so we want to give it support. We're going to be mounting this right in this cubby here the customer requested. That's where he wants it, so that's where it goes. See that little bit of a tip that it's got to it We don't want that going down the road. We don't want it pulling against our fasteners, so we got a plate here. I'm just going to use some urethane or some silicone and apply that right to the floor under where those bolts would be. That'll give us good spacing and we won't have to worry about any gaps. Then I'm just going to use a couple of self-tapping screws and secure that right to the floor. That's nice and solid. We won't have to worry about it going anywhere. While we're in here, we're also going to mount our two battery boxes. We're going to be setting these right down on the floor. Of course you want to make sure there's nothing underneath it there that you might cause damage to. We're going to mount them side by side like that. You want to be sure that your pigtail, and you can see they've got it so we can plug them in and they'll run parallel, is long enough for wherever you're going to be mounting your control module. In our case, that's going to be going right up against the wall here. All right. Good to go there. Now let's get that control module in place. Our control module is going to be mounted right there. All right, now that we've got our components mounted inside of the fifth wheel where we want them, we need to get our wires there. What I'm just going to use is just a long stick here. That's going to help us to push our wiring over that underbody panel so we don't have to completely remove it. Just get it down there far enough to where we can get a hold of it from underneath, then we'll be running it up into the camper. Now we're going to be using a pull wire. This is an air line tubing. You could also use a coat hanger, a stiff piece of wire, and wherever your access point is or wherever you're bringing your wires up through, we're going to push this down through. We'll tape our wires off to it, and then be able to bring them up to us. All right, now let's go down there and make that connection. Now we're just going to tape our wire bundle up to the end of the pull wire, and pull it up into position so we can make our connections. As we pull it'll have the tendency to drag across this metal edge, so if yours is anything like this, just put your wiring up inside of there so you won't have to worry about cutting it or anything like that. Each application of course is going to be a little bit different since every one of these campers is different. All right, we got our wiring up in here. We're going to leave a little bit extra of course. We don't need to cut it off too short so we can't make any changes down the road. Now we're going to bring the plugs that we cut off earlier in the installation in. We're going to get these attached to our wires that we ran into the inside here. The black wire, remember we're using the yellow wire for that, but the other colors are going to match up. Blue to blue and white to white on our three prong plug. Now we're ready to get our heat shrinks shrank down on our three prong plug and we'll move on to the two prong plug for the breakaway in just a moment. Let's get the plug on our breakaway taken care of. All right, now let's get this wiring cleaned up. I'm just going to use some electrical tape and also some wire loom. Now we'll make a few of the connections in here. The only one we're really not going to attach is going to be the one coming from the batteries, but the one that comes from the actuator is going to go into the second spot on our control module. Plug that in until you hear that click. Now, the wire that comes from our breakaway switch, it's going to go in the second from what would be the right, so if we're looking to the right, you have a three prong plug. Come to the two prong plug. That gets plugged in there. The one that comes from the trailer plug up front, that's going to go to the very right. Now, since we are using a Ford truck, we need to use the adapter, the Ford and Chevy adapter. Now that we also want to get mounted. I'm just going to use a self-tapping screw for it. Let's get our batteries put in position. We're going to get the wiring hooked up just so we can make everything nice and tidy, however we're not going to be plugging this in until the very end. Once we have everything else done, we'll plug it in and test it out. That's going to go down in our battery box. The red end should go to the positive side of the battery. It's going to have the black wire, and then the white wire's going to go to the negative or the ground side. There's a little gap there. Wires come out. It'll be nice and neat. Then that'll be easy to plug in once we're ready, right there in that first position. I'm just going to use a couple zip ties here, get everything cleaned up. We've got all of our electrical stuff taken care of. Now we're going to move on to getting the old drum style electric brakes removed and getting our new disc style installed. We need to remove the tire. You can just pull that off and set it aside. Now it's time to remove this cap that's on the end. Typically, you can see if you just tap that with a hammer as you rotate it, it'll start to come off. Just like that. We'll want to clean up that grease so we can see our retainer and our nut. In this application, there's a little retainer that has slid over the nut so it helps to keep it from backing off. Sometimes you might have a cotter pin. I'm just going to work that around the edge and it should come off for us. If you get some more of this grease out of the way you'll see the nut that's in here behind that. Let's get that removed. Typically for that we're just going to use a pair of channel locks. One thing to keep in mind, the retainer and the nut we want to hang on to. We're going to be reusing those. That's what we'll use to hold our new disc brake caliper in place. Set that aside. Then one more piece we want to hang on to. Behind that nut is going to be a washer or a thrust bearing there. Just like that. You'll see it's got a flat spot on it that matches with the flat spot on our spindle. Now we'll pull the drum assembly straight off. Right in here there's a bearing. Now, typically when you pull it off it'll just stay in there. Sometimes it'll pop out, so don't get it on your clothes. These we're not going to need anymore. You can set those aside, send them to the scrapper. Coming out of the back of the brake assemblies we're going to have wires. That was what we had previously for the electric braking system. We just want to trim these off. We're not going to be reusing them. Then we'll remove the four nuts that are on the backside that hold this brake assembly to the axle. Once the four of those are removed pull straight out on it. You'll see that's going to be the end of our axle, and our spindle. We want to take a good look over the spindle, and just ensure that there's no marring or any kind of damage on it there. As you can see, that one appears to be in great shape. Now we just need to repeat that exact same process for the other three locations. Inside of the camper here, right on the bottom of the actuator you can see we've got a fitting that comes out. The threaded portion closer to the actuator is the standard 1/8" by 27 NPTF fitting. There's a small #3 adapter that's on there. That's going to allow us to thread in another one of the 1/8" by 27 male fittings. There's a little plug in it. We're going to use our wrench here. This is a 3/8". I'm going to take the plug out, then we can simply use our flexible hose and we're going to go right into the front of that. The reason we're using a flexible hose is just because of the way we need to get out of the floor here. You can use the brake line kit however you see fit to make your necessary connections. I'm going to get that threaded in, and then just tighten it to secure it. The next thing we're going to do, you can see here's the end of our hose. It's just been routed down here to where we need our brake line. We're going to get one of our Ts mounted, and there's a little tab that sticks off of it so if that's not going to be positioned on an angle to help keep it straight, you'll need to drill a small 1/8" hole and place that up and in. That's going to keep this from rotating. We're going to get ours installed right here. I'm just going to use a #12 self-tapping screw. I'm going to mark our hole location. Then we'll bring our flexible brake line on and get that threaded in. With these flared style fittings, you just want to be sure you have them snug down so you don't have any leaks, and of course when we get done we'll check all of our fittings for leaks to make sure we don't have any issues. You can see we've got our little straight piece there. It's got a male fitting on each side. We're going to thread that right into this side of the T. The other one's going to be threaded in right there, positioned like that. Then again we'll secure that with one of our self-tapping screws. All right, now off the side of our T here, you can see we've got our brake line kind of preformed. It's a really good idea while you're working with these to use a tubing bender. What this allows us to do is make bends in our lines, you can see, without kinking it. That can restrict the flow of fluid, either drastically reduce the braking power that's sent to the caliper or even stop it completely. The one coming off the front here, that's going to go right over to our front driver side caliper. This one's going to provide the fluid back to the rear. In our kit, we're going to have these white clips. We're going to use these to secure off our brake lines, and again, we're going to use self-tapping screws here, just like that. Keep everything nice and secure. We don't want them to vibrate and move around too much. When routing your lines, we just need to ensure that these, these are going to be the flexible lines that'll go out to each caliper, we just want to ensure that we've gotten enough room to get those attached. There's going to be a little bit of travel, because we want it to be able to move up and down freely, so that looks like the fine attachment point right there. I'm going to mark it off. You'll see that hard line. It's going to be a little bit too far there, so what we can do is just put a little bit of a bend in it back here to make up for that. That should be about perfect. You can see we just put just a little bit of a bend in there to take that distance out, and that should be able to connect nice and easily. I'm just going to secure that here with one of our keepers. This one, we want this to wind up in about the same position as we had on the other side, so again, we have to put a little bit of a bend in it. Now let's bring a longer length of tubing. We're going to bring this back and over this direction so we can secure it off as it runs rearward. We're going to be mounting our T right underneath here, just where we did before, but you'll see we got a little bit too much length, so what we're going to do is just get rid of that length by putting in just a couple of bends here. In most of your standard applications, when mounting your caliper brackets which are here, they're just going to bolt right up to the existing brake brackets. Remember when we took off those hubs, those bolts will just slide through. You'll need a brake hardware kit sold on our website, and basically it just bolts to that flange. This is a very weird axle. It's got this and that that kind of change all of that up, so what we've done is we've had ours welded on, but in typical applications, the four holes here are going to line up with the four holes in that brake flange. That's going to give us the two holes that we're going to require to mount our caliper to. Before you mount that caliper, you need to get your disc on, so we'll start by packing those bearings and getting the seal put in. For packing our bearings we're just going to use a high temp grease designed for wheel bearings, and I like to just put it on my hand, and you basically want to squeeze it in between the inner and outer portion of the bearing there. Once we have it worked in there far enough, we'll actually see it. See that starting to come out of the top there You just want to do that all the way around. You could also use a bearing packer. These are easy lube spindles. Some people will just put the bearings on there and then lube them up afterwards. I just think this is going to give you a lot more confidence. You'll be 100% sure that you're bearings are completely packed and you won't have to worry about any premature wear on them once you start your travels. You can see that starting to come all the way around, and just keep working around the outside. We're going to do this for the inner, which is the larger bearing, and also for the outer, which is going to be the smaller. The bearings and seals are provided, so you won't have to worry about picking those up or using your old ones. Once our bearing's fully packed with grease, we're going to drop it right in the backside of the disc there. Then we can grab our new seal. To drive our seal in place, we're going to use a seal driver that we carry here at etrailer. This is part number PTW83020. You could also use a 4x4 or a piece of wood at home if you don't want to pick up a seal driver. The big key is just to get it started squarely so we don't bend the flange on one side or the other. I'm going to get that slid on our spindle there, and it's going to be a little loose for now until we get our outer bearing in, which we need to get packed right now. Once we've got that outer packed up, it's going to slide in with the tapered side facing inward. We'll slide that washer back onto that thrust bearing that we took off earlier, and replace our nut. Now we're going to set the end play or essentially the in and out movement. Let's see here. I'm going to loosen that up. You see that kind of movement in and out We want to get rid of all of that, but we don't want to tighten it up so much that we can't spin the disc, so if we we're to overtighten it just slightly, it's pretty tough to turn there. Get it down. We want to make sure everything's compressed nicely, then we just back it off a little bit until we get good free spin on there. Yeah. That's going to be really good. Not too much drag, but also zero end play, zero in and out movement. I'm just going to take the keeper that clips right on there like that, and that's really all there is for mounting our disc on. Now, for the calipers. We're going to be using the two threaded holes here and here to mount our caliper to the bracket. Now, on one side, you're going to have the block on the bottom. On one side, it's going to be on the top. We want to reverse these. Very simple design. We'll just unthread the bleeder screw, place it in the top, and then the block where our brake line's actually going to attach, that's going to go down to the bottom, but for now let's get it installed. We'll use the provided hardware, which are going to be bolts and lock washers. Just slide that into position and place in our bolt there and get it started. Once we have both of them started we can get them secure. I'm going to flip our bleeder screw and our brake line mount around so we get it going the right direction. I want to make sure that there's a copper washer on the top and bottom side of that block there. We've already done that in our other three locations, but you'll need to complete that process for your other three locations, and then we'll work on getting our flexible hoses from our hard brake line down to our caliper. All right, now while we still have these caps off, we can see in here well. Let's go ahead and get these filled up with the grease. Basically, as we put it in there, it's going to fill from the back to the front, so you just want to see it start to come out around that outer bearing that we installed. There you can see it starting to come out. Just do that for our four corners. Now we're going to tighten down the block there. We're going to get our flexible hose threaded in. We're going to leave those just loose enough to give us a little bit of movement, then we can route that right up to our hard line there. We just want to ensure as we mount these that we're going to have clearance between any sharp edges or anything. That'll be good right there. I'm going to mark our location because we're going to need to drill a hole. That's for our bracket to sit down into. Check our positioning on that again, and then I'm going to use a #12 self-tapper and secure the bracket in place. I'm going to slide that up in position, and you can see our keepers, they're going to slide up right behind that bracket. That way we won't have to worry about that moving around. Take the cap off of our hard line there and we can thread that right in. Then to hold that in place and keep it from rotating, we'll use a 5/8" wrench. All right. Now let's go around and do that for the other three locations. We'll just tighten down the fitting here where the flexible line goes into our block, and make sure we've got those washers crushed just a little bit to give us a good seal. Now we can head around to the other three locations and we'll do the same thing. All right, now we're going to get ready to bleed out the system. We need to get all the air that's in those lines out so we have good braking force. I'm going to remove the cap. We'll need to fill this up so it's at most 3/8" from the bottom of the lip. Now I'll place our cap back on there. Now, as we're bleeding the system, the level of fluid is going to go down as it enters the lines, so you want to monitor this to make sure, as we said, it stays within about 3/8" at the bottom of those threads. To bleed the system, we're going to be using the breakaway switch, so we need to plug in our breakaway batteries of course so it's going to get the power it needs to operate the system. To bleed out the system, we need to take the cap off of the bleeder screw. You want to hang on to that because we are going to be putting that back on. That's going to keep any of the dirt and grime and stuff like that out of there. We're going to use a piece of clear tubing. I'm going to have to hang on to it to keep it on there, but this will allow us to monitor the fluid coming out. As the fluid's coming out, we want it to be clear and we want to make sure that we get all of the air bubbles out of it. We just open our bleeder screw like that, and close it like that. Starting with the furthest caliper away from the operating unit, I'm going to crack our bleeder screw and I want to make sure that we got clear fluid coming out of there with no air bubbles. You can see we got no bubbles in there, so that one should be good. Do the same thing here, and if you watch, as soon as I crack that open you're going to see the air bubbles that we're talking about. See those air bubbles come out Then you've got a nice steady stream of clear brake fluid, so we'll tap that one back off. Now we'll go to the one that's just a little bit closer than what these are. Now we'll move on to our last one here. It looks like we're good. We're going to need to get our dust caps knocked on here. Now, we're using ones that we have here in the shop. The customer has a easy lube style of spindle and he wants to stay with that, so the other caps that come with the kit will go on in the same way. With those caps back on, we're ready to throw these tires back on both sides and we're ready to start enjoying this trailer again. With everything working as it should and no leaks detected, that's going to complete our installation of the Titan Disc Brake Kit and the BrakeRite II Severe Duty Electric-Over-Hydraulic Actuator for tandem axle trailers with 3,500 lb axles. Part number is T4843700.
Customer Satisfaction Score:
97% were satisfied with this product
3% of customers were not satisfied
- Arrived Damaged
Customer Reviews
Gel Cell Breakaway Kit for Dexter BrakeRite Systems - 2 Batteries - T4822100
Average Customer Rating: 4.9 out of 5 stars (7 Customer Reviews)
Designed for use with Dexter's BrakeRite EHB or BrakeRite II systems, this gel cell kit includes (2) 5-amp-hour batteries to be connected in parallel with the included breakaway switch for a simple, effective breakaway system.by: Scott M.02/02/2017
The products were ordered on Sunday night late, delivered by Wednesday. Converting drum surge brakes to disc, electric over hydraulic on a boat trailer for 26ft Sea Ray boat. I had everything including Titan brake actuator, 4 kodiac rotor and caliper conversion kits with bearings, and new lines installed by Thursday evening. Installation was straight forward, everything fit perfectly. One of the calipers was malfunctioning (not releasing). I called customer service and I had a new one within two days, it's now installed and working great!! Great product! Awesome service!!
by: Scott01/17/2015
When I ordered the stuff to change my trailer from surge brakes to EOH Etrailer did not have these in stock. I talked to Caleb and he got them shipped directly from the manufacturer free of charge. Caleb helped me a lot with my order and I am grateful. These is a nice set up the only thing I do not like is the boxes are a good bit larger than the batteries and they can move around a lot
by: Scott08/23/2015
This product is well made and replacing a set that got destroyed from the trailer being fully submerged in saltwater. The batteries hold a charge very well and provide plenty of power for a electric over hydraulic set up
by: Bill G. 07/02/2017
Great kit for battery installation for an electric actuator. Install was quick and easy, and has been trouble free.
by: Kyle 01/31/2024
by: Dwayne 08/09/2021
Good quality
by: Garry 11/22/2021
7
7
See what our Experts say about this Dexter Trailer Breakaway Kit
- Will a Battery Charger Charge Both Batteries In Breakaway Kit # T4822100 If Wired in ParallelYou are correct about how the batteries in the Gel Cell Breakaway Kit for Titan BrakeRite Systems, # T4822100, will be charged. Two batteries are required to meet the amp hour requirement and provide the 15 minute breakaway required by the Department of Transportation). The batteries must be wired in parallel according to the BrakeRite EHB, # T4822500, instructions (link provided for reference). A charger will charge both batteries, though because they are wired in parallel, it will take...
view full answer... - Is Titan BrakeRite Electric-Hydraulic Actuator Kit # T4813102 Compatible with 2014 Dodge RamI spoke with my contact at Titan and he said you will have no problem using the Titan BrakeRite I Plug and Play Electric-Hydraulic Actuator Kit # T4813102 on your boat trailer setup that weighs 9,000 pounds as long as your vehicle has an in-cab electric brake controller compatible with electric over hydraulic brakes. I recommend the Gel Cell Breakaway Kit for Titan BrakeRite Systems, # T4822100. This system will engage the trailer brakes should the trailer become detached from the tow...
view full answer... - What is the Recommended Trailer Breakaway Kit for the Titan BrakeRite System, # T4813102The recommended breakaway kit is the Gel Cell Breakaway Kit, # T4822100, that is designed for Titan BrakeRite System, # T4813102. I have included a link to the installation instructions for the BrakeRite system. Near the end there is a diagram that should help with installation of a breakaway kit.
view full answer... - Battery Amperage Capacity with Titan Gel Cell Breakaway Kit # T4822100The Titan Gel Cell Breakaway Kit # T4822100 that you referenced does indeed include two gel batteries each rated for 5 amp-hours while the owner's manual for the Titan Brake-Rite EHB actuator # T4813100 does state that 12-amp-hours of battery capacity are required for proper operation. I do understand why you ask your question since the information presented certainly appears to be contradictory. My contact at Titan confirmed that their Brake-Rite EHB actuator # T4813102 will operate...
view full answer... - Breakaway Battery Recommendation for a Titan BrakeRite EHB Electric-Hydraulic Actuator # T4813102The breakaway battery used with the Titan BrakeRite EHB Electric-Hydraulic Actuator # T4813102 that you referenced must have at least 12 amp hours. The battery will be mounted on the trailer. For a kit that includes both breakaway batteries needed you would want the part # T4822100.
view full answer... - Is a Breakaway Required with the BrakeRite EHB Electric-Hydraulic Actuator Part # T4813102If the 12 volt feed to the Titan BrakeRite I Plug and Play Electric-Hydraulic Actuator Kit part # T4813102 is broken then the unit will not be able to apply the brakes. This is why you will also need to use a breakaway system with a separate battery. For this, I recommend the Gel Cell Breakaway Kit for Titan BrakeRite Systems part # T4822100 which comes with everything you need. Most states require that the trailer use both safety chains and a breakaway system. If you need to know specifics...
view full answer... - How are 2 Breakaway Batteries Connected to a Titan BrakeRite II SystemThe Titan BrakeRite II Severe-Duty Electric-Hydraulic Actuator, # T4835700, comes with a wiring harness that connects to the breakaway batteries, # T4822100. The two batteries are not connected together but are both run through this harness to the BrakeRite.
view full answer... - Breakaway Battery Kit For Titan BrakeRite I Plug and Play Electric-Hydraulic Actuator KitThere isn't a standalone battery-only for kit for the Titan BrakeRite I Plug and Play Electric-Hydraulic Actuator Kit # T4813102. This does require the use of the batteries with the breakaway kit included, as you noted, so you will need the Gel Cell Breakaway Kit for Titan BrakeRite Systems # T4822100.
view full answer... - Can a Titan Electric Over Hydraulic Actuator be Installed without a Break Away KitTechnically, you could install the Titan BrakeRite I Plug and Play Electric-Hydraulic Actuator Kit # T4813102 without a break away kit. However, that is illegal in most states and you would be hit with a heavy fine if the break away kit is missing or not functional. To add a break away kit use # T4822100.
view full answer... - Will the BrakeRite EHB Electric-Hydraulic Actuator # T4813102 Work Well on a 3 Axle TrailerI spoke with my contact at Titan and he spoke with one of the original developers of the Titan BrakeRite I Plug and Play Electric-Hydraulic Actuator Kit, part # T4813102, and he said that you would have no problem using this # T4813102 on your trailer setup that has three 6K axles that weighs 6,000 lbs with your boat on it. I attached installation instructions for you to check out below also. You will also need a brake controller that is compatible with electric over hydraulic brakes...
view full answer... - Does the Tow Vehicle Charge the Batteries of the Titan Gel Cell Breakaway KitI spoke with my contact at Titan about the Gel Cell Breakaway Kit, # T4822100, which is designed for use with the Titan actuator. She told me that yes, the breakaway kit receives a trickle charge from the tow vehicle and does not require an exterior charger. Because the batteries are wired in parallel, it will take longer than a normal charge. You are also correct that the breakaway kit, part # T4822100, and Titan BrakeRite II Severe-Duty Electric-Hydraulic Actuator Kit, part, # T4835700,...
view full answer... - How to Install the Gel Cell Breakaway Kit for Titan BrakeRite Systems # T4822100If you have the Titan BrakeRite II # T4835700 then the battery cable would have been included with your kit. If you check out the diagram I attached you can see how the battery cable installs into the BrakeRite II system. I have also attached a video of this whole kit being installed on a trailer that you can use as a reference. If you jump to the 17:00 mark you can see our installer connecting the breakaway batteries. The breakaway batteries in the Gel Cell Breakaway Kit # T4822100 have...
view full answer...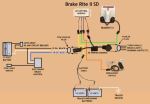
- Breakaway Battery Kit For Titan BrakeRite Electric-Hydraulic Actuator Kit For your Titan BrakeRite # T4813102, you're going to want to use the Gel Cell Breakaway Kit for Titan BrakeRite Systems # T4822100. This kit includes 2 5 amp-hour batteries to be connected in parallel, and it includes a breakaway switch.
view full answer... - Is Break Away Kit Required for Military M105A2 Trailer Equipped with Titan BrakeRite ActuatorBecause the original Prodigy was not compatible with electric over hydraulic brakes, you would need to upgrade to a Prodigy P2, part # 90885. The regulations regarding the use of a break away system can vary from jurisdiction to jurisdiction, but as a general rule of thumb, we typically state that a break away system is needed for trailers weighing more than 3000 lbs. You would need to check with your state DOT for specifics. If a break away kit is required in your area, I would recommend...
view full answer...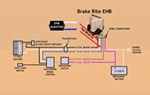
- Replacement Breakaway Switch for Gel Cell Breakaway KitThe switch for breakaway kits like the Gel Cell Breakaway Kit # T4822100 are universal so you can mix parts from different manufacturers. So for this kit I recommend the Hopkins Replacement Breakaway Switch # HM20014.
view full answer... - What Size Battery Will Fit in Replacement Battery Box # TN65117The battery that fits in box # TN65117 measures 3.54 inches long, 2.76 inches wide, and 3.93 inches tall. Including the terminals it is 4.17 inches tall. A battery that is at most these dimensions or smaller would fit in the box. It is designed as a replacement for Titan breakaway kit # T4822100. I have included a link to other battery boxes that we carry.
view full answer... - Activating Electric Over Hydraulic Trailer Brakes using Integrated Brake Controller on 2010 GMC 3500There are two options to activate the electric over hydraulic brakes on your trailer when towing with your 2010 GMC 3500 truck. The first, as you mentioned, would be to use an adapter, which also requires some additional parts. The second option would be to install an aftermarket brake controller which is compatible with electric over hydraulic brakes. If you decide to go with an adapter, you will first need the Titan BrakeRite SD Adapter, part # T4845900. In addition to using the adapter,...
view full answer... - Electric Over Hydraulic Trailer Brake Actuator Recommendation for 2008 Chevy SilveradoFor a trailer with electric over hydraulic brakes, you will first need an electric over hydraulic brake actuator. I recommend the Titan BrakeRite EHB electric-hydraulic actuator # T4813102. I have included a link to the installation details for you to view. Since your 2008 Chevy Silverado has a factory integrated brake controller, you will need an adapter, # T4845900, so the integrated brake controller and EHB unit can properly communicate. The other option, and what many people do,...
view full answer... - Adapter to Convert BrakeRite to Drum Brakes and Connect to Integrated Brake ControllerTo convert a Titan BrakeRite from a disc brake application to a drum you would need the adapter you mentioned part # T4844100 and then to use with integrated brake controllers you would also need the # T4845900. These both plug inline like you mentioned. Then for a breakaway kit you'd want the part # T4822100. You would not need an SD controller. If needed your trailer would have already have that.
view full answer... - Will Titan BrakeRite EHB Work for a 16K Trailer and 2013 GMC Sierra with Factory Brake ControllerTitan has told me before that the 1500 psi # T4813102 would work well for applications up to 20,000 pounds so 16K should not be a problem. You will need Titan BrakeRite SD Adapter for Ford/Chevy Integral Brake Controllers Item # T4845900 for the integrated brake controller in the vehicle. For a break away kit use # T4822100. I have included a link to the instruction for the EHB for you to view. I have also included a link to an FAQ on what you will need for the conversion beyond the actuator.
view full answer... - Availability of Electric-Over-Hydraulic Actuator For Triple Axle Trailer With Disc BrakesI would recommend the Titan BrakeRite I Plug and Play Electric-Hydraulic Actuator Kit, part # T4813102, for your triple axle trailer using disc brakes on all three axles. This actuator is designed for triple axle trailers and will need to have your tow vehicle wired with an in-cab brake controller like the Tekonsha Prodigy P2 Brake Controller, part # 90885. This brake controller works with electric over hydraulic or just electric trailer brake systems. I have included a link to the installation...
view full answer... - Converting a 2005 Ford F-350 and Trailer with Hydraulic Surge Brakes to Electric Over HydraulicI would recommend the Titan BrakeRite II Severe-Duty Electric-Hydraulic Actuator Kit, item # T4835700, along with the Titan BrakeRite SD Adapter for Ford/Chevy Integral Brake Controllers, item # T4845900, for your 2005 Ford F-350 Diesel with factory brake controller. You will also need the Gel Cell Breakaway Kit for Titan BrakeRite Systems, item # T4822100, to complete the setup. This system will connect to your existing brake line and give you much better control the disc brakes on your...
view full answer... - Electric Over Hydraulic Trailer Brake Actuator for a 24,000 Pound Tandem Axle Trailer, Disc BrakesFor your 24,000 pound trailer with disc brakes, I recommend the Titan BrakeRite I Plug and Play Electric-Hydraulic Actuator Kit, # T4813102. If the distance between the front axle to the trailer hitch is 16 feet or more, it is recommended to use 1/4 inch brake line to help with a better response time of the trailer brakes. I have included a link to the installation details for # T4813102 below. If you do not already have one, you will need a compatible brake controller to operate the BrakeRite....
view full answer... - Electric Over Hydraulic Brake Actuator For A 20000 Lb Trailer With Disc BrakesYou mentioned a 20 ton (40000 lbs) tag trailer with disc brakes. If you have a 20 ton trailer it would most likely come with air brakes. Next, you mention a tandem axle trailer with two 10000 lb axles and disc brakes, so I am thinking you were meaning the same 20000 lb trailer. For your 20000 pound trailer with disc brakes, I recommend the Titan BrakeRite I Plug and Play Electric-Hydraulic Actuator Kit, part # T4813102. If the distance between the front axle to the trailer hitch is 16...
view full answer...
Do you have a question about this Trailer Breakaway Kit?
Info for this part was:

Expert Research:
Michael H

Expert Research:
Adam R

Updated by:
Adele M

Updated by:
Wilson B

Updated by:
Manda E
At etrailer.com we provide the best information available about the products we sell. We take the quality of our information seriously so that you can get the right part the first time. Let us know if anything is missing or if you have any questions.
Product Experts Available Now!
Call 1-800-940-8924
Thank you! Your comment has been submitted successfully. You should be able to view your question/comment here within a few days.
Error submitting comment. Please try again momentarily.