


How to Identify the Fixed and Float Side on a Schwintek Slide
Updated 09/05/2026 | Published 08/31/2026
Products Featured in This Question


Question:
Hi, I have a bad couple of Schwintek slide racks on my 2015 Tiffin Open Road Vanity Slide. I think I need LC26VR for the right racks facing the slide from the outside and LC84FR for the left racks. Can you confirm? How do I know which side is the float side? Thanks, Andy
asked by: Andy H
Expert Reply:
Hey Andy, thanks for reaching out. You are on the right track, but you actually have those two reversed. When you're standing outside the coach facing the slide-out, the left side is the fixed side # LC84FR, and the right side is the float side # LC26VR.
You can also identify them by looking at the bearing blocks. The fixed side uses an aluminum rivet that prevents the bearing block from moving, while the float side uses a plastic shear rivet that allows the bearing block some movement. So for your vanity slide, assuming it uses the standard dual-rack Schwintek setup these kits are designed for, you'll want # LC84FR on the left and # LC26VR on the right when facing the slide from outside.
What happened to the original racks, are the teeth worn down or did they get physically damaged?


Product Page this Question was Asked From
Replacement Standard Dual Rack Repair Kit for Lippert RV In-Wall Slide-Outs - Float Side


- RV Slide Out Parts
- Roller Parts
- Rack Repair Kit
- Roller
- Lippert
more information >

Continue Researching
- Search Results: 10k jack
- Shop: etrailer Electric Trailer Jack w/ Tongue Weight Scale - A-Frame - 18" Lift - 5,000 lbs
- Shop: Replacement Standard Dual Rack Repair Kit for Lippert RV In-Wall Slide-Outs - Fixed Side
- Shop: Dicor Self-Leveling Lap Sealant - 10.3oz - Dove
- Shop: Dicor Self-Leveling Lap Sealant - 10.3oz - Tan
- Shop: Replacement Standard Dual Rack Repair Kit for Lippert RV In-Wall Slide-Outs - Float Side
- Shop: Mighty Cord 7-Way RV-Style Trailer Connector w/ Molded Cable - Trailer End - 6' Long
- Shop: Curt Cold Weather 7-Way RV Style Connector - Trailer End - 10' Long - RV Standard
- Video: Easily Install Your etrailer Class III Trailer Hitch - 2016 Audi Q5
- Shop: Trailer Wiring
- Video: How to Install the Curt T-Connector Vehicle Wiring Harness - 2015 Audi Q5
- Video: Set up: etrailer Trailer Hitch Receiver on a 2022 Ford Edge
- Search Results: trailer hitch
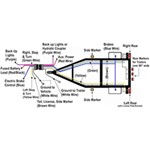
- Article: Trailer Wiring Diagrams
- Q&A: What is the Difference Between a Class II and a Class III Hitch?
- Video: Curt T-Connector Vehicle Wiring Harness Review C56040
- Q&A: What is the Difference Between a 4-Way and 7-Way Trailer Connector
- Search Results: trailer wiring
- Article: Brake Controller 7- and 4-Way Installation Kit (ETBC7)
- Search Results: trailer tires and wheels
- Article: How to Measure for Trailer Hitch Drop
- Q&A: Lug Nut Torque Chart for Trailer Wheels
- Video: The Low-Down on the Curt Powered Tail Light Converter with 4-Pole Flat Trailer Connector
- Article: How to Choose the Right Trailer Hitch Class
- Search Results: trailer jack
- Shop: Brake Controller
- Q&A: Installation Time for Blue Ox BX1128 Flat Tow Base Plate Kit for 2016 Jeep Grand Cherokee
- Video: How to Choose a Trailer Brake Controller
- Article: Wiring Trailer Lights with a 7-Way Plug (It's Easier Than You Think)
- Search Results: trailer lights

on RV Slide Out Parts






Louie
9/5/2026
From the beginning it seemed intimidating, but it was really quite simple. It took me a day the first time to change both railings on one side, but now I could probably do it easily in a half day. I wasn't confident that I was going to be able to get it back into position correctly. But that was not the issue at all. just make sure your holes line up before you us the sticky tape is exposed and carefully with the wiring it really fine