How to Bleed an Actuator As Well As The Brake Lines On A Trailer
Published 04/06/2026
Question:
How to bleed actuator / brake lines.
asked by: Wayne
Expert Reply:
Hey Wayne, here’s how to bleed your trailer brakes step-by-step.
I’ve also included a help article and video if you’d like a visual walkthrough, but these steps will walk you through the process:
Step-by-step
* Fill the reservoir – Add fresh brake fluid to the actuator.
* Start at the farthest wheel – Begin with the brake farthest from the front.
* Attach a hose – Put clear tubing on the bleeder screw and into a container.
* Compress the actuator – Push the actuator in to build pressure.
* Open the bleeder – Let fluid/air out, then close it before releasing pressure.
* Repeat until clear – Continue until no air bubbles appear.
* Move to the next wheel – Work your way toward the front.
* Top off and test – Refill fluid and check for a firm braking feel.
A few tips for best results
* Keep the reservoir at least half full to avoid pulling in air
* Always close the bleeder before releasing pressure
* You’ll know you’re done when the fluid runs clear and the brakes feel firm
If your brakes still feel soft after bleeding, there may still be air in the system or a leak somewhere.
What kind of trailer are you working on?


Product Page this Question was Asked From
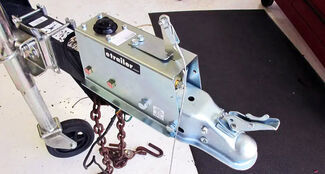
Dexter Brake Actuator with Manual Lockout - Bolt On - Drum - 2" Ball - 7,500 lbs
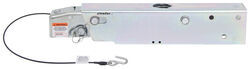

- Brake Actuator
- Surge Brake Actuator
- Boat Trailer
- Construction Trailer
- Farm Trailer
- Travel Trailer
- Utility Trailer
- Bolt-On
- 7500 lbs GTW
- 2 Inch Ball Coupler
- 3 Inch Channel Tongue
- Drum Brakes
- Manual Lockout
- Dexter
more information >
Featured Help Information
Miscellaneous Media


Continue Researching
- Shop: Demco Hydraulic Brake Actuator - Drum - Zinc - 2" Ball - 7,000 lbs
- Shop: Kodiak Hydraulic Brake Line Kit - Single Axle - 18'
- Shop: Dexter Brake Actuator with Manual Lockout - Bolt On - Drum - 2" Ball - 7,500 lbs
- Article: Hydraulic Trailer Brakes: How They Work & What to Buy
- Q&A: Replacement Part Availability And Options For Replacing An Atwood Brake Actuator
- Q&A: Recommended Brake Assembly Backing Plate Bolt Installation
- Q&A: What Are The Replacement Bearings For My 2,800 Lb. EZ Loader Trailer Axle
- Q&A: Replacement Bearing Kit Needed for EZ Loader Trailer with 2,800 lb Axle
- Shop: Trailer Hitch
- Search Results: trailer hitch
- Q&A: What is the Difference Between a Class II and a Class III Hitch?
- Shop: Curt Powered Tail Light Converter with 4-Pole Flat Trailer Connector
- Video: Firestone Ride-Rite Air Bags with Easy Mount Compressor Feature Breakdown
- Article: Trailer Wiring Diagrams
- Shop: Universal Installation Kit for Trailer Brake Controller - 7-Way RV and 4-Way Flat - 10 Gauge Wires
- Shop: Trailer Wiring
- Article: Brake Controller 7- and 4-Way Installation Kit (ETBC7)
- Q&A: Lug Nut Torque Chart for Trailer Wheels
- Search Results: trailer tires and wheels
- Article: Wiring Trailer Lights with a 7-Way Plug (It's Easier Than You Think)
- Shop: Power Mountain Tallboy Off-Road Bottle Jack - 8-1/2" to 37-3/4" Lift - 6 Tons
- Search Results: trailer wiring
- Q&A: Replacement for Atwood 61101 Brake Actuator
- Video: How to Choose a Trailer Brake Controller
- Shop: Trailer Wheel Bearing Kit for Lippert, Dexter, and AL-KO Axles - 3,500 lb with #84 Spindle
- Article: How to Measure for Trailer Hitch Drop
- Search Results: trailer jack
- Shop: Brake Controller
- Video: An In-Depth Look at the Roadmaster Battery Charge Line Kit for Towed Vehicles
- Article: How to Measure Your Trailer Wheel Bolt Pattern

on Brake Actuator