Hi Bill! You will need to completely replace the system since you have old Dometic R410a units on your Monaco. Everything switched to R32 refrigerant following new EPA regulations in 2025, and the new systems are not backwards compatible. For a…
Hey Jonathan, We haven't heard of any issues with the P3 #90195 and plug-in harness #3070-P with a 2024 Honda Ridgeline. How are you sure that the brakes are being applied on your Honda when applying the manual override on the P3? What are you…
Hi Collin, welcome back! The most economical replacement is going to be from Advent Air. You will need a complete system since everything moved to R32 refrigerant. If your upgraded thermostat is R32 compatible, or a smart thermostat that got a…
Hey Keith! I can definitely help you find a replacement for your Dometic Duo Therm. However, you're going to have to replace the thermostat and air distribution box as well. Your current setup is for R410A and everything switched to R32 last year…
Hey Matthew, thanks for reaching out. We do have a heat strip kit that will work with the Advent Air RV Air Conditioner System #ADV99QR. For that you'll need the following: - Electric Heat Strip for Advent Air RV Air Conditioners - 5,500 BTU -…
Hey Alan, while the Air Distribution Box w/ Wall-Mounted Thermostat for Advent Air RV Air Conditioners #ADV98SR does have ability to control a furnace it can't be used with a Duo Therm setup like you have. It can only work with Advent Air AC…
Hello Wayne, Great question, because this is one of those details that isn’t obvious until you look closely at the install. On the Furrion Chill Cube #FR59TD, the oscillating outlet is designed to face the front of the RV. During installation, the…
We got you covered Sherrel, thanks for reaching out! If your Jeep Wrangler has a different bumper than the standard factory, please let me know because that would change which base plate is compatible with your vehicle. This flat tow setup is for a…
Hello Greg, thanks for reaching out. Sadly, we do not offer any replacement rubber springs for the Timbren Axle-Less Trailer Suspension. Your best bet would be to reach out directly to Timbren for that. I believe they can provide them. The rubber…
Hey Alex. From the information I can find online it does look like your 2011 Keystone Cougar 318SAB does come prepped for a second AC unit. The bedroom roof vent should be reinforced and pre-wired for a 13.5k or 15k BTU unit. To check if your trailer…
Hey Denise, Advent does have an RV AC unit that has ability to control a furnace as well but it needs to be one like the part #ADV92SR that has a wall thermostat and not the part #ADV32SR that has all of it's controls built into the vent…
Hey, Jason. Thanks for reaching out! Yes, the Furrion Chill Cube part #FR59TD will come with the bolts and seal to for install. The seal is already attached to the bottom of the main AC unit, and the hardware will come along in with the air…
In these days of customer "no service" I am usually disapointed when doing business with people I don't know. It was refreshing doing business with you. I'm impressed!
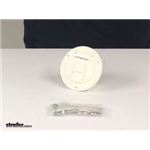
RV Access Doors with Electrical Cable Hatch, Open Back
Install a clean pass-through that stands up to weather. These RV access doors pair an electrical cable hatch with an open back, making it easy to feed power cords or hoses while keeping rain at bay thanks to cable notches on some designs. Check your cutout and hole pattern to confirm fit—some replacements line up perfectly, others may need a slight enlargement, and finishes like flat black can match your paint.
Yes, when matched and sealed correctly it can help keep weather out while routing cords. Use the provided putty or sealant and seat the flange evenly. Some hatches include a notch so a cable can pass through with the door shut to reduce rain entry—verify this in the listing. After install, close the door on the cable and check for gaps you may need to seal.
Measure your existing cutout and outside footprint first. Compare both to the hatch's listed cutout and overall dimensions so the holes line up. If your opening is slightly smaller, you may need to enlarge it. Check center-to-center hole spacing when possible to confirm alignment. When replacing older round hatches, verify the outside diameter matches your existing trim ring.
They work well but tabs and hinges can be fragile on some designs. Inspect the latch tab design before install and avoid over-stressing it. If a door isn't designed to come off, you may need to replace the front assembly if it breaks. Some versions include a lock; if keyed, expect that only 1 key may be included. Test the latch action before sealing everything up.
Many include screws and putty, and installs can be quick. Use the packaging as a cutout template if provided, and a hole saw for clean edges. Dry-fit first to confirm hole alignment. If your finish needs to match, confirm whether black is flat or gloss in the description and photos. After mounting, tighten screws evenly to avoid warping thin plastic doors.


 Rectangle
 Round
Round
 RV Access Doors Parts or Accessories
 Filters