
Thule WingBar Edge Roof Rack for Flush Rails - Aluminum - Silver - Qty 2


To see if this custom-fit item will work for you please tell us what vehicle you'll use it with.


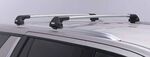
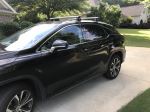
The flush design keeps the crossbars tight to the roofline for a clean, from-the-factory style. Nothing sticks out past the feet, so the setup feels integrated and balanced. The result is a low-profile look that blends in instead of standing out, whether you’re hitting the road for a long trip or just keeping it mounted for day-to-day use.
Wind noise can be one of the biggest annoyances when driving with a roof rack. The Thule WingBar Edge helps keep things quiet with its aerodynamic shape and split rubber strips built into the top channels. These strips close back around your gear mounts to smooth airflow, reducing wind noise and vibration while you drive. It’s a small detail that makes highway travel much more comfortable.
This rack system gives you the flexibility to bring along all kinds of gear. The aero-style crossbars work with both channel-mount and clamp-on accessories, so you can load up kayaks, skis, bikes, or a cargo box without changing your setup. It’s built for everyday hauling and all-season adventure, letting you switch between attachments as your plans change.
Mounting accessories in the top channel couldn’t be easier. The split strip design means no trimming or cutting rubber strips just to fit your mounts. Slide your gear into place and the strip closes back around it, sealing out wind and keeping everything tidy. It saves time during setup and makes swapping accessories simple.
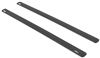
Each bar features a tough aluminum construction that stands up to regular use while keeping weight down. The system supports up to 165 lbs (always observe your vehicle’s maximum roof load capacity), giving you solid performance for everything from camping trips to weekend projects. A limited lifetime warranty backs it all up for peace of mind over the long haul.
 Alternate Instructions
Videos are provided as a guide only. Refer to manufacturer installation instructions and specs for complete information.
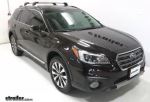
Hi, everyone. I'm Evangeline right here at etrailer. And today we're talking about this Thule roof rack system here on our 2025 Lexus UX 300h. If you are looking to carry around some things on your car, maybe you wanna carry some bikes, or maybe a kayak, or maybe you want a little bit more cargo space, attaching a rear rack system like this is gonna get you there. There's plenty of roof rack options available for this Lexus, but I really like this one. It's super sleek, it sits flush against the side of the vehicle, and Thule is a very well-known roof rack brand.
Now, what we have here is called the WingBar edge, which means we've got this edge here that drops off. So that gives you that sleek look. And you also have the option of getting this in the silver, which is what you see here, or the black color option. It's important to get the right roof rack style though that matches what you want to carry. The WingBar edge is right for that sleek look, but you do have a little less crossbar space compared to bars that stick a little bit further out.
So up front you have 29 inches of usable crossbar space, and then in the back, you have 27 1/2. Yeah, that number is a little different, but that's mainly because of the UX roof design. It's a little wider in the front and then it tapers back in the back. This attaches to the flush rails of your vehicle. And the cool thing about this specific system is you can adjust where you want it installed, and that's gonna be helpful depending on what you carry.
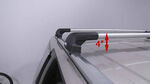
So we're looking at crossbar spread, and crossbar spread is measured center to center. Currently I have it at around 22 inches apart, which is very surprising 'cause it looks really close together. If you wanna carry longer items, you can move this further forward, but you'll have a little bit of an angle downwards. So right where I have it here, where the doors are is probably my best recommendation. Can carry a lot of different types of things, but you still have a very level surface.
You can always double check our different accessories like kayak carriers or roof-mounted bike rack carriers, which specify what crossbar spreading they need. There's also roof measurements, and I take two measurements. First is gonna be the top of the roof to the bottom of the bar, and I have it at maybe 2 1/2 inches, maybe 2 3/4, depending where you measure. It's a little bit on the low side, meaning if you have accessories with really large clamps, you wanna be careful with those, just so that they don't scratch up your roof when you have them attached. The next measurement I like to go for is the height now added to the top of the roof. So top of the roof to the top bar, let's say about 3 1/2 inches, and that's where your accessories sit. So this is most important if you have, let's say, skis with extra tall bindings, you can make sure that those bindings clear. If not, you can take a look at some accessories we have here at etrailer, like ski carriers, that give you that extra height. Opening up the sunroof, you can see that the back of it does come up, so that takes up a little bit of space. Further up and sliding backwards, it does come close, but you do clear, and you are able to open up the sunroof completely. As someone who also owns a sunroof and a roof rack on their car, my personal recommendation here is if you also wanna open up your sunroof, where this bar sits is fantastic, because it doesn't go in the opening of your roof, so you're not gonna lose too much experience from opening up your sunroof while having a roof rack. Works great, but if you have accessories attached, well, I'd be very mindful of those clamps, because any clamps that go underneath the bars are gonna scrape up against that sunroof. Try to take advantage of that channel up top, and try to use channel-mounted accessories when possible. I've learned on tons of different roof racks on a lot of different cars, and something that I've seen in common with people that get a roof rack for this style of a car is that with this specific roof rack, one main benefit is they now have the ability to carry all kinds of fun accessories, usually bike racks on their car. The second surprise benefit is that this will make your car look really sleek and kind of official, and that's all just a good combination of a functional roof rack that you get with Thule, as well as that sleek look. So if this is the style that you are going for for your Lexus, but you're curious about the installation process, surprise, it's actually very, very simple. So stick around for that. Getting all of these parts put together is a little confusing at first because there's so many different pieces, but once you know the general process of how it goes together, it's very straightforward after that. The main thing you do need to think about is that you do have two different size bars. So the shorter bar actually goes in the back and then the longer bar is going to go in the front. So grab your kit, unpack it, and we'll start installing the longer front bar together. You're gonna have these rubber strips as one piece initially, and the funny thing is that the piece needs to be ripped apart from the center, and then switched around before you put it on the bar. So as reference, the flat piece is gonna go on the side where your Thule logo is, and this just pushes right in. And then the other piece that has the arrows aims towards the front of your bar, which is gonna be the taller part of your crossbar. So just push all those rubber pieces in. You are then going to be able to attach your towers, so there's going to be a right and a left tower. It's gonna be set right here in this corner, not very visible. A nice way to see which one is the correct set is how it fits up to your crossbar. So notice how the tower has a large side to it, and that's so that it can run to the side of the crossbar. See how that fits nicely there Now, to attach the tower, there is going to be this little tab on it. And I have a special trick for attaching a tab. I just go ahead and grab the tool from the kit, and I push down, and then in on the tab, just like that. And that way, as I slide the tower in, the tab eventually catches in that opening in the crossbar there. And once it catches, I can then adjust the tower however much I want for whatever length I want. The next part is attaching the little hooks and the rubber pads. So we're going to have four different pieces here. So I like to flip the crossbar over so that we can first attach the piece A. This will have an A stamped on it, but you'll also see it for its hooks. This secures just like that into the tower. See how that sticks out And then you'll keep that in place with the rubber pad, which will have B stamped on it. And then you're gonna have C. And then this fits into the lip of A, and then goes over that bolt. And then finally, you secure it with the nut over here, and then that threads down. So I don't thread it down all the way, just enough where none of the pieces come off. So there are gonna be the exact same pieces for the front, the back, the left, and the right side. So don't worry about the numbers stamped on the pads. With both of those towers secured, you can now gently lift this onto your roof. Now, what I like to do is just get a general idea of where I may want to put it. If I put it a little bit further forward, then we do have a little bit of a tilt downwards. I could put it a little backwards here, but then we're going to have a really short distance apart. So it's all about what type of accessories will you be lining this up with. Something that can be helpful for you too is that there are going to be two holes on your flush rails that you can use as a guide to where you may want to put your clamps. Once you figured out where you want this, then go ahead and tighten down with your included tool. Now, I actually already tightened down the other side halfway, so we're just gonna finish up over here. And I finished up, this is actually a torque tool included with your kit. So once you get to the required torque spec or tightness, your tool's gonna click like that. I like to have it click twice like a gas cap, and that's how you know you're not over tightening. To cap it off, you have this end cap that slides onto your tower, and then to secure the end cap you're gonna have, or you can use a screwdriver over on this plastic lock core, and just turn it over to the locked position. You can also purchase one key system lock cores and switch out these plastic lock cores if you want. Plastic ones are just included with your kit. That's gonna be it for the installation of your Thule roof rack system. I think this looks really good here on our Lexus UX, and hopefully you thought so too. Again, this is available in both aluminum or silver colors which is what we have here, or black, depending on what better fits your vehicle. And if you're looking for any other options for your car, maybe you want more space or more bar length, you can check out those options here at etrailer. Hopefully this video installation helps you out with getting this set up for you and your vehicle and your journeys. This was these Thule Edge roof rack here at etrailer on a 2025 Lexus UX 300h.
Ratings & Reviews





Do you have a question about this Roof Rack?
Info for this part was:
At etrailer we provide the best information available about the products we sell. We take the quality of our information seriously so that you can get the right part the first time. Let us know if anything is missing or if you have any questions.
















Thank you! Your comment has been submitted successfully. You should be able to view your question/comment here within a few days.
Error submitting comment. Please try again momentarily.