
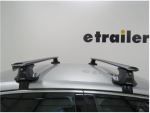
Inno Aero Roof Rack for Naked Roofs - Aluminum - Black - Qty 2


To see if this custom-fit item will work for you please tell us what vehicle you'll use it with.


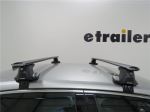
When you’re loading up heavy gear—whether that’s kayaks, canoes, or a full cargo box—you want bars that won’t flex or rattle. These aluminum crossbars give you that solid feel under load. The system carries up to 165 lbs (always follow your vehicle’s roof capacity) and includes 2 aero crossbars, 4 through feet, and a custom fit kit for a stable, locked-in setup. Their sturdy construction makes long road trips and camping runs feel secure from start to finish.
Highway drives can get noisy with some racks, but these bars are shaped to smooth airflow and reduce that hum. The top channels use push-down rubber strips that close around the mounting hardware—no trimming needed—which helps quiet wind vibration. The result is a calmer cabin even when the rack is fully loaded for travel.
This rack doesn’t limit your options. The aero-style bars accept both channel-mount and clamp-on gear, so you can easily attach your kayak carrier, cargo box, or ski holder without changing setups. The top channel dimensions—13/16" wide x 1/4" tall with a 3/8" opening—fit most universal carriers for clean, straightforward mounting across all your adventure gear.
When you’re parked overnight on a trip or stepping away from your vehicle at the trailhead, it’s reassuring to know the rack itself is protected. The leg covers lock to deter theft, keeping your crossbars and mounted accessories right where you left them until the next day’s outing.
The black aluminum bars are corrosion-resistant and simple to maintain through every season. With their sleek look and durable build, they handle daily use as easily as weekend getaways—and the limited lifetime warranty backs that up for the long haul.
 Alternate Instructions
Videos are provided as a guide only. Refer to manufacturer installation instructions and specs for complete information.
Hello, neighbor. This Kurt with etrailer, and today we're taking a look at the Inno Aero roof rack, and we're going to see how it looks and how it fits with our 2024 GMC Terrain. So oftentimes when we're heading out on a trip, we're going to have a lot of items with us that we either can't fit or don't want riding with us in the vehicle. And there are a few options in order to get that extra stuff with us. One, we could use our hitch, either with a small trailer or maybe a cargo basket or something like that. The other option is going to be a roof rack.
Now, a roof rack to me is the better option in this scenario because it doesn't really add to the footprint of the car. So parking and things like that, you don't really have to worry about while you're out and about. Depending on what you're carrying up there, you may have to worry about roof clearance, but the Terrain isn't the tallest of vehicles out there. So I think in most instances, you're going to be okay with that as well. So the Inno Aero roof rack is going to have a weight capacity of 165 pounds.
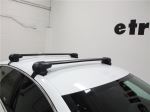
However, you do definitely want to double-check your owner's manual in order to, you know, check on that roof capacity for the vehicle itself. If it's lower than 165 pounds, that would end up being your capacity. So it is going to be an aero bar, and by that it means that it's going to have kind of an elliptical shape to it. It's going to be a little wider in the front, a little bit more of a blade shape here in the back. And what that's going to do is really help you out aerodynamically in that it's not going to vibrate as much and, therefore, create as much road noise as you're going down the highway.
These are going to be much quieter than a square or round bar. Now, this is an overhang style of bar, which I really like because it just gives us more bar space up here to work with. So these are going to have 51-inch bars. Because of the overhang with our clamp-mounted accessories, we do have an opportunity here, depending on the size of the clamp, to kind of move it over here, which is another reason why I like overhanging bars. It does give you the opportunity to possibly go side by side with two different items up here, as opposed to a flush-mounted bar where the crossbar is going to end inside the tower.
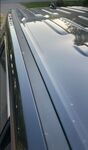
While those tend to have kind of a more aesthetically pleasing look, to me they're a little bit limited because you're forced to mount everything toward the center of the vehicle and you really don't have that opportunity to put more than one thing up there. So with the clamp-mounted accessories, that's just going to give you a little bit of extra room to work with. There is a T-track up top with a weather strip to help keep the noise down, and you're going to access that through our end cap. And then by pushing down on that weather strip and sliding your T-slot accessories over. Now, with an overhanging crossbar, you might be concerned that you might hit your head on it getting in and out of the vehicle, but the truth is it really doesn't come out much past the door threshold. So getting in and out of the vehicle is actually pretty safe. I don't feel like I'm in any danger of it hitting my head at all. But I do think that the fit on the Terrain is actually really nice. So let's grab a measuring tape and just see how it fits up there on our roof. So as we're up here, one of the most important things that we want to measure is our crossbar spread, and that would be the distance between our crossbars. You're going to see momentarily in the installation that, you know, is very specific about where your crossbars go up here. You're not really too free to move them around wherever you want to just because of how they're going to fit. So when we get it fitted up here, we're looking at a crossbar spread of 27-1/2 inches. And that to me is actually not a bad place to be. Most rooftop accessories have, you know, a minimum maximum fit between 25 and 35 inches. And knowing what your crossbar spread is crucial when it comes to picking out accessories, you just want to make sure that you're getting one that fits with whatever crossbar spread you have. And at a little over 27 inches, I'm really not too worried about, you know, not being able to find accessories that are going to work on my roof rack. The other thing that we're going to want to take a look at is how much clearance do we have, you know, up above our roof with this rack on How much higher is this going to add to the vehicle So you're going to have an additional roof height of 4-1/2 inches when you have these crossbars up on your Terrain. So if you're curious about what the clearance is for your roof, add the height of your accessory, plus that 4-1/2 inches, and you'll get an overall vehicle height with the height of your vehicle. That'll help you understand if you're going into an area that maybe is too low of a clearance for you and your cargo. We're also going to take a look here at how much room we have underneath the bars. Underneath the bars, we are just under 3 inches. That's more than enough space for any of those clamp-mounted accessories to be able to wrap around and grab onto your bars. Now, we mentioned a little bit about the installation process. It's actually very simple and it can be done on your own. So follow along and I'll show you exactly how we got these on the roof of our Terrain. So to begin our installation, first we just want to kind of lay out everything that we're going to need. We've got our crossbar, tower, our fit kit, which is going to include this clamp and pad, our tower cover, and we've got this fitting piece right here that's going to end up going into our crossbar in order to fit our tower onto it, along with the Allen tools that comes with it. Now, we already have our front bar installed, and really all the towers go together the same. They go onto the crossbars the same. However, the one thing that you really want to pay attention to are the rubber pads that go underneath your towers. Your back crossbar towers should have number 419. Your front crossbar pads should be 424. Now, the reason for that and the reason they're different is they are contoured to fit on your roof pretty snugly as long as they're placed in the right spot. So with that being said, we've got the correct parts here. We're going to go ahead and take one of our towers and our pad. If we look underneath here, we're going to see some inserts here for it to go into, plus we've got some spots here that are going to cover up the heads of these screws. So we're just going to go ahead and firmly place that on there, just like so. We're going to place our clamp over it just like that. And then replace the bolt and washer. So this is going to be your completed tower. We do want to leave this bolt a little loose. We want to make sure this clamp is going to be maneuverable, just so we can make sure that we can set it correctly and easily when we get it up on our roof. Our other tower is going to assemble the exact same way. All four of them, in fact, assemble the same way. Again, though, just double-check whatever towers you're working on, front bar, back bar, make sure you have the correct rubber pad underneath it. So with both of our towers assembled, it's time to get our crossbar prepped. And in order to do that, we're just going to turn it over. We're going to remove our end cap, and then we're going to slide this tab all the way out, just like so. And then once we do that, we're going to take this piece here. Okay. It's going to fit in here just like a frame, and we're going to do this in a way that the slot here is kind of toward the outside of the bar, and we want the silver portion of it facing up, not the plastic side. Make sure this side is facing up just like so. Once that's done, we could just slide it back in. We're going to replace our end cap here. And once we get to here, we'll have this tab to push down. We'll push down on that, clear it all the way through. Now we could take our tower, and this tab here is going to go right into this slot. This bolt here is going to go right into that bolt hole there. And once we have it in place, we could slide it back just like that, and it'll lock into place for us. We're going to do the exact same thing on the other side of our crossbar. Now, you're going to need to refer to your instructions as far as how far apart your towers need to be on your crossbar. We're working on the back bar right here. There is going to be a mark on the center of your crossbar that's going to indicate where that is. There's a line back here on your tower that you're going to measure from, with a bolt dropped right into a hole underneath it. So for your back bar, the measurement they asked for is 20-3/4 inches. So we'll measure 20-3/4 inches from that bolt to the center mark. We're going to do the same on the other side. And we'll make any movements or adjustments we need to here, but once we get it in the right spot, we're going to go ahead and take our Allen tool, and we're going to throw that bolt underneath here. We're going to go ahead and tighten our towers down onto our crossbar so they don't shift on us while we're moving it around up on our roof. So we can make sure everything stays exactly the way it's supposed to be. And we're going to do that on each side, and then we'll get it up on our roof. According to the directions that we got from Inno, going from our door seam here, we want this bolt to be 6 inches from that. So we got that into the correct position there. And if you've got your towers spread correctly on your crossbar and you've got it in the correct position up here on the roof, these rubber pads underneath are going to really contour just perfectly to the shape of your roof. And that's a pretty good indication that we've got it in the right spot. Now, our second crossbar, they ask us to go 20-3/4 inches back from this center door seam, which is going to put us right in this neighborhood right about here. So we're going to go ahead and grab our crossbar and get it up there. Now, when you grab your crossbar, just make sure you're putting it up here facing the correct direction. Being an aero bar, it's got a wider front and a narrower back, like a kind of blade shape back here. So just make sure that you have that oriented correctly before putting it up. But we're going to just come up here. We're going to kind of wrap our clamp gently around the other side there. We're going to hop down, and do the same thing, just kind of being wary of the clamps, making sure they're not rumbling around or doing anything kind of dangerous on us. And once we get it kind of in the right spot, we're going to go ahead and grab our tape measure again and just double-check to make sure it's even on both sides. We definitely want to check it on both sides because we need to guarantee that these are going to be parallel to each other. That way every load that we put up there is going to be done so safely. So once we have them in the correct position, we've got them measured off on both sides. Before we tighten our clamps down, Inno provides us with these pads that we're going to just stick right here around the contour of the roof. It's going to kind of follow this clamp here, so underneath and over the edge. However, we're just doing a test fit today. We're not doing a permanent install, so we're not going to be using them at the moment, but just to be clear, you're going to want to put these down before you tighten up your clamps. So with everything in place, we're going to go ahead and grab our Inno tool here, and we're going to tighten it through this bolt here. Now, what I would recommend is that you just, you know, whatever side you're starting on, just get it so that the clamp comes up and is snug. What you don't want to do is really over tighten one side compared to the other because it could shift the crossbar and make it kind of lose its place, or it just won't clamp down properly on the other side. So my suggestion would be, once you get the one side snug, go ahead and go to the other side and do the same thing, and then just kind of incrementally tighten each side as you go until you get them tightened down completely. That way, you could guarantee they're not going to lose their place or shift on you while you're doing it. And this is a torquing tool, so we are going to get a click out of it indicating that we've gotten it tightened down to spec, (tower clicks) just like that right there. So all you need to do is grab your tower cover here and your keys. You're going to have these two hooks here. They're going to just kind of slide right over that, just bring it up and into place, and lock it down. Now, with all four of those up, I'm going to give this a nice little shake test, make sure nothing is moving. We've got everything tightened down really well. Everything looks fantastic. We're ready to load up and hit the road. Now, if after watching this video, you decide that the Inno roof rack is the roof rack for you and your GMC terrain, and you get it, install it, and have the opportunity to use it a few times, please share with us what you think about it in the comments below. We would love to share that experience with other neighbors so they can make the best decision for themselves. Once again, this is Curt with etrailer. Thanks for stopping by.
Ratings & Reviews

These work great! Perfect for mounting J-bars to carry our kayaks. We've already used them for over 30 trips with our kayaks, and they are still like new. e-trailer always provides expert help in making sure I am getting exactly what I need. I am a loyal repeat customer.
These feet are easy to use and go well wit the Inno system. I was worried since my car did not come with any roof racks, but this is the solution to haul things on my roof. They work well and are very secure.
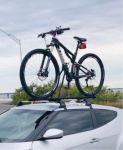
I have had countless bike racks over the years and this is by far the best system I have ever had. Fits like a glove on my F150. Easy to install, looks great and the bikes do not move when on the roof.
These are made perfectly for your vehicle. They are very secure when combined with the other Inno products. No worries of the rack system coming off. Using them to transport kayaks using kayak holders.
These fit the car along with the other Inno items perfectly. They are very secure when combined with the other Inno products. No worries of the rack system coming off. Using them to transport kayaks using kayak holders.
Great Fit for my 2017 Jeep Patriot. Easy install and looks great!
I just received and instilled my rack system. Time will tell, but my initial reaction is that of disappointment with the quality of the system, considering what I spent. The cross bars seem to be plastic, and the end caps on the cross bars seem to be plastic and covered with a faux metal chrome. I am curious to see how well this system holds up to the hot Florida sun. The positive is that I like the general shape of the aero crossbars, and they are relatively quiet when I am driving.
Tule and Yakima did not have a rack for my Nissan murano. So it was a blessing to find the immo rack. It seems like it can fit any car model. It's strong and secure. I feel my equipment will be safe with this rack.
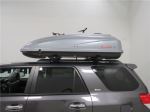
Started assembly last summer and finally completed installation this spring. Directions took a lot of attention to detail but were adequate. Rack went on car securely and looks great. Have attached kayak rack and a roof pod and both worked flawlessly. Would definitely recommend.
Purchased with the, "Inno Through Feet for Aero Crossbars," for our 2017 Sienna. Pretty simple to install, maybe 20minutes after reading instructions. Seems solid.
Easy to mount and use. Very sturdy aswell. Measurements are a bit off on width adjustment.
This kit does not fit well. All measurements have been double and triple checked down to the millimeter. The lock on the covers interfere with the hooks. You have to apply so much pressure to get it to close that it makes the rack come loose. Not very satisfied
thanks to Adam for help and competent approach. Adam listened impeccably and in the shortest possible time helped to deliver the goods I needed
etrailer was the only vendor who had the custom fit roof rack feet I needed for my vehicle. I was trying to put a roof rack onto a Dodge Durango SRT...not a typical vehicle for this accessory! I looked everywhere for a suitable roof rack and thought I was settling by ordering the Inno kit from etrailer. I could not have been more wrong! I am so happy with the purchase!
One was extremely hard to get on compared to the others (not sure if it had some rough machining or something), but once all we’re on, all was good
Waste of money. Most annoying couple hours spent in a long time. Extremely disappointed. Does not fit well. Not exactly a cheap option, but a cheap option in terms of fit and engineering. The instructions online and in the kits do not agree. But there is no helping the design. Plus there are no universal set of instructions--they are all individual items for the fit kit, the bars, etc. But a reasonably inclined person can figure it out so no big deal, but the engineering design is garbage--requires precise measurement yet the design is such that exact measurement is impossible due to the design.
Additionally, the parts are low quality Either low density plastic or easily stripped bolts. Even when as precise as possible, I wouldn't trust it with my kayak. What a mistake. Do yourself a favor and get a Yakima trailer or similar. It isn't that much more money in the scheme of things and then it isn't tied to your car. Can add a hitch to most vehicles anyway.
I upgraded to these Aero Crossbars hoping it would mean a quieter drive with less wind noise. I am so glad I did. There is not noise at all with these bars. I use them with my roof cargo carrier and I don't even notice it is there. These bars are even strong enough to haul my canoe. I am very pleased with them.
Great racks. High quality parts. Fit perfectly. Went together easily.
Worked like a charm. My daughter and I completed a 10K mile, 35 day camping trip around the USA.
Installation was a little tricky but once the "feet" were attached to the roof and the bars properly spaced, everything wrapped up very well.
There is no noticeable wind noise with these installed.
I bought these as part of a kit with 60" Aero bars and the appropriate kit for my 14 Flex. I spent probably an hour and a half double checking my measurements and getting them torqued down properly. I spaced the bars on top of the car just a little wider than proscribed because I was planning on carrying 4x8 plywood, and it looked better to my eye. One thing to watch for: The instructions for the car-specific kit (in my case INK263) show the foot spacing measurements for a square bar, and the measuring point for these feet and Aero bars is different. That measurement point is indicated in the instructions for the feet, not the kit. Same numbers, just different reference point. Otherwise, they look good and are rock solid.
We recently purchased 2 kayaks & Thule roof racks from our local outdoor store.
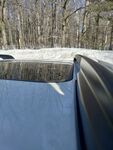
After waiting 2 weeks for our roof racks and J bars to come in we found that the Thule racks did not fit our 2017 Lincoln MKX and they didn't make any racks that would. The vehicle does not have roof racks and has a moon roof.
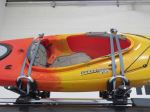
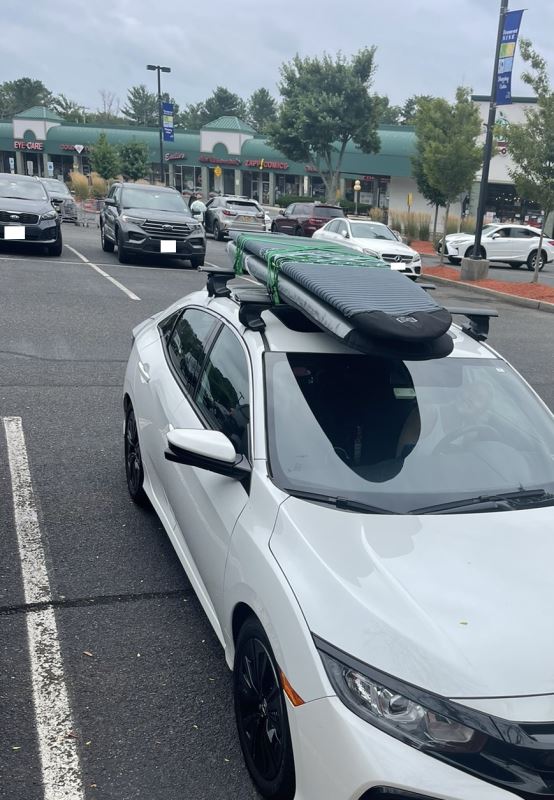
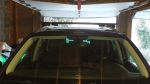
After a couple of days searching the internet we discovered etrailer.com. We found the Inno roof racks, but still was not sure they would work. We spoke to a repesenative and he assured us that the racks we chose would fit and the Thule J bars we did return would also work. As you can see by the photos 2 days later we were happy Kayakers.
The Inno roof rack is an excellent product and etrailer.com provides exceptional service with videos, email, chat and phone. I bought this roof rack for my 2008 Ford Edge because because there is enough clearance for the moon roof. I use it to mount a 600W solar system for rustic camping instead of a noisy generator. I wish I'd taken a photo... I won't be mounting it again until mid-August 2024.
Very nice quality, made in Japan. Easy to install using the Inno XS150 base stays. The 51" was a nice size for my 2015 Touareg. Many of the manufacturers recomment wider (53-54"), but I like the narrower profile. Unfortunately, the Aero design still creates a slight bit of wind noise at highway speeds, and it gets worse if the sunroof is raised (vent). I like the soft rubber T-channel material which allows the accessories to mount without cutting the material. I also like the slightly arched shape.

Do you have a question about this Roof Rack?
Info for this part was:
At etrailer we provide the best information available about the products we sell. We take the quality of our information seriously so that you can get the right part the first time. Let us know if anything is missing or if you have any questions.



















Thank you! Your comment has been submitted successfully. You should be able to view your question/comment here within a few days.
Error submitting comment. Please try again momentarily.