
To see if this custom-fit item will work for you please tell us what vehicle you'll use it with.
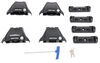
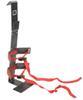
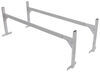
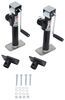
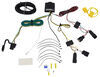
This custom fit kit lets you mount 4 Rhino-Rack 2500 legs to your vehicle with a naked roof. Clamps mount to legs with bolts. Includes 4 clamps and 4 pads.
Features:
Specs:

California residents: click here
Videos are provided as a guide only. Refer to manufacturer installation instructions and specs for complete information.
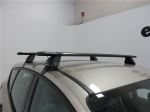
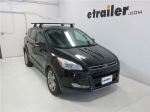
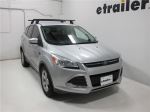
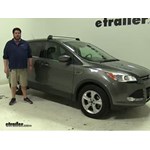
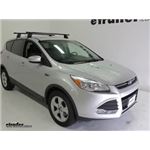
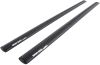
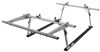
Today on this 2014 Ford Escape we're going to be test fitting the Rhino Rack Vortex Aero Crossbar Roof Rack System, from Rhino Rack. Part numbers RRVA137S-2, which are the crossbars. Part number RRRLKVA, which are the legs, and then part number DK375, which are the clamps, which attach it to your vehicle. Now as you can see, we have the front crossbar already installed. Let's go ahead and show you how the rear one goes into place. We have it set up on a table here and one side of it is already put together. Now when you get the kit, it's going to come with the bars, the legs, and it's going to come with these 2 covers here, which are lockable, as well as the keys to lock them.
You're going to have this tightening tool that comes with it, as well as the foot pad, or excuse me, the leg pad, and the clamp itself. Okay. I'm going to go ahead and flip this upside down so it's a little bit easier for you to see. Now they're also marked on the inside here, this is the rear left, and this is the rear right. Now we're first going to go ahead and put on the leg pad and you want the aero on this facing forward. There we go.
Then we'll take our clamp and put that into place as well. I'm going to go ahead and flip this back over. Undo the screw here. Place the screw through our clamp, and just loosely install it for now because you're going to need this loose when you put it onto the vehicle. There we go. Now we'll go ahead and move over to the car and open up our rear doors.
Go ahead and take our crossbar, put it up and over, just kind of generally set it into place for now. Looks like this side can come over just a little bit. Okay. Next we'll go ahead and set our crossbar spread. In this case it's going to be 70 centimeters.
I have to get my roll tape here, excuse me. That's going to be from center to center. Repeat this on the other side. Okay, this should be good. Okay, now we can loosely tighten them up. We'll take our tightening tool, just get them loosely fit up against the door sill here first, like so. Now we'll go ahead and make about 5 turns each side until it's completely tightened down. I'd like to point out something, too. I kind of run through this on the other side there. When you're tightening up these clamps you want to make sure the clamp comes between these 2 spaces here and you're not tightening up against that because you don't want those to break. Then when these things are actually tightened and torqued where they need to be, the tool here will actually become straight while you tighten it, instead of curved like it is now. It looks to be good. We'll go ahead and put our covers on now and lock them up. Put this in like so, lock it up. There you have it for our Rhino Rack Crossbar Roof Rack on our 2014 Ford Escape. .

Do you have a question about this Accessories and Part?
Info for this part was:
At etrailer we provide the best information available about the products we sell. We take the quality of our information seriously so that you can get the right part the first time. Let us know if anything is missing or if you have any questions.


Thank you! Your comment has been submitted successfully. You should be able to view your question/comment here within a few days.
Error submitting comment. Please try again momentarily.