
Thule WingBar Evo Roof Rack for Raised Rails - Aluminum - Black - Qty 2

 Arrives before Christmas

excluding Hybrid
Will this fit?
To see if this custom-fit item will work for you please tell us what vehicle you'll use it with.
- All Info
- Reviews (14)
- Q & A (0)
- Videos (1)
- Photos
Thule Roof Rack - TH45ZA
- Aero Bars
- 60 Inch Bar Space
- Thule
- Black
- Overhang
- 2 Bars
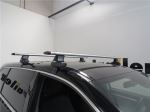
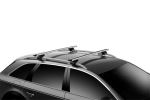
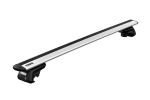
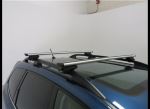
This Thule roof rack lets you carry cargo and gear on your vehicle. Aerodynamic crossbars with split rubber strips in top channels work with channel-mount and clamp-on accessories. Installs to raised rails on your vehicle's roof.
Features:
- Complete roof rack system includes 2 WingBar Evo crossbars and 4 Evo Raised Rail feet
- Aero-style crossbars work with accessories that mount in the top channels or clamp around the bars
- Compatible with most bike, watersport, snow, and cargo carriers
- Top channels with split strips let you easily slide accessories into the tracks - no trimming required
- Strips help reduce wind noise and vibration while you're driving
- Thule One-Key System locks (sold separately) deter theft of the rack and channel-mount accessories
- Custom installation to the raised rails on your roof
Specs:
- Crossbar dimensions: 60" long x 3-1/8" wide x 1" tall
- Top channel dimensions: 3/4" wide x 1/8" tall x 3/8" opening
- Weight capacity: 165 lbs
- Always observe your vehicle's maximum roof load capacity
- Color: black
- Construction: aluminum
- Limited lifetime warranty
711520 Thule WingBar Evo 150 Aluminum Crossbars - Black - 60" Long - Qty 2
710405 Thule Evo Raised Rail Roof Mounted Railing Foot Pack - Qty 4
Installation DetailsCalifornia residents: click here


Videos are provided as a guide only. Refer to manufacturer installation instructions and specs for complete information.
Video Transcript for Installing the Thule WingBar Evo Roof Rack on a 2022 Nissan Armada
Hi, I'm Matt with etrailer. Today we're gonna talk about the Thule roof rack on our 2022 Nissan Armada. Now this can be a great option if you're looking for something that's gonna be really easy to work with and is gonna look good on top of your roof. So let's check it out. Now, something I do recommend doing with these is just putting in your vehicle's information into our fit guide to make sure you get in the right one, 'cause you can get this in a couple of different variations. Now the one we have today is gonna be the raised rail option.
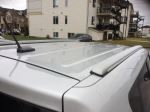
And why that's important is 'cause the Armada comes with that raised rail. And the way you can tell if you have that or not is if you put your hand underneath here, and as you grab onto this, you know you got it. Now what I think really stands out about this one today, or really any type of roof rack, is the ability to load up your roof, 'cause we have a lot of space in real estate here. And I like using this instead of the back of a vehicle because, let's say, you got a trailer that you're pulling behind you, or even a cargo carrier, that's really extending the footprint of your vehicle. So if you're trying to get into those tight spots, like a parking lot, that's gonna be a lot tighter to do, especially with this already large vehicle.
So with the vehicle already being large, you might as well use a real estate on top of the roof. So today we're gonna be focusing on how this roof rack interacts with a vehicle. And this is gonna come in two pieces. So up top, we're gonna have the crossbar. You can put gear on here one of two ways.
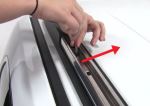
You need to have clamp-on accessories that grabs onto the rail. This is gonna be a fairly standard one, so most of them should work with this. And then here at the very end, if I flip this tab over, this will gain access to this T-channel, which you can mount accessories like this too if you don't wanna go with the clamp-on style. I like this 'cause this is really easy to work with. Other ones out there, typically you have to take this off completely.
This is taking a few steps out of the equation. Now underneath it, we're gonna have the actual towers. And with these towers, they're gonna have this hole here. You can put the plastic lock core that comes with your kit in here, or you can put a metal lock core. That's one I would suggest investing in. You can actually find those on our website. And why I recommend that is 'cause this is a fairly nice roof rack, you don't want that going anywhere. And you can also get this keyed-alike with your other Thule accessories. Underneath there, you can see what's here. There's gonna be a bolt that tightens it down into place. And this does a fairly good job, because when we look at how's it grabbing onto this railing here, we don't have any glaring gaps. And that's nice 'cause, one, it looks better, and two, it won't cause any wind noise. Now let's get a couple measurements to see how this is sitting on here. So the first one I'm gonna get is gonna be how high it sits up. So going from our rails here to the top of the crossbar, that's gonna be a little bit under three inches, which is a pretty good height. I still suggest getting the total height of your entire system. So what that's gonna be is your railings, your crossbars, and any gear that's sitting on top of them, get that measurement so you know if you're can make it under a low clearance spot like a garage. Now the next one we wanna measure is gonna be the clearance underneath our rails, and that's gonna be about 2 1/2 inches. That's plenty of clearance for any type of more bulky clamps that get on here. Now if your vehicle has a sun roof on the very front of it, then definitely take that into account because that might go up and make contact with something over here. But like I was saying earlier, the Armada has a ton of real estate. Right now, we're just using the front section of here. This is gonna have a crossbar spread of roughly 28 inches. So that's gonna be compatible with most gear out there. If we needed a wider one, we simply just move this back to the second section, over here. Or if I needed to pull the whole kit back some, I have the room to do so. Now, how much can you put on it That's really gonna come down to the weight capacity. It's gonna have a pretty sturdy weight capacity, but also check what your vehicle's roof is ready for. You can find that in your owner's manual. Then go from the lowest rated component so you don't damage anything. Now, in my opinion, I think this is a solid choice for what I was talking about earlier. One, it looks good on top of our roof, and it's just easy to work with. Especially when you're going out on a trip, you don't wanna have to fuss with something for another extra 20 minutes before you actually get out on the road. Now another option that's also pretty easy to work with is gonna be the Rhino-Rack roof rack. Now it's gonna be a little bit more low profile than this one. But for me, I personally just like the look of this one a little bit more, but it just comes down to aesthetics at that point. Now when it comes down as you're getting this on here, it's a pretty simple process. It only takes maybe about 10 minutes if you know how to do it. But if you do go with this, let's know how it's working for you in a review if it really is that easy to use or not. But with that said, let's jump in into the install. So where we're gonna start off is just laying everything out. So I'm gonna have the two towers, their end caps, the tool that comes with it, and the measuring tape. And we're actually gonna have the crossbar itself. Now I only have one set here. I already got the other one on the roof, but it's gonna be the same process. So where to start is just by flipping this over, so the underside is showing up. We're going to come to one end. We're gonna remove this end cap by pressing on that tab, pulling on it, grabbing a tower. You have these tabs at the very top of it and push it in this orientation where we have the head of this bolt facing out. What'd you have it like that, put you in cap back on, and repeat that on the other side. And now we can put it on top of our roof. Something I'll do though, just double check the gaps in between your clamps so it'll as you fit around your rails. And if they don't, you can just loosen up with your tool, and now get it up there. When you're putting it up there, you wanna make sure that fixed side is facing forward, thin side behind us. You're gonna place it on a roof by lining it up with your rails. If you can't really see what you're doing, just do it slowly and get one side on there, and then go to the other side and adjust it. And once you get both crossbars up here, what I like to do is make sure we have a good crossbar spread. And what I'll do is make sure they're even too. What I'm doing is just bring this to the edge of this bar that holds up your rails on either side. That's gonna work for me. But again, just double-check that this spread is gonna be compatible with your gear. And then the second measurement I like to make sure of is our overhang. So make sure this is about the same one either side. Mine is. So I'm just gonna come back over here with our tool and then tighten this down. And I'm gonna just do this a little bit at a time, going back and forth until we have this fully on. Now you're eventually gonna get to the point where you're gonna have a lot of resistance to this. You're gonna hear that click a couple times. Once you hear that, you know it's gonna be fully tighten down. Just make sure you're doing that to the other side. And from here, I'd have to give it a good shake test, make sure it's not gonna go anywhere. And if it feels good, we can load it up and take it for a ride. Now if you guys have any other questions, let us know here at etrailer. And again, I'm Matt, and thanks for watching.
Ratings & Reviews
4.9
14 reviews
See what our Experts say about this Thule Roof Rack
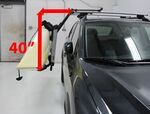
- Are Thule AeroBlade or WingBar Evo Bars Compatible With Older Thule Hullavator?The Thule AeroBlade bars are being discontinued, but if you already have them they will work with the Thule Hullavator Pro Kayak Carrier and Lift Assist with Tie-Downs # TH898 (even if it is an older model). That is provided the bars are long enough. The Hullavator needs at least 4-8 inches of crossbar length beyond the feet of your roof rack to ensure clearance on the side of your vehicle when lowered. If you don't already have the crossbars, I recommend the new Thule WingBar Evo...
view full answer... - Thule Roof Rack that Fits Jeep Wrangler With One Touch Roof We've had customers come back and tell us that the 8 inch Rapid Gutter Feet for Thule Crossbars # TH33ZR are the perfect feet to use on the Wranglers with the One Touch roof as it gives the perfect amount of clearance for the roof to still open. Then for crossbars you'd also need the part # TH711520 and you'd be set.
view full answer... - Thule Roof Rack Availability for a 2019 Toyota Highlander LE Without Roof RailsYes, we do have the ability for you to add all of the parts for the Thule AeroBlade roof rack for your 2019 Toyota Highlander with one click of the button! I have added links to both the Black option and the Silver option with takes you directly to the product page. Simply click the "Add to Cart" button and it will add the 60" bars # TH711520 (Black) or # TH711500 (Silver) along with the Rapid Traverse Foot Pack # TH480R, and Fit Kit # THKIT1803 for a complete roof rack system! If you...
view full answer... - Looking For Thule Evo Raised Rail Feet And Crossbars For 2024 Subaru Outback WildernessHello Shannon, thanks for reaching out. We do have the 710405 Thule Evo Raised Rail Roof Mounted Railing Foot Pack as part # TH710401. We do not offer the 59" ProBars. I recommend instead going with the 60" WingBars part # TH711520 as these are also compatible with the Hullavator.
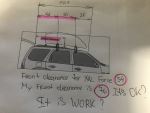
view full answer... - Can 60 Thule AeroBlade Bars be Used on a 2015 Jeep Grand Cherokee with the E Group PackageTo determine if you can use the 60" WingBar Evo Crossbars, part # TH711500 or part # TH711520, will fit on your 2015 Jeep Grand Cherokee you first need to measure the center to center distance between the mounting holes where the Podium feet will sit. I have attached a picture showing where you want to measure. If this measurement falls between 46-1/2" - 59-3/4" then the 60" bars will fit. For your E Group package you also need the Podium Foot Pack # TH460R and the Fit Kit # THKIT3142 to...
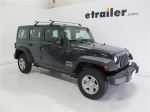
view full answer... - Installing Thule Gutter Feet on 2013 Jeep Wrangler Unlimited Hard Top and Two KayaksThe Thule Rapid Gutter Feet for AeroBlade Crossbars are compatible with your 2013 Jeep Wrangler Unlimited (4 door) hard top. The feet need to be 20 inches apart on center. You can see in the attached photo that the front rail can be centered above the front doors if desired. The max capacity for this system is 165 lbs. If you don't already have crossbars, the 60 inch Wingbar Evo # TH711520 is a great option. You can also add locks to secure your rack using # TH450400. These locks...
view full answer... - Can XXL Thule Roof Cargo Box Fit on Roof of 2015 Dodge Durango R/TI checked with Thule and you can install the Thule Force XXL cargo box # TH6359B on the roof of your 2015 Dodge Durango with a naked roof currently once you install a roof rack. This is a longer box at 90-1/2 inches but due to the longer length of your roof it would not hang over the glass. For that I recommend the Thule Wingbar Evo part numbers # TH711520, # TH480R, and # THKIT1616 which gives you a great looking and aerodynamically shaped roof rack confirmed as a fit for your vehicle....
view full answer... - Thule Wingbar EVO Roof Rack that Fit 2019 Dodge Grand CaravanThe Thule WingBar Evo part # TH711520, # TH480R, and # THKIT1043 is a confirmed fit for your 2019 Dodge Grand Caravan. The overall weight capacity of the roof rack is 165 lbs.
view full answer... - Will Thule Hullavator Pro Fit 2021 Hyundai Palisade Factory Roof RackHi Ben; unfortunately, the Thule Hullavator Pro # TH898 will not fit your Hyundai factory roof rack. The Hullavator requires crossbars that extend 4" - 8" beyond the feet for proper clearance so you will need to put on an aftermarket rack to meet these requirements. Sticking with Thule, I recommend the WingBar Evo rack. You will need the Evo Flush Rail Feet # TH710601 and the Fit Kit for Thule Evo Flush Rail Roof Rack Feet # TH83CE. Thule typically recommends the 50" bars but they won't...
view full answer... - Parts Needed to Add a Roof Rack on a 2018 Honda RidgelineIf you would like to stick with the Thule theme that you have going then I recommend using a Thule roof rack system that uses the AeroBlade bars. For your 2018 Honda Ridgeline you will need 60" crossbars which is part # TH711500 for Silver or part # TH711520 for Black along with the Rapid Traverse Foot Pack # TH480R, and the Fit Kit # THKIT1811. The WingBar Evo bars have an aerodynamic design that cuts down on wind noise and drag compared to traditional bars. If you prefer the more traditional...
view full answer... - Thule Roof Rack that Fits 2018 Ford F-150 with SunroofI checked with Thule and for your 2018 Ford F-150 their roof rack like the Aeroblade kit part # TH711520, # TH480R, and # TH145177 do not have any fit exclusions for versions of the truck that have the sunroof so this will fit and work great.
view full answer... - 2024 Ford Explorer Roof Rack Recommendation to Fit with Panoramic Roof and Raised RailsWe have a few options compatible with the raised rails and panoramic glass roof on your 2024 Ford Explorer, and out of those options I recommend going with the Thule WingBar Evo system which includes the following parts: - 60" WingBar Evo Crossbars # TH711520 - Evo Raised Rail Feet # TH710401 - Lock Core Kit # TH450400 (optional) These are easy to install and high quality which is why I really like to recommend it.
view full answer... - Best Low Profile Roof Rack and Best Roof Bike Rack for a 2018 GMC YukonThe Rola Sport REX Series Roof Rack 59685 is a great roof rack but I have a different recommendation for you. The highest weight capacity roof rack that we have is from Rhino-Rack with a 220 lb weight capacity. Typically vehicles do not have roof weight ratings this high so you probably wouldn't be able to max it out anyways. I recommend going with the Thule AeroBlade Edge, parts # TH7604B-TH7604B and # THKIT4041 for black or parts # TH7604-TH7604 and # THKIT4041 for silver, for a few...
view full answer... - Roof Rack With Black Crossbars for Pace Edwards BedLocker Rails on 2019 Ford F-350Hi Michael; you can use the same fit kit # THKIT3101 and mounting feet # TH460R. However, the longest WingBar Evo is 60" # TH711520 which probably won't be long enough for your truck bed. That is why Conner originally chose the # TH713700 which are 79" long. For bars that are black I recommend switching to a Yakima setup. You will need the following: -Landing Pad 1 for Yakima SkyLine and Control Towers # Y00221 -SkyLine Towers for Yakima Crossbars # Y53TR -Yakima CoreBar Crossbars -...
view full answer... - Thule Roof Rack Options for Carrying Bike Rack on 2017 Ford F-350 Crew CabSounds like you're just needing a roof rack for your 2017 Ford F-350 so you can use your bike rack. We actually do have Thule options for you! You just need to use one of the 60" crossbar options listed below along with the Evo Clamp Feet # TH710501 and the Fit Kit # TH145177: 60" Crossbars WingBar Evo Black - # TH711520 WingBar Evo Silver - # TH711500 SquareBar - # TH712500 Don't forget to add lock cores for your roof rack with the 4-Pack # TH450400, or using the 6-Pack # TH450600 or...
view full answer... - Roof Rack Recommendation for 2019 Ford Explorer to Carry Two Thule Hullavator Kayak CarriersTo fit two of the Thule Hullavators # TH898 on the roof of your 2019 Ford Explorer with flush rails you'd want longer crossbars so that you can fit everything easily. So for that the Thule Wingbar Evo roof rack part # TH711520, # TH460R, and # THKIT3151 that has 60 inch long crossbars would be your best option. This rack is a custom fit for your Explorer, is a very high quality rack that is also easy to install.
view full answer... - Roof Rack Crossbar Spreads for a 2017 Infiniti QX80Each roof rack for your 2017 Infiniti QX80 will have its own specific crossbar spread that works best with your QX80. The range of crossbar spreads from the roof racks that we carry are from 45" to 47" from the middle of the front to the middle of the back crossbar. If you don't already have a roof rack on your QX80 I highly recommend going with the Thule WingBar Evo system. This option consists of the 60" WingBar Evo Crossbars, part # TH711500 for Silver or part # TH711520 for Black,...
view full answer... - Can Acessories Be Mounted To The Bottom Channel Of The Thule Wingbars?Hello James, interesting question. The Thule Wingbars like part # TH711520 do have a bottom channel, but this is only for mounting the bars to the feet. The bottom channel should not be used for mounting any kind of accessory since they are not rated to be used in this way. What accessory were you wanting to mount to the bottom of the bar? You piqued my curiosity since I have never been asked about this before.
view full answer... - Roof Rack for 2018 Jeep Wrangler JL Unlimited Hard Top to Carry Thule Hullavator Pro Kayak CarrierThere are a couple options for a roof rack on your 2018 Jeep Wrangler JL Unlimited with a hard top, from Yakima and Thule, with both allowing you to use the Thule Hullavator Pro Kayak Carrier and Lift Assist with Tie-Downs # TH898. The parts you need for the Yakima roof rack consist of: - Yakima JetStream Crossbars # Y00426 (Black) - SkyLine Towers for Yakima Crossbars # Y53TR - Landing Pad 6 # Y00226 The parts you need for the Thule roof rack consist of: - Thule WingBar Evo Crossbars...
view full answer... - Does Thule Roof Rack Fit Kit For Laredo Roof Rails on a 2015 Jeep Grand Cherokee Leak WaterThere are two variations of the flush rails on the 2015 Jeep Grand Cherokee. If the rails have a stainless steel strip that runs down the bars you have the Group E Laredo package and would need the Thule part numbers # TH7602-TH7602, and # THKIT3142. This roof rack setup does require threading an allen bolt through a bracket into the channel of the rack. I attached a picture that shows how all of the pieces should look when assembled and torqueing everything down. Without seeing a picture...
view full answer... - Recommended Roof Rack And Kayak Carriers For 2 Kayaks On 2014 Honda Odyssey With Factory RailsThe roof rack I recommend for your Odyssey is the Thule WingBar roof rack system. This system features the 60 inch WingBar crossbars which are some of the quietest on the road. The roof rack has a weight capacity of 165 lbs, but you will want to make sure you do not exceed the roof weight capacity of your Odyssey. To order this roof rack you will need part # TH710401, and part # TH711500 for silver or # TH711520 for black. If you do not have carriers for your kayaks I recommend using...
view full answer... - Recommended Roof Rack For 2014 Kia Soul with Side RailsThere are 3 different roof options on a 2014 Kia Soul. There are the ones with no rails, there are others with factory side raised rails, and there are flush mounted rails. I know that you have one of the two rail options based on your description. If you have the rails that have space under them, I recommend the Thule WingBar Evo Load Bars - 47" - Qty 2 # TH711220 and the Evo Railing Foot Pack # TH710401. Then the locks # TH450400. If you have the flush rails, I recommend the Thule...
view full answer... - Recommended Crossbars and Feet for a LEER Camper Shell with Thule TracksOk Sean, so I was able to track down some info about your LEER camper shell and it looks like you ordered it with the Thule tracks already installed. So, if that's the case, you can then use either the Thule Tracker II feet with the Thule WingBar Crossbars # TH711520, or you can use the Rhino-Rack Vortex Aero Crossbars # RRVA165B-2 with the Rhino-Rack Quick Mount Legs for Vortex Aero Crossbars # RRRLT600 for a more cost-effective non-Thule setup.
view full answer... - Parts Needed To Install Thule WingBar Evo Crossbars On a Leer Truck Cap With Thule Top Rack TracksTo mount feet and crossbars to your Leer truck cap with the Thule Roof Mounted Top Rack System # THTP54, you will need to select the correct length cross bars. The Thule WingBar Evo Crossbars are available in the following lenghts. 43" # TH711120 47" # TH711220 50" # TH711320 53" # TH711420 60" # TH711520 Then you will need the Rapid Podium Feet # TH460R and Fit Kit # THKIT3101 to fit the Thule track. The Thule One-Key System Lock Cylinders Kit # TH450400 will contain 4 lock cylinders...
view full answer... - Recommended Roof Rack and Rooftop Cargo Box for 2017 Volvo XC90 With Flush Mounted RailsI would be happy to get you exactly what you need. To do so, I would first need to know if your 2017 Volvo XC90's roof has side rails on top that are raised or if they are flush to the roof (basically, if there is a space underneath the rails on top of your roof or not). If you can get back to me with that info I can get you exactly what you need.
view full answer... - Roof Rack for 2007 Toyota FJ Cruiser to Carry Thule Hullavator Kayak CarrierFor your 2007 Toyota FJ Cruiser that has factory raised side rails you'd need a set of crossbars that extend past the feet of the rack like the Malone AirFlow 2 rack part # MPG216 which is a fit for your vehicle and would work great with the Thule Hullavator part # TH898 that you mentioned.
view full answer... - Thule Square Bar Roof Rack That Fits A 2022 Subaru Outback With Factory Raised RailsFor your 2022 Subaru Outback Wagon, I recommend the Thule SquareBar Evo # TH712300, with the Evo Raised Rail Feet for Thule Crossbars # TH710401. These bars have a maximum weight capacity of 220-lbs, and measure 47" long, 1-1/4" wide, and 7/8" tall. I recommend checking your vehicle owners manual for the maximum weight capacity that your roof can hold, and use the lowest rated component between the roof rack, and your roof, to ensure you aren't going to overload your vehicle.
view full answer... - Looking For Thule Evo Raised Rail Feet And Crossbars For 2024 Subaru Outback WildernessHello Shannon, thanks for reaching out. We do have the 710405 Thule Evo Raised Rail Roof Mounted Railing Foot Pack as part # TH710401. We do not offer the 59" ProBars. I recommend instead going with the 60" WingBars part # TH711520 as these are also compatible with the Hullavator.
view full answer... - Recommended Roof Rack For a 2024 Subaru Outback Wilderness With Factory Roof RailsI recommend the Thule WingBar Evo roof rack for your 2024 Subaru Outback Wilderness. For this you will need the Crossbars # TH711320 and Feet # TH710401. I prefer this system as the crossbars use a 2-piece channel seal which allows you to easily add channel mounted accessories without having to pull out or trim the single piece seals. The Thule One-Key System Lock Cylinders # TH450800 will provide you with 8 keyed alike lock cores. Four of these will be used to secure the roof rack to...
view full answer... - What Locks Do I Need for My Thule Hullavator?For locks to ensure that your Thule Hullavator # TH898 is secure on your vehicle, you will need the Thule One-Key System Lock Cylinders # TH450200. This kit comes with 2 lock cylinders, 2 keys, and a universal master key that is used if you ever need to change out your cylinders. Also, depending on what year Subaru Impreza you have, there also may be an option for you to add Thule same-key lock cylinders to your SquareBars as well. Feel free to respond to this answer with your vehicle...
view full answer... - Will the Malone AirFlow2 Fit on My Dark Gray Rails on My 2020 Jeep Cherokee? I confirmed with my tech at Malone that in order for the Malone AirFlow2 Roof Rack # MPG215 to fit onto your 2020 Jeep Cherokee Trailhawk, your vehicle's roof must be equipped with non-black raised factory rails. I confirmed with Malone that they say that the crossbars will not work with solid black raised rails. Depending on how dark of gray your rails are, it is possible that those rails are considered black. In order to make sure, please feel free to respond to this answer with a photo...
view full answer... - 2024 Ford Explorer Roof Rack Recommendation to Fit with Panoramic Roof and Raised RailsWe have a few options compatible with the raised rails and panoramic glass roof on your 2024 Ford Explorer, and out of those options I recommend going with the Thule WingBar Evo system which includes the following parts: - 60" WingBar Evo Crossbars # TH711520 - Evo Raised Rail Feet # TH710401 - Lock Core Kit # TH450400 (optional) These are easy to install and high quality which is why I really like to recommend it.
view full answer... - Roof Rack Fit for 2013 Volkswagen Touareg With Roof Rails and Sun RoofThere is definitely a solution for you, though it could be that you have a sun roof and not a moon roof. This matters in terms of fit, because a moon roof slides into a cavity in the roof and does not extend above it, while a sun roof generally does extend above it. Due to this, the rack you mentioned, Rhino Rack # RRVA126B-2 and # RRSX022, would not work for your 2013 Volkswagen Touareg because the rack should not be used with vehicles that have a sun roof. Additionally, each of the Yakima...
view full answer... - Best Roof Rack with Silver Aero Crossbars for a 2017 Volkswagen TiguanFor your 2017 Volkswagen Tiguan with the raised factory side rails, I recommend using the Thule WingBar System which is composed of part # TH711200 for the crossbars and part # TH710401 for the mounting feet. As you requested, this system contains silver crossbars that have an aero shape which will help to reduce wind drag and noise. The crossbars also mount atop the feet which will provide you with more clearance between the crossbar and roof in comparison to the systems that attach directly...
view full answer... - Recommended Thule Crossbars and Feet Kit for a 2024 Subaru Crosstrek WildernessI checked with Thule and the parts you are looking for, for your 2024 Subaru Crosstrek Wilderness, are listed below: Thule WingBar Evo Crossbars item # TH711320 for Black or item # TH711300 for Silver Evo Raised Rail Feet for Thule Crossbars item # TH710401
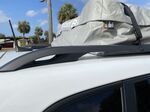
view full answer... - Will the Sunroof Support a Fully Loaded Thule Cargo BagVehicle manufacturers do not recommend placing any cargo directly on sunroofs. The glass was not designed to support additional weight. A better option for you would be to add crossbars to your factory side rails and use a roof basket and a cargo bag or a roof mounted cargo box. This would keep the load off of the sunroof and allow you to carry more weight. Based on your photo, it appears that you have a GMC Acadia. There are different roof rack options depending on the year of your...
view full answer... - 2015 GMC Terrain Roof Rack Recommendation for Thule HullavatorFor your 2015 GMC Terrain the roof rack I'd recommend for use with the Thule Hullavator part # TH898 is the Thule WingBar part numbers # TH711220 and # TH710401. This is a confirmed fit for your Terrain and will work really great with the Hullavator since Thule makes this too. The WingBars are aerodynamically shaped too which helps prevent wind noise. This configuration has been tested to work on your vehicle and with the Terrain so it will work really well overall.
view full answer... - Recommended Roof Rack and Canoe Carrier for a 2014 Jeep Wrangler Unlimited with Soft TopWe do have a roof rack that you can use to carry your canoe with your 2014 Jeep Wrangler Unlimited but you will need to remove the soft top to do so. The Thule Evo Raised Rail Feet # TH710401 will easily clamp around the roll bars on your Jeep once the soft top is removed and give you the ability to either use the 53" WingBar Evo Rails # TH711420 Black or # TH711400 Silver OR the 60" SquareBar Crossbars # TH712500. Simply put the feet on the crossbars at the correct locations and then...
view full answer... - Thule Roof Rack Recommendation for 2016 Mercedes GLE 350 with Raised RailsFor your 2016 Mercedes GLE 350 with raised roof rails I'd recommend the part # TH7503-TH7503 for an OEM looking crossbar roof rack with silver bars. These are a flush mount bar that won't protrude past the feet of the rack either. If instead you are looking for the longest bars you can use you'd instead want the part numbers # TH711420 and # TH710401.
view full answer... - Roof Rack, Basket, and Cargo Bag Recommendations for 2018 Volvo XC90For your application I recommend using the Thule WingBar Evo roof rack system with the Small Inno Roof Deck Platform Rack # INA510 and the Thule Interstate Cargo Bag # TH869. I've personally installed the Inno Roof Deck Platform Rack a number of times (see attached on a 2017 Nissan Titan) and it is pretty light (28.7 lbs) plus it is very easy to install. When it comes to your Thule roof rack the parts will vary depending on if your 2018 Volvo XC90 has the raised or flush rails: Raised...
view full answer... - Removing Thule Evo Crossbars From Feet on Ford Ranger to Mount on 2024 Subaru CrosstrekHI Kayla; are those Evo Feet? If they are, you need to remove the end cap from the WingBar Evo crossbars and then push in on the buttons on the foot to release it and slide it out. Check out the installation video below for the F-150 starting at the 3:30 mark. Once you remove the old feet you can use the # TH710401 to install the roof rack on your 2024 Crosstrek rails. I'm not sure what size bars you have on the Ranger but Thule does recommend the 50" bars # TH711320 for the Crosstrek.
view full answer... - Roof Rack Crossbar Spreads for a 2017 Infiniti QX80Each roof rack for your 2017 Infiniti QX80 will have its own specific crossbar spread that works best with your QX80. The range of crossbar spreads from the roof racks that we carry are from 45" to 47" from the middle of the front to the middle of the back crossbar. If you don't already have a roof rack on your QX80 I highly recommend going with the Thule WingBar Evo system. This option consists of the 60" WingBar Evo Crossbars, part # TH711500 for Silver or part # TH711520 for Black,...
view full answer... - Which Thule Roof Rack Rail Clamps Fit 2025 Subaru AscentHey John, Thule has their Wingbar Evo roof rack part number # TH52ZA as a confirmed fit for your 2025 Subaru Ascent. Just the feet of this rack are part number # TH710401. What crossbars do you have?
view full answer... - Could Inno Roof Rack Feet for Raised Rails be Used with Thule CrossbarsThe Inno roof rack feet like part # INXS350 can only be used with Inno crossbars. If you want to use Thule Wingbars you'd need to use the Thule raised rail foot kit part # TH710401 instead.
view full answer... - Recommended Roof Rack And Kayak Carriers For 2 Kayaks On 2014 Honda Odyssey With Factory RailsThe roof rack I recommend for your Odyssey is the Thule WingBar roof rack system. This system features the 60 inch WingBar crossbars which are some of the quietest on the road. The roof rack has a weight capacity of 165 lbs, but you will want to make sure you do not exceed the roof weight capacity of your Odyssey. To order this roof rack you will need part # TH710401, and part # TH711500 for silver or # TH711520 for black. If you do not have carriers for your kayaks I recommend using...
view full answer... - Recommended Roof Rack And Cargo Carriers For 2010 Honda Odyssey With A Sun RoofThe Rightline Gear Roof Cargo Carrier, part # RL100S30 will work great on the roof of your 2010 Odyssey. This cargo bag holds 18 cu ft of gear and will work with vans that have naked roofs, raised side rails, crossbars or cargo baskets. This bag measures 48 inches long, 40 inches wide, and 19 inches tall and is made of waterproof woven polyester. Although the bag is waterproof, it is always a good idea to make sure anything you carry in any cargo bag is sealed to keep moisture out. We...
view full answer... - Recommended Roof Rack For 2014 Kia Soul with Side RailsThere are 3 different roof options on a 2014 Kia Soul. There are the ones with no rails, there are others with factory side raised rails, and there are flush mounted rails. I know that you have one of the two rail options based on your description. If you have the rails that have space under them, I recommend the Thule WingBar Evo Load Bars - 47" - Qty 2 # TH711220 and the Evo Railing Foot Pack # TH710401. Then the locks # TH450400. If you have the flush rails, I recommend the Thule...
view full answer... - Recommended Square Bar Roof Rack Mounts For Ski and Snowboard Rack for 2007 Saab 9-3For your 2007 Saab 9-3 with factory rails, I recommend the Evo Raised Rail Feet for Thule Crossbars - Factory Raised Rails - Qty 4 # TH710401 which is compatible with the bars you mentioned, that are often simply referred to as square bars even though they are rectangular by measurement. I also recommend the Thule One-Key System Lock Cylinders - Qty 4 # TH450400 for increased security. The manufacturer suggests using 50 inch bars which have been discontinued with this system. You can...
view full answer... - Will Yaikima MegaWarrior Y07080-82 Fit 2025 Nissan Armada?Hello Phil, thanks for reaching out. The Yakima MegaWarrior Extra Large Roof Rack Cargo Basket # Y07080-82 can indeed fit a 2025 Nissan Armada, provided the vehicle is equipped with a roof rack with crossbars. If you are in need of a roof rack for your Armada, we do have options. The Thule Roof Rack # TH45ZA will fit the factory raised rails that come on the Armada. Or use the Yakima Roof Rack # Y77TB if you have the factory flush rails on the roof. Both of the roof racks I mentioned have...
view full answer... - Can I Mount a Cargo Carrier to My Factory Raised Rails on My 2021 Ford Explorer?Hello Jared, Great question! The cargo box won't be able to mount directly to your factory-installed raised rails that run front to back (please refer to the image I’ve attached). To make it work, you'll need the Thule WingBar Evo Roof Rack for Raised Rails - Aluminum - Black - Qty 2 # TH45ZA, which will attach securely to your factory rails. Once that's in place, you'll be able to mount the Thule Force 3 Rooftop Cargo Box - Large - 16 cu ft # TH67SA to your roof without any issues. Getting...
view full answer... - Recommended Crossbars for a 2012 Honda Pilot W/ Factory RailsHey Kathy, so from the three brands you're asking about you really only have options from Thule and Malone. Rhino-Rack does have a set of bars # RR82QE, but they are only an inch longer than the 135 cm bars you're saying won't work. So with that said, you can either go with the Malone AirFlow2 Roof Rack # MPG216 which are 58" long (5" longer than Thule's 135 cm bars), or the Thule WingBar Evo Roof Rack for Raised Rails # TH45ZA which are 60" long (7" longer than Thule's 135 cm bars)....
view full answer...
Do you have a question about this Roof Rack?
Info for this part was:


At etrailer.com we provide the best information available about the products we sell. We take the quality of our information seriously so that you can get the right part the first time. Let us know if anything is missing or if you have any questions.





Thank you! Your comment has been submitted successfully. You should be able to view your question/comment here within a few days.
Error submitting comment. Please try again momentarily.