


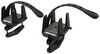
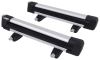
Durable nylon legs with built-in locks let you mount Sportz crossbars to your vehicle's factory flush side rails. Integrated handles tighten legs to rails for easy installation. Pair with 2 crossbars to create a complete roof rack.
Features:
Specs:

California residents: click here
Videos are provided as a guide only. Refer to manufacturer installation instructions and specs for complete information.
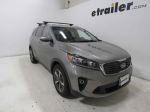
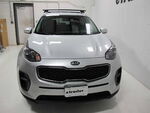
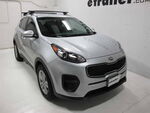
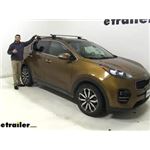
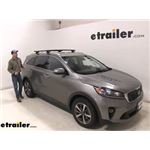
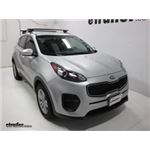
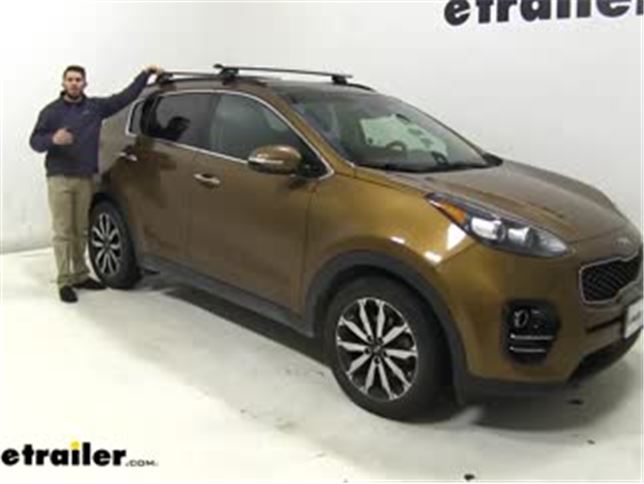
Colin: Hey everyone. It's Colin here at etrailer. And today we have a 2018 Kia Sportage. Now we're going to go and do a test fit of the Rhino-Rack Vortex Aero Roof Rack System. Now you can see that we have these mounted to our flush-mounted side rails of our Sportage. This is going to give us an opportunity to get some of our favorite rooftop accessories loaded up, whether we've got a bike rack, because we don't want a hitch mounted bike rack, maybe a kayak carrier, because we know that we probably can't fit a inside our vehicle.
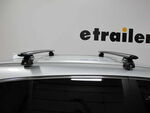
Maybe even a cargo box for those longer road trips, where you want to conserve on space inside the vehicle. You can get all those accessories mounted onto this crossbar system. Now on the top, we have our 49 inch long Vortex Aero crossbars. We have them in silver right here, but they're also available in black, so if you think that'll match your Sportage better, go ahead and check that out on our website.We have a nice elliptical shape to our crossbars. That's going to help cut down on wind noise and drag, especially if you compare that to a square or round bar roof rack system.
We also have this nice rubber strip up top. This is covering up that channel so that you don't have as much wind noise and drag, but that also means we can access it to insert some T-slot accessories in case you don't want to use any crampons. How you would do that, take your plastic key, unlock the end cap right there, pull it out. And then we have the rubber strip right here. And then all you have to do is pick the spot on your roof you want to mount it, you would pull this rubber stripping out and then cut that little spot out so your T-slot accessory can fit in there.
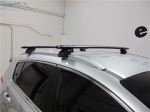
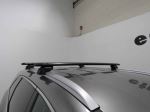
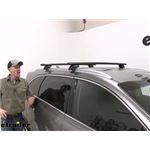
And then reinsert the strips right there.` And make sure you hold onto the spots that you cut out because you'll be able to take that off and get a new accessory. Then you can put this stripping right back where you cut it out. And we just put that end cap back on and we're good to go.Now between our crossbars and our flush side rails, we have these SRB legs from Rhino-Rack. Now these are actually pretty cool. This is a tool-free install and it's very easy.
All we have to do is pull up this handle right here. It's locked right now, which is a inaudible 00:01:59 to turn, so I can't pull that up. Key is included. Unlock that and from there we can pull up on this tab right there and that's our tightening handle. We can loosen it or tighten it to our desired location. We can tighten it a little more even if we wanted to, get it back and lined up right there. Folds down to a nice flush design. And then we just take our key and lock it up when we're done.Now on the side right here that's going to be climbing onto your flush side rails, it's all rubber so you're not going to have to worry about it scratching your flush side rails or anything like that. And it actually uses the fixed points that are already on the backside of your flush side rail. That eliminates the need to have to measure your crossbar spread. That's going to do that for you. So you just utilize one of those two holes on the front and the back and then get it installed and tightened down.Now I want to go over a few measurements for you guys. First from the top of our roof to the bottom of our Vortex bar, it's going to be 2-1/2 inches. Now you want to keep in mind, that's plenty of space to get your clamp on accessories underneath your crossbar without risking damaging the top of your Sportage. Now from here, we're going to go from the top of our flush rail to the top of our crossbar. That is three inches. That's a measurement you want to keep in mind because you have that height added to your roof onto the flush side rail. So for any low clearance situations, you do want to be mindful, although with the Sportage, it is a smaller crossover SUV so you probably aren't going to encounter that too much.And as you can see, we can open up our sun roof still. There's still plenty of space underneath the crossbar, but you do want to keep in mind if you have some clamp on accessories that do extend pretty low on your crossbar, that may make contact right there. But for now, while it's empty, we can still open up our sun roof.Now this roof rack does have a weight capacity of 165 pounds, but you always want to check your vehicle's owner's manual. Make sure your roof can handle that weight before you load it up. When I was going over some of those features, let's show you guys how to get this installed onto your Sportage. Now like I said, install is very easy. All I have to do is take our foot and then slide it into this bottom track right here. You see that tab right there just goes right inside. There we go. Slide it in. And then we'll just take our end cap and put that on. Then you also want to make sure you get your end cap key that I showed you earlier and then lock the end cap on.Now we're ready to get it on our roof. And so what we'll do is raise it over top of our roof and get it installed. Now one thing I do want to point out is that, like I said earlier, we have this little part right here, this little tab that's going to go into the slots on the backside of our flush side rails, so make sure you line it up with those.Now we're going to tighten it up and then we'll go to the other side and do the same thing. Again you can see these fixed points right here. We just need to get this plate lined up with that. There's a little tab that goes right in. Once you get that in, you can tighten up both sides. And then when you're done, I always like to give the roof rack a really good shake, make sure everything is secure. If you can see our entire Sportage is moving around and this thing's not going to go anywhere. We're ready to load up a favorite rooftop accessories, and then hit the road.Thank you all for watching. And I hope this information helps you out, but that's going to do it for our test fit of the Rhino-Rack Vortex Aero Roof Rack System on our 2018 Kia Sportage.


Do you have a question about this Accessories and Part?
Info for this part was:
At etrailer we provide the best information available about the products we sell. We take the quality of our information seriously so that you can get the right part the first time. Let us know if anything is missing or if you have any questions.


Thank you! Your comment has been submitted successfully. You should be able to view your question/comment here within a few days.
Error submitting comment. Please try again momentarily.