


Thank you! Your comment has been submitted successfully. You should be able to view your question/comment here within a few days.
Error submitting comment. Please try again momentarily.


Replaces the mounting hardware for your Searsbox cargo box (SP-20SV).
Features:
Videos are provided as a guide only. Refer to manufacturer installation instructions and specs for complete information.
Ellen: Hey everybody. Ellen here at eTrailer.com. Today we're going to be taking a look at the replacement hardware kit for the Searsbox cargo box. This is a replacement hardware kit from Thule, and it's going to come with everything you see laid out on the table here.We'll get four of our larger plates. Four of our smaller plates. Four U-bolts with the threaded ends.
And then eight wingnuts. And also, a sheet of vinyl stickers.The vinyl stickers help to plug up any holes for unused mounting holes. So any kind of hole that you have in your cargo box that isn't being used, this can help to seal that up and prevent any leaks from happening. We'll get 15 of those little stickers. I'm going to set these off to the side, because my fan tends to blow them away.
But they do come with your kit.The more important part, though, will be our brackets. So everybody wants to know how big these are. Will they fit my cargo box And like I said, this does fit the Sears Box cargo box. But it does work for a lot of different cargo boxes out there. Especially if it has that style that has the U-bolts and clamps to get it attached.So this bigger plate here measures about 5 1/2" long by about 2 1/2" wide.
The mounting holes, center to center, for the two furthest ones are about four inches apart. Again, that's center to center. And then, the two . each one is separated by about two inches center to center.It is about 1/8" thick. Maybe even less than 1/8".
So it's a pretty thin material, but it is pretty durable. So this might flex around your bar, depending on how tight you get it. That can be a good thing, because then it'll help to kind of grip around and prevent any sliding, but, of course, you don't want to over-tighten, and then end up crushing this, or totally warping it.Our smaller bracket. Let's look at that one. From end to end, it kind of has these rounded edges. It's about five inches long. And about an inch wide. We'll have several mounting holes on this one. The two widest holes are four inches apart again, center to center. The two that are a little bit set in from that, center to center, those are three inches apart. And then from those narrowest holes to that center hole, is about 1 1/2" to our furthest out option is about two inches.So, two inches in between these two holes. 1 1/2" in between these two. And then it'll be the same going in the other direction. Now, those measurements are going to be the same for all of our brackets.Let's look at our U-bolt. So, from outside edge to outside edge, that U-bolt is about four inches wide. The threads are a little bit thicker. They go just past four inches. But I think four inches is going to be . excuse me. 4 1/4 inches. So, the center of the bolt to the center of the other one is a little bit wider than that at the ends, so they do kind of flare out. But at the top it's about four inches.There is a slight curve to that, so it'll work well for aero bars, elliptical bars, round bars. Pretty much most style roof racks. The tallest portion of that is just over two inches from the bottom of the threads to the very top of it. The inside area is about two inches. The threaded portion is a little over an inch. Maybe 1 1/8" long. So I hope that helps you in determining if this is going to fit for your box.Those handle nuts, overall, are about 1 1/2" long. The widest point, that little wing portion, is about 1 3/8". The nut, or the threaded portion inside, does sit back a little bit. Say that starts about where that bump is in the bolt, and that's about 3/8" deep. So I have a little bit of room.And then, it goes down about 7/8". So I just wanted to kind of go over those measurements with you to help figure out if this is going to fit your particular cargo box. This is going to be a very universal kit. A lot of boxes will have that four-inch-wide mounting holes.If yours doesn't but you still need this kit, you still need that clamp style, you can always drill out those holes. Just be careful whenever you do that. Always measure twice, cut once. And plug up any holes that you might have created on accide.tnAnd that's going to do it for our look at the replacement hardware kit for the Searsbox cargo box.
Customer Satisfaction Score:
97% were satisfied with this product
3% of customers were not satisfied
Ratings & Reviews

Kip L.

10/8/2018
Still great! Works well and no corrosion/deterioration.

Maineah
6/2/2025
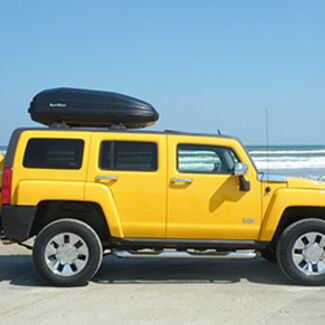
Very well, went through 4 vehicles Jeeps and now a Subaru since I bought my x cargo bix from sears. Lost the origional hardware when I moved but this kit brought it back to life.
Jeffrey
6/10/2020
Excellent hardware kit. Just what was needed
Virginia
6/21/2021
Things are still working good, a year later, everything is functioning as at should.


Do you have a question about this Accessories and Part?
Condition: Missing Parts
Notes: Item is missing 3 of the knobs which can be purchased from the site - Item TH04877.
Condition: Missing Parts
Notes: Item is missing 1 u bolt and the black stickers. Otherwise new and unused.
Info for this part was:
At etrailer we provide the best information available about the products we sell. We take the quality of our information seriously so that you can get the right part the first time. Let us know if anything is missing or if you have any questions.

























Cameron
7/7/2026
Flawlessly! Since my original purchase from etrailer.com, I’ve used my cargo box carrier multiple times and am plan on using it again this week on a family road trip. Thank you so much etrailer.com!