ZCI Circuit Protected Vehicle Wiring Harness w/ 4-Pole Flat Trailer Connector and Installation Kit
Thank you! Your comment has been submitted successfully. You should be able to view your question/comment here within a few days.
Error submitting comment. Please try again momentarily.
- All Info
- Reviews (522)
- Q & A (0)
- Photos
Tekonsha Custom Fit Vehicle Wiring - 119250KIT
- 4 Flat
- Universal Fit
- Trailer Hitch Wiring
- Vehicle End Connector
- Plug-In
- Tekonsha
- Plug and Lead
- Converter
- Hidden
Install a 4-way trailer connector on your vehicle without cutting or splicing into your wiring. Zero-contact interface sensors identify the current flowing through each wire by simply clamping onto it. Circuit-protected module is made using SMT.
Features:
- Provides a 4-way flat trailer connector at the back of your vehicle to power your trailer's signal lights
- Compatible with 5-pole, 6-pole, and 7-pole adapters (sold separately)
- Bypasses factory wiring and involves no cutting, splicing, or plugging into vehicle's wiring
- Sensors clamp onto the wires of your factory tail light wiring harness to detect current
- No feedback, no interference with, and no power draw from your vehicle's wiring system
- Easily removable and transferrable between different vehicles
- Circuit tester included to ensure proper setup
- Includes circuit-protected module that connects directly to car battery for power
- Power wire, fuse holder, and 15-amp fuse included for installation
- Works with 2-wire, 3-wire, PWM, and multiplex wiring systems
- Constructed using surface-mount technology (SMT) for consistent, reliable performance
- Maximizes trailer light yield and intensity while producing minimal heat
- Ensures superior operation in rough road conditions
- Comes with dust cap for 4-way flat connector
Specs:
- Application: vehicles with 12V electrical systems
- Maximum amperage:
- Stop/turn lights: 4.2 amps per circuit
- Tail lights: 7.5 amps per circuit
- 1-Year limited warranty
This revolutionary wiring method makes it fast, easy, and safe to add a 4-way connector to your vehicle so you can power your trailer's lights. Unlike traditional tail light wiring harnesses, which either splice into your vehicle's wiring or plug into designated ports in your factory harness, this system bypasses your vehicle's wiring entirely. Just clamp the intuitive sensors onto the individual wires of your OEM tail light harness and let the ZCI system do the rest.
Zero-Contact Interface Sensors
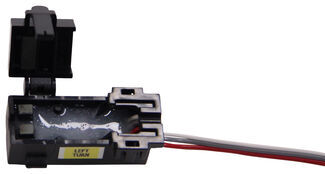
Each zero-contact interface (ZCI) sensor included with this harness is able to read the current that travels through the wire it is clamped onto. Upon sensing the specific modulation of that wire, a signal can be sent along the wire that connects the sensor to the included 4-way flat trailer connector. That signal is then transmitted through the connector to activate the appropriate function on your trailer lights.
Universal, Worry-Free Design
No Splicing, Cutting, or Connecting to Factory Wiring
Because the ZCI sensors can read the signals sent through your vehicle's wires just by clamping onto them, no cutting or splicing is necessary. The system completely bypasses all of your vehicle's wiring. As a result, your trailer's lights will be powered without overloading your vehicle's electrical system. And there is no chance of damaging feedback either.
When using this ZCI harness, you don't have to worry about voiding your warranty, nor do you need to be concerned about any potentially damaging errors on your part if you're not an experienced do-it-yourselfer. And if you have a vehicle that doesn't allow certain modifications - like a leased car or truck - you can install this harness and remove it later with no obvious alteration to the vehicle.
Maximum Compatibility
This wiring harness is universal. You can use it on any vehicle that operates on a 12V, negative ground system. Because installation is so simple, you can easily remove the unit and transfer it to another car or truck at any time.
In addition, the ZCI sensors are able to read the signals sent by multiplex wiring systems and systems with pulse width modulation (PWM) and low-side-switched wiring, making the harness compatible with nearly all automotive wiring systems. This unit also works with both standard incandescent tail light bulbs and LED bulbs.
Built-In Tail Light Converter
Most trailers run on a 2-wire system - wherein the brake and turn signals are carried on a single wire. Many vehicles, however, are built with separate brake and turn signals. This type of system is referred to as a 3-wire system. If your vehicle operates on a 3-wire system, it will need to be converted so that it will be compatible with the wiring system of your trailer. This is done by adding a tail light converter to your wiring setup to combine the brake and turn signal functions of your automobile so that they run on a single wire to properly activate your trailer's tail lights.
This ZCI unit has a tail light converter built in to ensure proper functioning with any vehicle that operates on a 3-wire system. If your car has a 2-wire system and therefore does not need a converter, don't worry. The method of installing the sensors will take into account the wiring configuration of your vehicle so that only the necessary sensors are used, making sure the appropriate signals are sent back to the 4-way.
Installation
This universal harness connects to your vehicle's tail light wiring harness. To connect, just follow the included instructions. There are 4 ZCI sensors included. Each sensor has a colored label on it. Depending on your application, you will need to connect all or some of these sensors to the factory wires indicated in the instructions.
To get the power necessary to operate, the harness must be connected to a 12V power source. The included installation kit provides the hot lead required to connect this module to your car battery. When all connections have been made, connect the hot lead to the black wire on the ZCI power module and run the other end of the lead up to your car battery. Connect the hot lead to the included fuse holder, and then connect the fuse holder to the positive terminal on your battery. Then insert the included 15-amp fuse into the fuse holder.
Once installation is complete, the 4-way connector will be stowed in an out-of-the-way location either within your cargo area or beneath your vehicle, near the trailer hitch. If you choose to mount the connector near your hitch, a mounting bracket (sold separately) is recommended to keep the connector secure.
It is also recommended that you use a small amount of grease on all electrical connections on the 4-pole connector to help prevent corrosion.
Surface Mount Technology
Each ZCI wiring harness is built using surface-mount technology (SMT). This method of construction involves soldering electronic components directly to the surface of a printed circuit board. SMT eliminates the need for leads, which are used in older through-hole technology. The result is a circuit board that is smaller yet provides more routing area and that offers superior performance, reliability, and durability.
Circuit boards constructed using SMT have been shown to perform better under rough conditions with excessive vibration than those made using the through-hole method. And where would vibration be more likely to occur than in towing applications? SMT components also produce less heat, leading to increased durability and longer life. In addition, lower levels of resistance ensure better performance, especially for parts that operate at higher frequencies.
119251 Tekonsha ZCI Zero Contact Interface Universal ModuLite and Installation Wiring Kit
48705 LED Circuit Tester - 12 Volts
Installation DetailsCalifornia residents: click here
Customer Satisfaction Score:
92% were satisfied with this product
8% of customers were not satisfied
- Product did not meet expectations
- Wrong item was ordered
- Defective
Ratings & Reviews
4.5
522 reviews
I bought this for my 2020 Audi Q7 and just got it back from my dealership I use for all Audi service and they installed this. My mechanic told me he’s never done one before and would give it a shot. I bought a Curt Hitch off Amazon and he installed that no problem and then he installed this wire kit like a pro all inside my vehicle like Audi ask to have done. It made it much easier him not having to splice anything and made his job quicker which saved me $$ in the long run as they’re $125 an hour. I just got home and plugged my boat in and all lights work as they’re should!! I recommend this brand and company 100% they have great customer service and great instructions along with the kit as well!

It was fairly easy to install although the 3 inductor blocks make installation on the right hand side pretty cramped. I like not cutting/tying into the factory harness. The lights occasionally come on when parked, but I just disconnect the harness from the trailer. Other than that little glitch the unit has performed flawlessly.
I would purchase again and recommend for others who have vehicles where a plug in trailer harness is not available without cutting into your vehicles wirers.

is a good product and works good.
the only issue I had the unit never turn off and drain the battery 2 times,
should have a current switch that when the vehicle is not running the unit is off.
I have motorcycle with systems like this.

excellent build quality - especially the axle and wheels. Pacific to Atlantic.
The service was great, the hitch looks very well made, the installation video made installation very straightforward, and it looks good on the car. I have not installed the trailer wiring yet but expect no problems with that.
The harness is bolt on, fits perfectly. I found that on x5 e70 u have a hole on driver side for cab ventilation. It’s better to attach the harness behind the bumper, buy a 2$ bracket and attach the plug next to the hitch.

I have noy yet used the trailer lights harness, as trailer project was set aside to complete other projects.
But installation was easy, as instructions are good AND YouTube video's are readily viewable.
The quality of the unit is evident, as module does not feel flimsy,and wire is supple.
Well satisfied that I will like the system, as many others have in posted reviews.
Victoria H.
3/4/2025
I'm happy to hear the install videos were helpful to you, and that this satisfied your needs! If you ever need anything for your future projects, we will be here and happy to help!
Works well, but marker lights stay on when the trailer is connected even when vehicle is off. I just disconnect the trailer whenever I’m not driving

Excellent. Easy to install. The trailer blinkers are acting a little funky, and only one brake light lights up, but I appreciate that there was no cutting. Issues are probably user error (me).
etrailer lists this item to fit 2013 bmw x5 and also has installation videos with the x5. after my installation was completed, I was having issues with this device turning on the running lights of the trailer intermittently when the lights on the vehicle were off. I called the manufacturer to help troubleshoot or warranty the product and they said this year make and model is not listed in there wiring list so this vehicle is not compatible!! watching etrailer installation video really carefully, I can see the mistake they made. after they programed this product they leave the tail lights on as they demonstrate all the other functions ( left, right , brake). They never shut off the tail lights to check if they shut off the trailer tail lights. It's a big problem, and cost me a lot of money and time. I had to buy the other curt product that needed to be spliced in and it works perfectly! ultimately, the zci product works fantastic but is not compatible with this vehicle.
This wiring harness is everything as advertised. Being able to deliver signal without splicing the turn signal and brake wires is awesome. The install process is pretty involved, but the etrailer videos make it pretty straightforward, the toughest part is finding out which colors go to which wires on your vehicle. A $2 test light and a friend operating the turn stalks and brakes solves this problem. The programming portion is also pretty easy, I did it first time no problem. The power wire running to the 12v battery has fairly thick shielding too which is nice if you need to run the wire under the car.
Great kit, comes with everything needed. There was some uncertainty regarding fitiment of this on a 21 Mercedes GLB250. I’d just like to say that it works perfectly. I was able to determine the left, right and parking light wires (grey with white stripe for right turn signal, grey with white stripe for left turn signal and black with purple stripe for tail light. Don’t attach brake light). The hardest part was running the power wire to the battery but this car has underside fairing so a fish tape made it easy.
The installation was pretty straightforward and easy. I would give it 5 stars but I'm having a strange problem. With the trailer connected and the car off (Tesla model Y) the trailer lights turn on and stay on until I unplug the power cable. I contacted the manufacturer but have not re derived an answer.

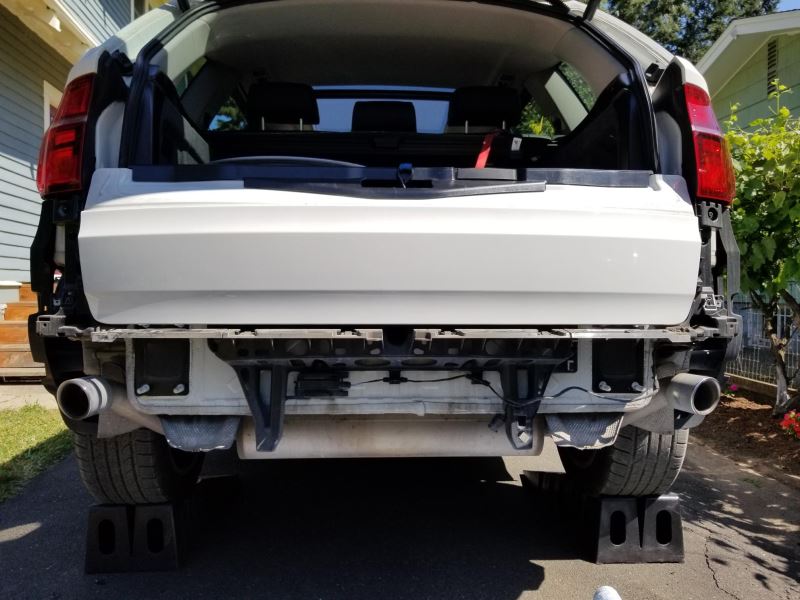
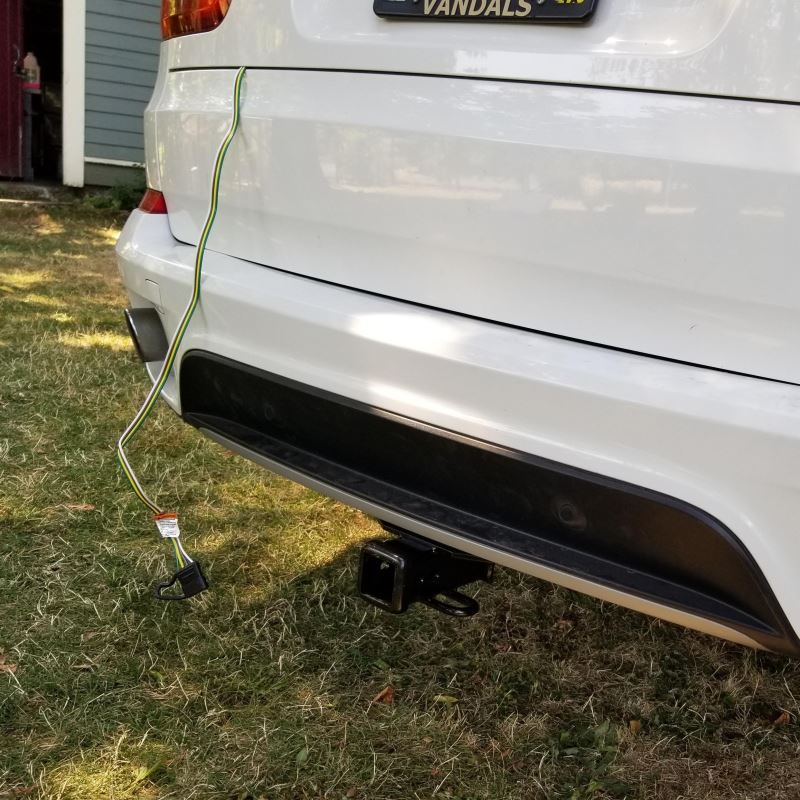
The trailer hitch and wiring assembly have worked flawlessly. After calling several local installation outfits and receiving estimates of $2,000+ I decided to install myself. I have a little mechanical experience but this was the first hitch and wiring harness for me. This is my wife's X5 so I was a little nervous about popping rivets and pulling the rear bumper cover off, but eTrailer has excellent step by step video instructions by model year. The order included replacement rivets and detailed instructions. They could not have made this any easier. I really took my time and completed the job in about 5 hours. The final install looks professional and clean. The no-splice wiring harness is amazing - worth every penny.
Tools: I was able to easily pop off the existing plastics rivets, and installed the new rivets (included from eTrailer) with pliers pretty easily - you may want to borrow a plastic rivet gun from your local hardware or auto parts store. On the X5 your have to cut a small notch out of the underside of the bumper cover. I happen to have a Dremmel which worked well. You may be able to use a razor blade. The plastic is not that thick.
Pictures are attached.
Thanks etrailer!

Product did not work. Signals were not picked up. I spend countless hours on the phone with technical support and parts replacement just to find out the product simply was not functioning as described. Returned it for credit. Went to hitch shop; they hard wired the wires into my existing harness.

I was worried about finding a wiring harness that would work with the electrical system in my Audi Q5 hybrid (I’ve heard stories) but luckily this one worked. Install was not easy and the function isn’t ideal though.
I had a really hard time finding the correct wiring diagram for my vehicle so I wound up doing a ton of trial and error. I finally did get it working, but now the driving lights simply never turn off. The instructions said to wire directly to the battery, so I figured this might be the issue, but after drawing power from (what I thought was) a switched fuse, the problem persists.
I’ve considered trying another fuse, but don’t pull a trailer often enough any more to bother. I simply unplug the trailer whenever I park now.
Excellent experience from the moment of purchase. Great communication and fast delivery. Installation was exactly as shown in the video. I had always been apprehensive about installing a harness but the circuit protection design and detailed install video made it simple as it led me through each step in great detail

Victoria H.
3/7/2025
I agree Mark, the concept of the ZCI is intimidating but you did great! Thank you for sharing your experience and possibly alleviating some concerns of future buyers too.
I installed the ZCI Circuit Protected Harness in my 2020 Bolt EV. It works as advertised. With a little searching YouTube and chevy Bolt EV forums I located the correct wires. I can confirm that your kit works on my vehicle.

William

2/6/2025
After a year of use its still working fine. One note: I make sure to unplug the trailer connection when parked. It may be a quirk of the Bolt but sometimes the running lights come on when not in use.


This kit works perfectly! A reasonably straightforward installation, though not for a DYI'er who is uncomfortable ripping into the trim and lighting wiring harness of their vehicle. A reasonably accurate wiring diagram is very helpful, but not necessary because trial and error works well with Hall sensors used in this kit (i.e. no cutting and splicing wire is required).
Once installed, the trailer lighting load is easily handled by the power module without feedback to the vehicle lighting control circuit, although my setup does not interface with a trailer brake controller so I cannot judge full performance.
One hint - do not loose the heavy stock reference card that reminds one of the programming routine, While performing other electrical work on my car needing battery disconnection, I can never remember the programming sequence for the trailer lighting controller. Not to worry, though, the product support site has the info.
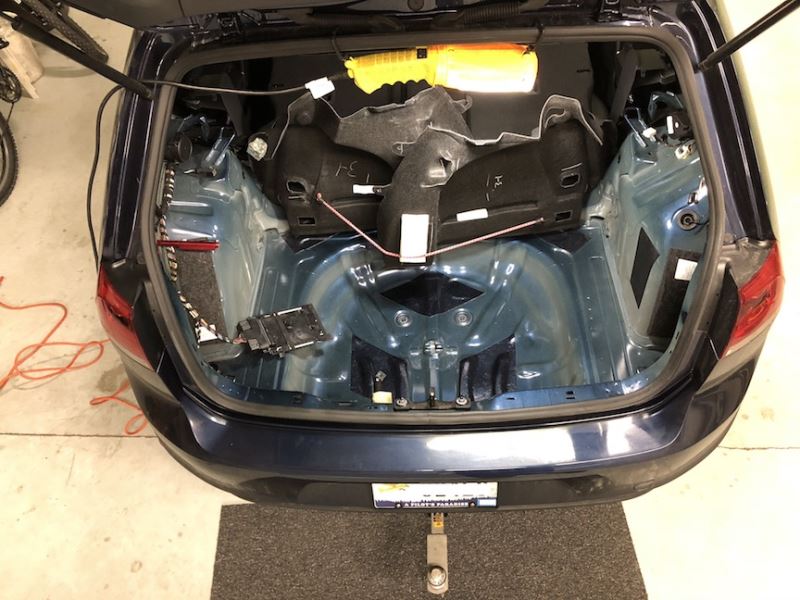
2012 VW GTI (autobahn edition) Installation (DSG)
I had some small issues and hiccups along the way, so in order help out since I couldn't seem to find vehicle specific help, here is what I did. I did buy the CURT 4-way flat connector tester (Item #126) first to make my life easier when testing. It helps. Buy it.
First - start by removing the cargo floor carpet and pulling down the drivers side wall carpet. I did find it necessary to take the moulding trim off the top portion of where the hatch cover locks in, along with the rear seat belt guide trim so I could run the wires to the battery cleanly. There is a few star bolts holding the trim alongside the rear seats when folded down, so just do a search if can’t find it (one cover has to be popped off)
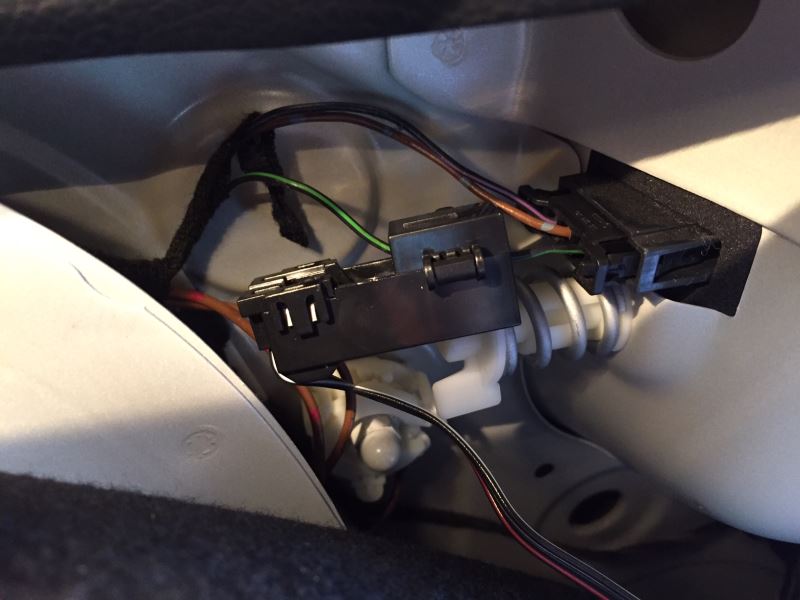
Second - Wiring. This was a little bit of a guess, as I have 3 wires, and my meter didn’t seem to be helpful since they were so small and close together. Here’s what works (drivers side):
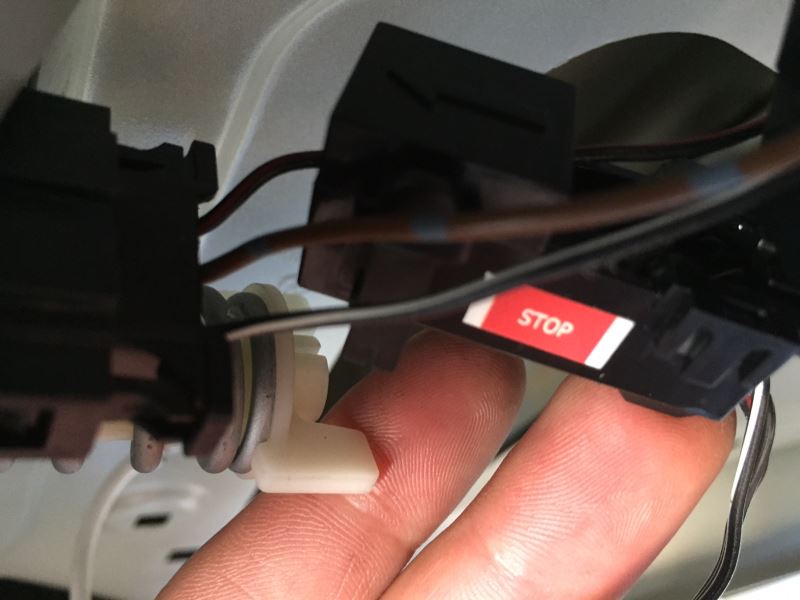
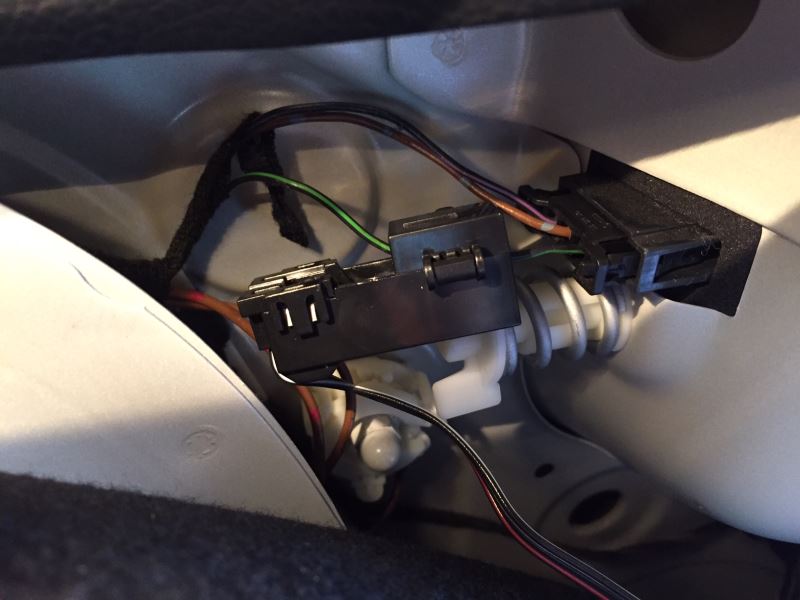
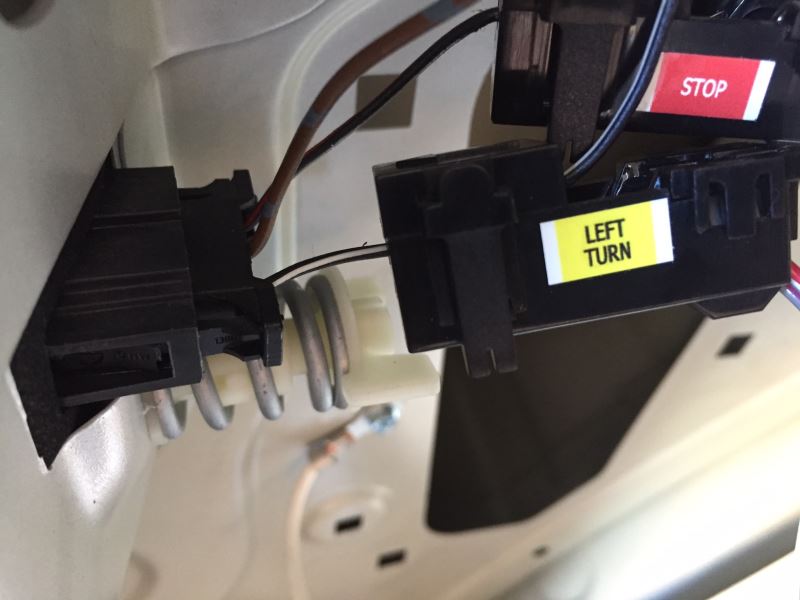
- “Stop” module clips over the black/red wire
- Middle brown wire isn’t used
- “Left” turn signal module clips over the green/black wire
- Passenger side right turn signal clips over the green/black wire
- I screwed the ground right into a side structure panel
Running the battery cable was the bigger time suck.
- Stated above I had the drivers side rear panel trim and carpet removed, and I continued removing the front/rear drivers floor sill trim. I ran the black wire along the current loom and tucked it under the floor carpet.
- I then ran it behind the hood latch and towards the top of the metal foot rest, keeping it behind the carpet
- This is where you get to the firewall. There is a piece of foam. Remove it. Now you’ll see a rubber grommet where the clutch pedal would go through if you have a standard. I took that out, drilled a small hole to run the wire through that I attached the wire to a metal hanger to fish up and to the right of the battery box. Fish it up, grab it, and pull it through.
- Slide the grommet back into place (your wire would have been already through it) and snap it on.
- Make your connection to the battery and follow initiation instructions.
Easy straight forward install.
As per instructions you may have to program more than once but very simple.

My mechanic loved how easy it was to install and appreciated the bluetooth technology. I appreciate safe transport of my Laser sailboat thanks to this system and etrailer’s awesome hitch. Together, a perfect system for me!
I purchased this kit for my 2018 Macan S. The battery is located at the back which makes it easy to connect to the power.
1. remove the side panels to get to the rear lights (they are snap on)
2. remove the spare wheels cover.
3. Unclips the back light connectors (left and right) and remove tape to access the wires
4. with the provided probe, check for left, right signal wires and mark them
5. with the provided probe, check for Brake and Tail light wires and mark them
6. connect the provides sensors to the corresponding wires (arrow pointing to the lightbulb).
7. Make sure to connect Ground wire (white) to the good location on the vehicle. (on the Macan it took me a while to find good connection spot due to the exceptional paint job the Porsche does, you may connected it to the battery to test it)
8. Connect the power wire to the battery, fuse should be removed.
9. run the learning mode as per interactions provided
10. I purchased a 4-pin test connector to help me with testing and troubleshot.
11. tuck in all the wires and, cover the sensors and places back to vehicle covers .
This unit works very well, it was easy to install. making sure you have a good ground spot is very important.
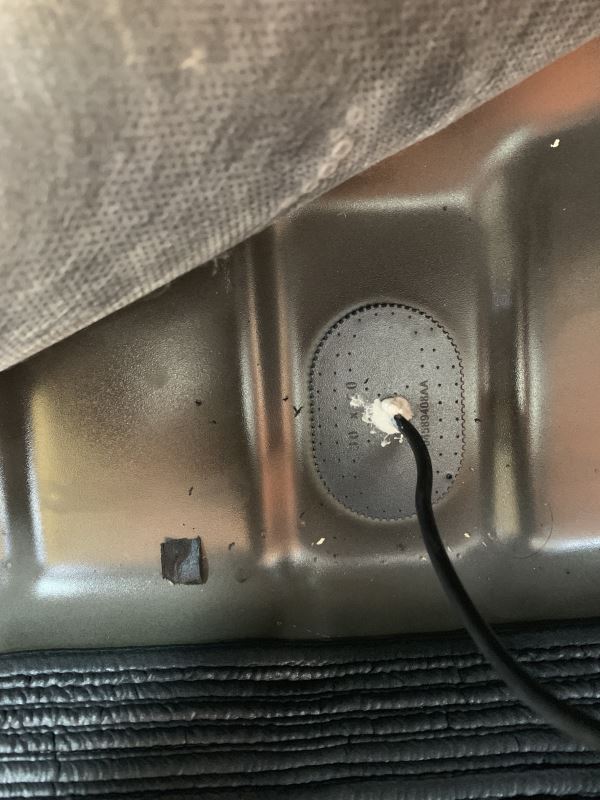
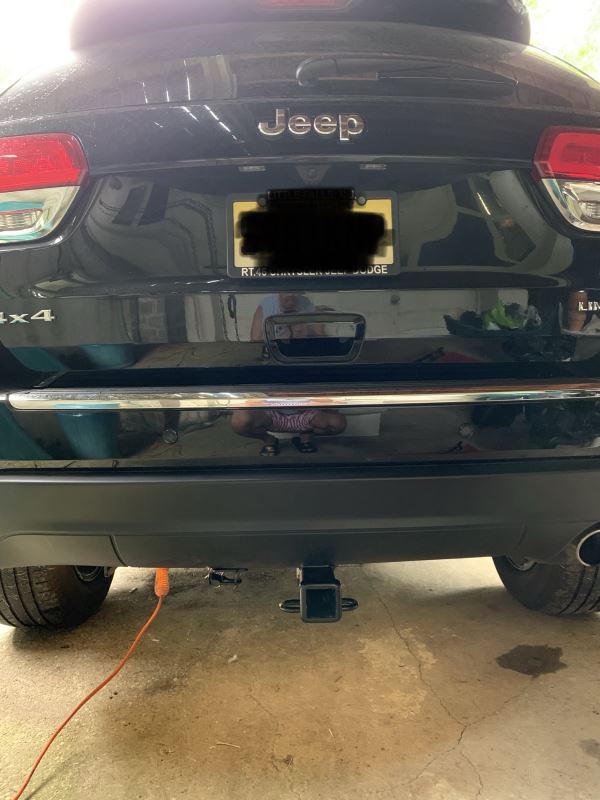
Installed on 2018 Jeep Grand Cherokee Limited with no tow package. Install was kind of a P.I.T.A. But worth doing on your own to avoid the stealership. Not too much electrical knowhow required, as the black wire on Jeep tail lights are all ground. Running the power cable was the most difficult part, and required removing the interior rear quarter panel, which I managed to break a plastic clip. Would not recommend this on a Jeep, as there is no simple way to install this on the interior of the vehicle since the tail lights are wired 100% outside of the car. I’d say skip if you are looking into this for a Jeep, and wait for an OEM trailer harness to come out from mopar.

The Tekonsha wiring harness was a bit difficult to install, as the clip-on connections are a somewhat bulky to fit in my Tesla Model 3's tight spaces. The good news is: they work as promised like a charm with our tiny camp trailer's lights. In truth, I have only had to use them once, but cannot imagine that any unforeseen problems would occur with them in the future.
See what our Experts say about this Tekonsha Custom Fit Vehicle Wiring
- Recommended Hitch for a 2024 Volvo XC60 RechargeYes, it does! The Curt Hitch item # C92WR has been confirmed to fit the 2024 Volvo XC60 Recharge. This hitch is custom fit and bolts to your Volvo with included hardware. It is a class III hitch with a 2" receiver so it will work with almost every bike rack on the market. I really like the Curt Hitch item # C92WR because the crosstube mounts behind your rear bumper cover leaving only the 2" receiver visible. This not only helps with ground clearance but it also looks better. I have...
view full answer... - What is the Best Hitch for a 2024 Toyota Sienna?The best hitch for a 2024 Toyota Sienna is the Curt item # C22UR. This hitch is custom fit and bolts to your Toyota with included hardware. It is a class III hitch with a 2" receiver that has a 3,500 lbs towing capacity and a 350 lbs maximum tongue weight that can be increased to 5,000 lbs and 500 lbs when used with a weight distribution system. The reason the Curt item # C22UR is the best hitch for your Sienna is not only its high towing capacity but the position of the receiver. The...
view full answer... - Will Curt T-Connector Vehicle Wiring Harness Fit 2025 Chev Equinox EV LT Without Factory Tow PackageHi Cliff; sometimes a wiring harness like the # C44FR still works even without the factory tow package. However, it is required for your 2025 Chevy Equinox EV LT. If you don't have the tow package then your vehicle doesn't have the port to plug in the wiring harness. What you can use instead is the Tekonsha ZCI # 119250KIT. This is perfect for an EV since it doesn't require splicing. The sensors clamp onto your vehicle wiring to identify the current flowing through the wires and send...
view full answer... - Trailer Hitch for 2021 Polestar 2Hey Dion, the EcoHitch part # EH84CR is a fit for your 2021 Polestar 2 and a great option so you are off to a solid start. You will need trailer wiring too to control the taillights of your trailer and for that I would go with the # 119250KIT which does not require any splicing into the vehicle's taillight connectors. To reduce noise the etrailer anti-rattle part # e38FV would be a really good option as it will hold the ball mount tight to the hitch opening. We don't have any suspension...
view full answer... - Recommended Wiring Harness for a 2025 Hyundai Santa CruzHey Joe. There's no timeline for when a plug in wiring harness will be available for a 2025 Hyundai Santa Cruz. I completely get your resistance to wanting to cut into the wiring on your brand new vehicle. Congrats btw! The only solution I have for you is the ZCI Circuit Protected Vehicle Wiring Harness w/ 4-Pole Flat Trailer Connector and Installation Kit item # 119250KIT. The ZCI item # 119250KIT clamps to your Santa Cruz's wires instead of splicing into them. The sensor detects the...
view full answer... - Recommended Trailer Hitch and Wiring for 2025 Audi Q5 PHEVHi Shawn; for your 2025 Audi Q5 PHEV I recommend the Curt Trailer Hitch Receiver # C98JR. This is a Class III hitch with a 2" receiver and a bolt-on installation. It has a 750 lb max tongue weight which will be more than enough to handle your bike rack and bikes. The hitch also features a limited lifetime warranty. For wiring we have the Tekonsha Powered Tail Light Converter w/ 4-Way Flat Trailer Connector and Install Kit # 119147KIT. This splices into your existing wiring and has a 4-way...
view full answer... - Availability of Class II Hitch for 2021 Chevrolet Bolt EVThe only option for a Class II hitch on your 2021 Chevy Bolt EV is the EcoHitch # 306-X7359 with a 2" receiver. Any hitch with a 1-1/4" receiver like the # 24956 is Class I. If your bike rack is Class I compatible the Draw-Tite will be the better option. More than likely it requires at least Class II if it has the capacity for two e-bikes. You can use an adapter like # C45770 with the EcoHitch but it will reduce your capacity by 50% so that isn't a good option. You may be faced with getting...
view full answer... - Trailer Wiring Options For A 2025 Chevy Equinox Without Factory Towing PackageHi Dennis, your request is proving to be more difficult than I assumed it was going to be. From what I could ascertain, you have 2 to 3 options for your 2025 Chevy Equinox without the tow package, which I have listed out below. First, you can use the Tekonsha ZCI Circuit Protected Vehicle Wiring Harness # 119250KIT. This uses sensors clamped over the wiring so you do not need to do any splicing, which is nice. You will still have to run a line up to the battery to provide the needed power,...
view full answer... - Troubleshooting ZCI Vehicle Wiring Harness 119250KIT Having Inconsistent Right Turn Signal FlashingI reached out to my contact at Tekonsha and there are a few things that could be causing the ZCI Circuit Protected Vehicle Wiring Harness w/ 4-Pole Flat Trailer Connector and Installation Kit # 119250KIT you installed on your 2014 Audi AllRoad to have an issue with the right turn signal flashing correctly. On your vehicle there is a few different wires that have a signal when the turn signal is applied, but some of them use a different pulse width that is hard for the module to read correctly....
view full answer... - Troubleshooting Trailer Tail Lights That Stay On with Tekonsha ZCI Wiring Harness on 2016 Golf RWe know from Tekonsha training on their universal-fit ZCI Circuit Protected Vehicle Wiring Harness # 119250KIT that this item is very sensitive to the initial setup process, which must be followed exactly for correct operation. My technical contact at Tekonsha advised that the magnetic sensors in this kit are directionally sensitive. If one of these were clamped on in reversed orientation it would not function correctly. He suggested that you pull the fuse to let the circuitry power down...
view full answer... - Recommended Hitch for a 2024 Mercedes-Benz Sprinter 2500To add a hitch to your 2024 Mercedes-Benz Sprinter 2500, I recommend the etrailer item # e82TR. This hitch is custom fit and bolts to your Sprinter with included hardware. It fits both the 144" and 170" wheelbase models so long as you have the factory step bumper. The etrailer item # e82TR is a class III hitch with a 2" receiver. It has a 5,000 lbs towing capacity and a 500 lbs maximum tongue weight. These capacities can be increased to 7,500 lbs and 750 lbs when used with a weight distribution...
view full answer... - Will The Tekonsha 119250KIT Work On A 2021 Audi Q5 HybridThe Tekonsha Powered Tail Light Converter # 119250KIT will indeed work on your 2021 Audi Q5 Hybrid. The 119250KIT is a universal hardwire kit that can be used on virtually any vehicle regardless of differences in the electrical systems. The manufacturer (Tekonsha) has confirmed that it will work on the hybrid models. We made an install video showing the 119250KIT being installed on a 2020 Audi Q5 (non-hybrid). I have linked our video below if you want to take a look.
view full answer... - Recommended Hitch for a 2024 Audi Q5 Plug-In HybridYes, it does! The etrailer Hitch item # e94CR has been confirmed to fit all models of the 2024 Audi Q5 including the plug-in hybrid model. This hitch is custom fit and bolts to your Audi with included hardware. It is a class III hitch with a 2" receiver. I really like the etrailer item # e94CR because the crosstube mounts behind your rear bumper cover leaving only the 2" receiver visible. This not only looks better but also helps with ground clearance. I have linked an installation...
view full answer... - Recommended Trailer Hitch Compatible with 2018 BMW X3For your 2018 BMW X3, we have a couple different hitch options. We have the Draw-Tite # 76226 and the Curt # C13387. Both install in the same manner, so I have attached a couple photos to help you with the installed appearance. Either of these options will work well with a bike rack or other accessory. If you will be using this hitch for light towing, I also recommend the ZCI Circuit Protected Vehicle Wiring Harness w/ 4-Pole Flat Trailer Connector and Installation Kit # 119250KIT,...
view full answer... - Recommended Trailer Hitch Receiver for 2004 Mercedes-Benz E320 WagonThe Curt hitch # C11701 is a fit for the following models only based on the frame hole locations and vehicle capacity: 2003 - 2009 Mercedes-Benz E-Class Sedan - excluding Sport Package 2006 - 2006 Mercedes-Benz E-Class Wagon - E350 and E55 AMG 2007 - 2009 Mercedes-Benz E-Class Wagon - E350 and E63 AMG 2005 - 2005 Mercedes-Benz E-Class Wagon - E55 AMG For your 2004 Mercedes-Benz E320 Wagon, the Curt # C11820 is the only confirmed fit. It has a capacity of 200 lbs tongue weight and 2,000...
view full answer... - Recommended Wiring Harness for a 2025 Kia Carnival Hybrid Hey Gary! I checked with all of our vendors and no one has a plug and play wiring harness for the hybrid model of the 2024 Kia Carnival. Additionally, none of them had an eta on when to expect one. The only option I have for you is to install the ZCI Circuit Protected Vehicle Wiring Harness w/ 4-Pole Flat Trailer Connector and Installation Kit item # 119250KIT. This is a universal wiring harness that clamps onto your Kia's tail light wires. It mimics the signal sent to them and activates...
view full answer... - Recommended Trailer Hitch Receiver and Wiring Harness for 2019 Mercedes-Benz GLS550The Curt Trailer Hitch Receiver - Custom Fit - Class III - 2" # C13190 is a great fit for your 2019 Mercedes-Benz GLS550. It is a great hitch that will work well for you. There isn't a specific custom fit for your trailer wiring, so I recommend using the Tekonsha ZCI # 119250KIT which we have installed and can confirm the fit. I also recommend the B&W Tow & Stow 2-Ball Mount - 2" Hitch - 3" Drop, 3-1/2" Rise - 10K - Black # BWTS10033B for a ball mount because it offers to hitch balls...
view full answer... - Correct 4-Way Wiring Harness for 2025 Kia Sorento Hybrid SX PrestigeHi Bryce; U-Haul probably tried to use the Curt # C63RV which does not fit hybrid or SX models of the 2025 Sorento. None of the manufacturers make a custom wiring harness so the only option is a universal splice-in like # C59236 or the # 119250KIT which clamps onto your vehicle wiring. If you decide to pick up a hitch through us you can use the Curt # C37RV. For a ball mount that will work with a variety of trailers check out the # e66PR. This has a 6” rise or drop for different trailer...
view full answer... - Is Class III Trailer Hitch Available for a 2015 Infiniti QX50The only trailer hitch designed for your 2015 Infiniti QX50 is the Curt # C11510 which is a Class I rated hitch with a 1-1/4" receiver. So unfortunately there are no Class III trailer hitches that fit a 2015 QX50. If you let me know what you plan on using the trailer hitch for I can make some recommendations for you.
view full answer... - Installed Tekonsha Wiring # 119250KIT on My 2019 Mercedes Metris, now Issues with Blind Spot AssistHello Bill, Thanks for the shout out to our video department, we take a lot of pride in our content and it's always nice to hear from customers that we are doing it right. I am sorry that the Tekonsha wiring # 119250KIT is causing you issues with the vehicles blind spot assist. We have not ran into this issue. I do have some troubleshooting for you to try before taking it to the dealership: -Check Connections - Inspect all wiring to ensure the Modulite ZCI is properly installed and...
view full answer... - Trailer Hitch and Wiring that Fits 2021 Lincoln CorsairYou'd need a new hitch for your 2021 Lincoln Corsair with the Curt # C23FR as what have now does not fit your current vehicle. For trailer wiring you'd need a universal kit like the ZCI part # 119250KIT which doesn't require splicing for a quicker and easier install.
view full answer... - Trailer Hitch and Wiring for 2026 Toyota Corolla Cross HybridHey Mark! The EcoHitch Hidden Trailer Hitch Receiver # EH87CR will fit your 2026 Toyota Corolla Cross Hybrid. However, we cannot confirm fitment of a wiring harness at this time. What you're referencing is just the bulbs. You actually remove the entire tail light assembly to get to the connectors for the # C55ZV, see the attached photo. This wiring harness fits the 2025 with LED lights, the # C39DR you were looking at is for incandescent. Regardless, without a vehicle to test this on...
view full answer... - Testing Tail Light Wires to Install ZCI Trailer Wiring Harness on a 2018 Volkswagen Golf AlltrackWhile I do not know the wire colors/functions on your 2018 Volkswagen Golf Alltrack I can tell you how to figure it out. Use the included circuit tester that came with the ZCI harness # 119250KIT or if you need one you can get # PTW2992 to test the taillight wires while someone sits in the vehicle and goes through the various light functions. If there is one wire that has brake lights, taillights, and turn signals on it then you only use one connector per side on the ZCI harness. You...
view full answer... - Availability of Custom Wiring Harness for 2021 Chevrolet Bolt EVHi Pierre; there are no custom wiring harnesses with a T-connector for your 2021 Chevy Bolt EV but you can use the # 119147KIT. This will still give you a 4-way connector at the rear to power your trailer's signal lights. If you're worried about splicing, the ZCI Circuit Protected Vehicle Wiring Harness # 119250KIT is another option. This clamps onto the wiring making it popular for electric vehicles like yours.
view full answer...
Do you have a question about this Custom Fit Vehicle Wiring?
Info for this part was:


At etrailer we provide the best information available about the products we sell. We take the quality of our information seriously so that you can get the right part the first time. Let us know if anything is missing or if you have any questions.







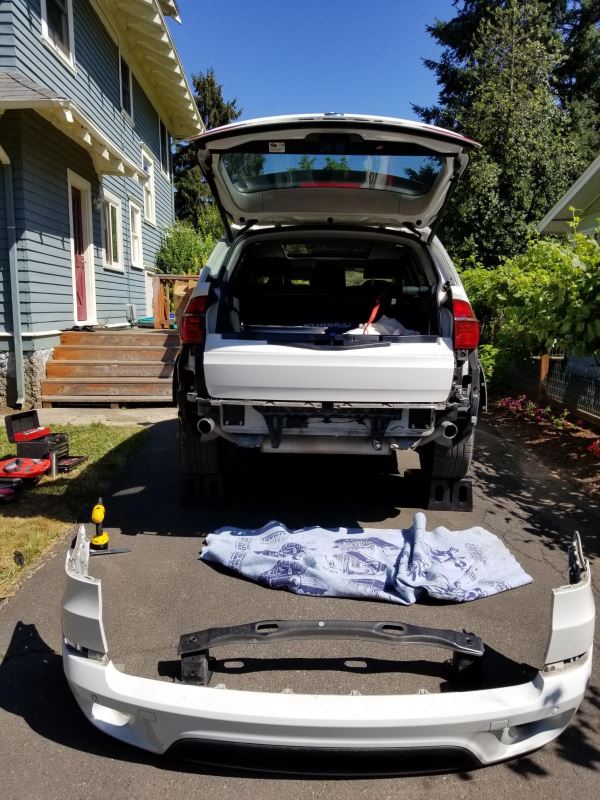
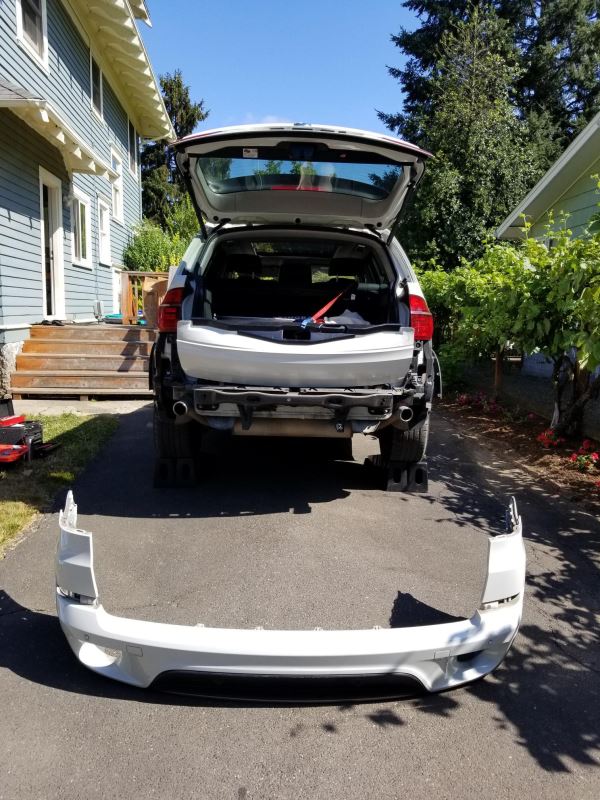
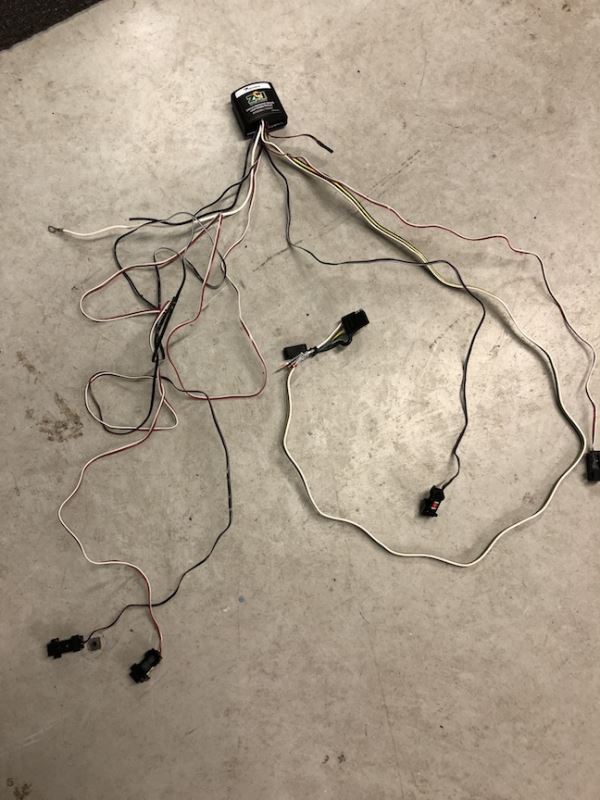
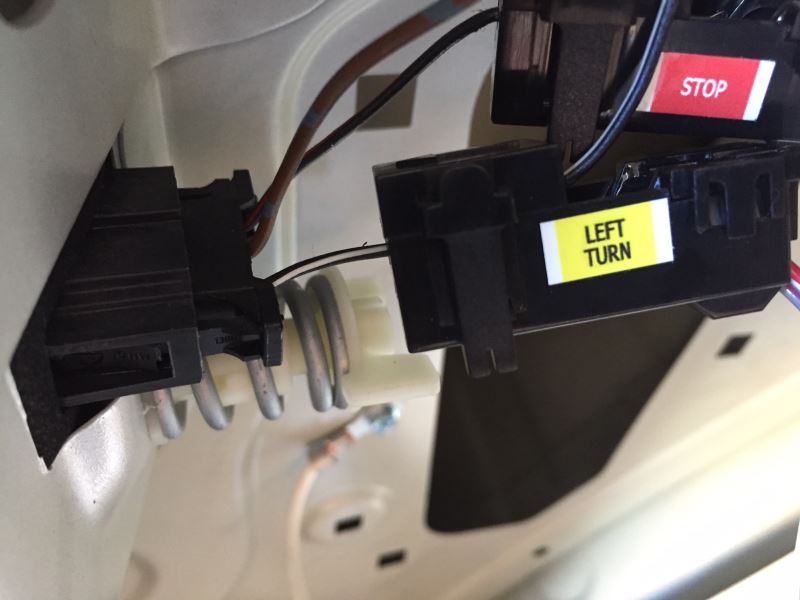


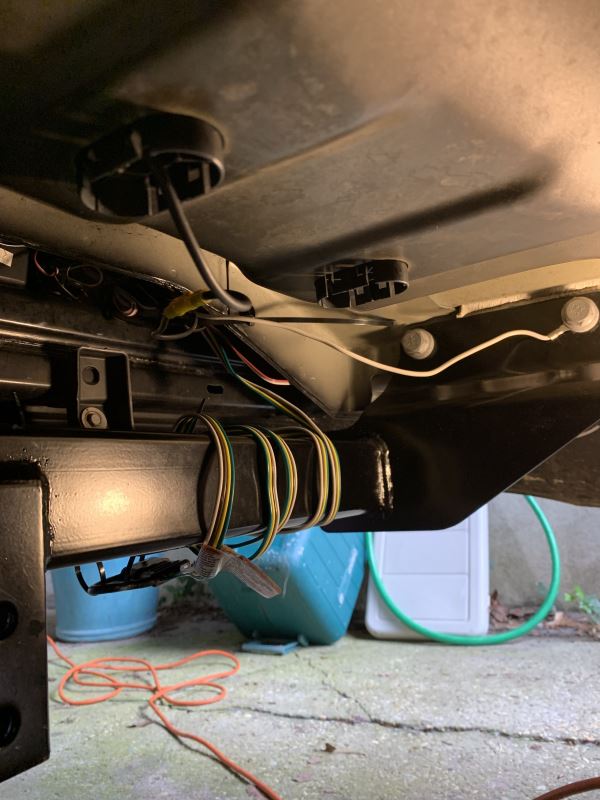

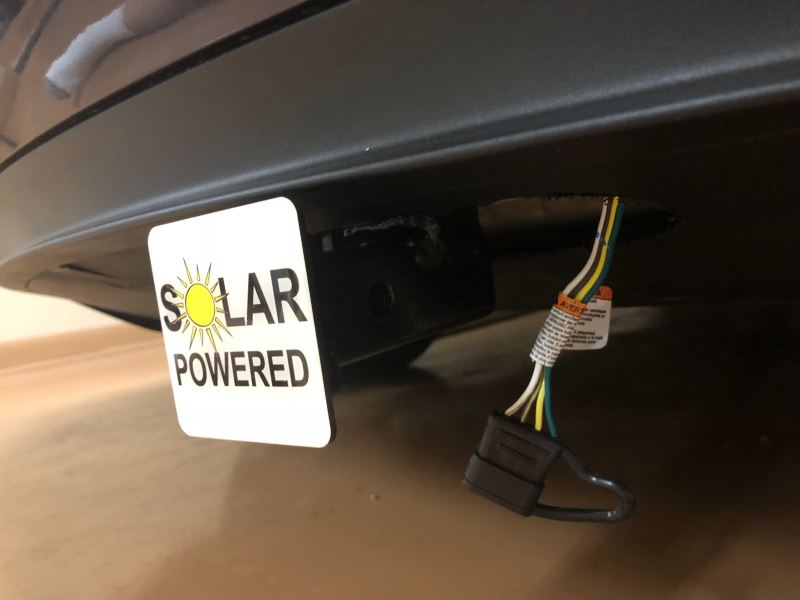
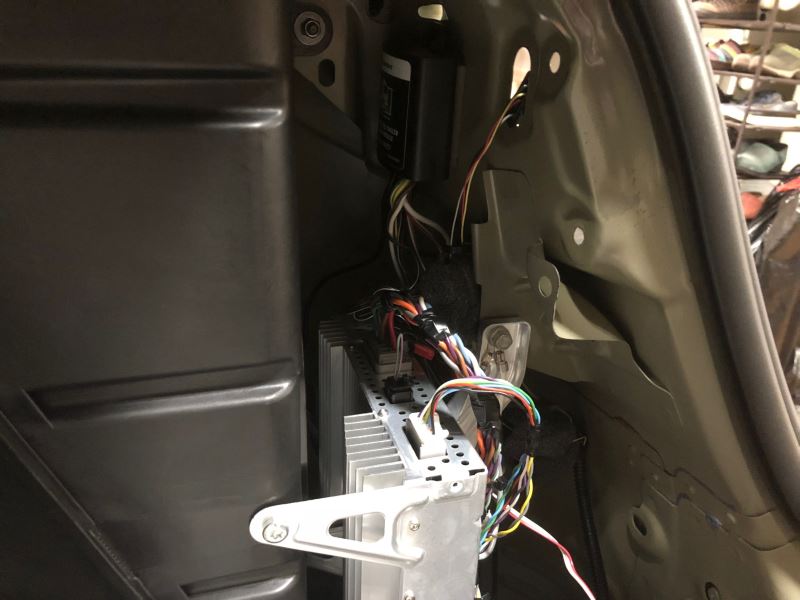
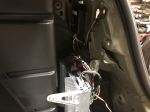
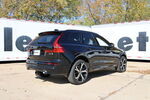
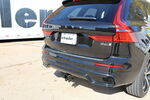
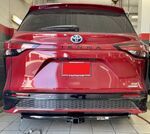


Brooke M.
6/11/2025
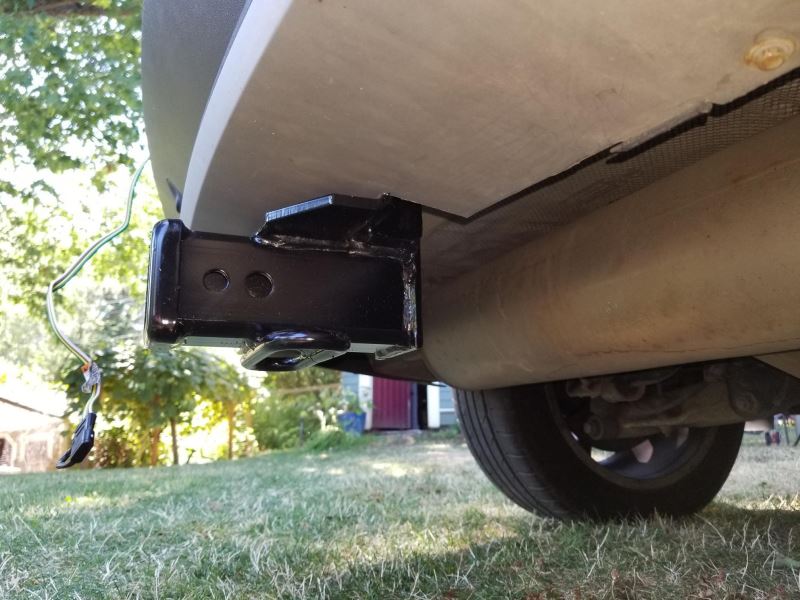
So glad to hear that! It's nice for everyone involved when things just fit the way they should :) What are you going to be towing or carrying with the new set up? It looks great, by the way - thanks for the photo!