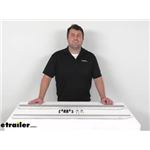
The Replacement Standard Dual Rack Repair Kit for Lippert RV In-Wall Slide-Outs - Fixed Side, #LC84FR is the left side of the slide-out as looking at it, facing it, from the outside. The float side, #LC26VR, will of course be the right side as facing…
Hi Ron, thanks for reaching out. I completely understand why you're checking that measurement before ordering since if the fins don't reach the slide wall, the seal won't do the job you're expecting. The Rubber Bulb Seal with Fins for…
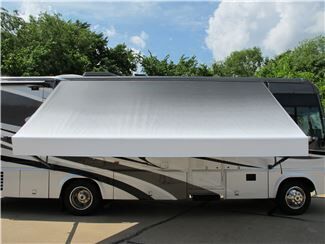
Hey Stephen, we have the 16 foot etrailer awning part #e84QV that would work great on your car hauler. How tall is the side of the trailer? It shouldn't be a problem but the arms of this awning are 69 inches tall. We spent a lot of time on our…
Unfortunately, I cannot tell you what wiper seal you would need for your 2004 Keystone Outback. This is not something that is known just from the RV information. It depends on your particular slide-out. The best way to determine what wiper seal you…
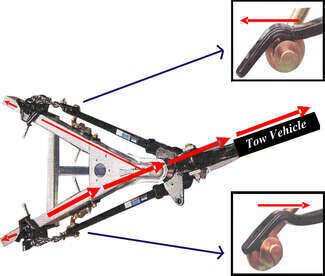
Hey Jack congrats on the new Jeep! To flat tow a 2021 Jeep Wrangler Rubicon behind your 2012 Thor Hurricane 31J motorhome, I recommend the following parts: Tow Bar and Safety Chains - etrailer XHD Non-Binding Tow Bar for Roadmaster Direct-Connect…
Hello Andrew, good question. Basically the only difference between the composite kits and the standard (non-composite) kits is the application they are used for. Composite are used in motorhomes, the other are used on towable campers. It has to do…
Hey Jared, the pass through amp rating of the Rich Solar NOVA 3K12 3000W 12V Pure Sine Wave Inverter with Built-in Transfer Switch for RVs #RS79VR is 30 amps. What AC units do you have? This should be more than enough for that.
Hey, Skip! Happy to help get your new Jeep set up for flat towing. There is going to be a list of parts, so I'll go ahead and list them all below for ya. Blue Ox Base Plate: Part #BX1139 Blue Ox Avail Non-Binding Tow Bar: Part #BX7420 Demco…
To get right seal you'll need to remove a portion of the seal to get the side profile of your current seal. There are multiple types of applications for slide-out seals; Glue On, Peel-N-Stick, Press In, Push On, and Slide-On. There are multiple…
Hey Martin, The only difference I'm seeing between the Replacement Motor #TUS24FR and the Replacement Motor #LC125802 is that the TUS24FR has a 9000 RPM rating while the LC125802 has a 440 RPM rating while under load, which jumps up to 500 RPM…
Hey Donna, you would have to replace the entire setup as there was a refrigerant law change in January of 2025 that forced the complete systems to have to be redesigned and because of that nothing is currently backwards compatible. So what I would…
You've got both a wiper seal and a bulb seal here with the wiper seals having a track for the bulb seal to slide onto. The Rubber Wiper Seal with Track for RV Slide Out #SR87FR you were already looking at is most likely the closest option to what…
WOW! I am impressed! I called to place my order and real person answered, spoke perfect English, albeit a slight southern accent, and my order was sent within a day, shipped quickly and I had it a few days later. I saved over a hundred dollars over local and installed it my self. I cant imagine how that they could do any better. THANKS!
RV Slide Out Parts with roller parts for smooth travel
Keep your slide moving smoothly with roller parts that tame vibration and support heavy rooms. Verify key fit points like bracket height and the height to the top of the roller, such as 2", and match roller diameter for swaps into existing brackets. Installs can be straightforward, though some bearing replacements may require removing the slide, and shimming or minor grinding can help fine-tune alignment.
Test-fit the bracket so tabs don't contact or gouge the floor; light grinding of tabs has helped in some setups. Use flat washers as spacers if you need a small height adjustment for clearance. Some replacements may not include 3/8-24 fine thread nuts—confirm hardware needs before starting. In some layouts, bearing replacement requires removing the slide room.
Yes, if the wheel is removable and the new roller matches the diameter and axle/bearing size. Check that the axle bolt head will clear the mounting surface; if it isn't flush, the bracket can tilt. If needed, recess the contact point or use appropriate hardware to keep the bracket square.
Start by measuring the bracket height to the top of the roller and the roller diameter. Compare the mounting style and hole spacing so the bracket sits flat and supports the slide evenly. If your current bracket height differs, confirm whether spacers or a different bracket profile is needed to keep the slide floor level.
They can reduce vibration and help the room move smoother. Verify the underside of the slide is smooth; knock down ridges and seal repairs so the rollers glide. Place rollers to support heavy or high-traffic areas and ensure they share the load evenly to minimize hang-ups on the way in.


 Filters