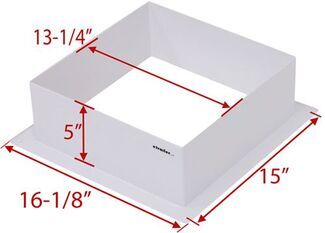
Hey Ron, great question! The Coleman-Mach Underbunk RV AC #CM82RR vents the heat through the floor. Installation requires creating openings in the floor for air flow, heat rejection, and also for the drain pipes. See the attached photo. The #CM62RR…
Hi Angela; you will run air ducting (not included) off of the openings on the side of the Coleman-Mach Underbunk RV AC #CM62RR. I recommend getting the All-In-One kit #CM82RR which includes all of the accessories you need for installation. The unit…
For a 25-3/4" x 14-3/4" cutout we have the following single bowl and double bowl options: Single Bowl: Better Bath RV Kitchen Sink #LC385313 Double Bowl: Better Bath RV Kitchen Sink #LC388412 Better Bath RV Kitchen Sink #LC385314 LaSalle…
Hey Mike, congrats on the new trailer. The Tire Linc Pro TPMS for RVs and Trailers item #LC77VC is the Lippert TPMS Prep. This is just the aftermarket version of what gets installed on newer trailers. It includes four sensors that mount to a trailer…
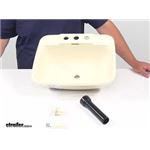
Hello Geoff, thanks for reaching out. The closest thing we have to that would be the Better Bath RV Kitchen Sink #LC421572. This is 25" long x 15" wide overall. The interior of the sink is 22-7/8" x 12-7/8". Do you have any…
Hey Jeff, Depending on how much clearance you need from that tailgate is going to determine what kind of hitch extender you will need. Assuming you just have a factory 2" hitch receiver on your Ram you could go with the hitch extender #e48YR…
Hey Michael! Since you were looking at the SoftStartRV Soft Start #SSR54FR are you wanting that built in as well? The Active Controls ActiveStart Plug-In Soft Start for RVs #AS94FR is a soft start and surge protector all in one. If you aren't…
Hey Chris, No, there isn't an upgrade kit for your Generation 1 MORryde StepAbove RV Steps to make them a Generation 2. There is a Replacement Leg for MORryde StepAbove RV Steps - 2nd Generation #MR36DR, but because the Generation 1 steps'…
Hey Ron, great question! The new PowerMax stand-alone converters like the 45A #PM34VR, 55A #PM94VR, 60A #PM44VR, and 100A #PM84VR give you three selectable charging modes so you’re not locked into one charging behavior. 3-stage mode factory default:…
The Lippert Replacement 500:1 Motor for Electric In-Wall RV Slide-Out System, #LC287298 is the proper replacement part for Winnebago PN 181862-01-700 and is considered a high torque replacement motor. If your 2014 Itasca Solei 38R was built with the…
Hey Tyler, yes, as long as your factory jounce bumper and bracket are still in the original location, the Firestone air bag kit #F64XV can absolutely fit your lifted Silverado. You’ll just need the right Firestone spacer to restore air-spring height.…
Product arrived very quickly. Everything was there and fit properly. I'm very satisfied.
Greg
Hillsborough, NC
17 x 20 Inch RV Sinks for Easy Upgrades
Dial in the right replacement with 17 x 20 inch RV sinks. This size often fits existing cutouts, though some installs may need a slight trim or bracket-hole adjustment to sit flush. Mounting tabs clamp the rim to the underside of the counter, and when no cutout pattern is included you can use the sink itself as a template for the counter and faucet holes.
Not always. If a template isn't included, flip the sink upside down and trace it to guide your cut, then use the sink itself to mark faucet holes. Dry-fit first to confirm bracket reach and check for small counter trims that might be needed to sit flush.
They clamp to the underside with mounting tabs. Set the sink in place, attach a tab at each mounting point, and face the tabs outward so they grip the underside of the counter. Check tab locations before tightening; in some setups tabs were closer to the rim than the old sink, which can change where they bite.
Match the drain to the sink's hole. If the drain hole is 1 5/8, use a 1-1/2 inch threaded diameter drain. If you prefer a pop-up without overflow, that style is available; confirm it seats well on your bowl since shallow contours can affect the fit.
It can, but measure your cutout first. Some installs needed a minor trim to the countertop for a proper fit. Mounting tabs may sit closer to the outer edge than the original, so check where the brackets land under your counter. If reusing hardware, verify number eight screw length—some swaps required screws a 1/4 inch shorter to clamp correctly.


 Filters