Roadmaster Tail Light Wiring Kit with Bulbs

Will this fit?
To see if this custom-fit item will work for you please tell us what vehicle you'll use it with.
Thank you! Your comment has been submitted successfully. You should be able to view your question/comment here within a few days.
Error submitting comment. Please try again momentarily.
- All Info
- Reviews (244)
- Q & A (0)
- Videos (2)
- Photos
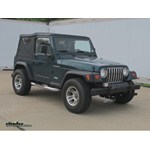
1999 Jeep Wrangler - Roadmaster Tail Light Wiring Kit with Bulbs
- Bulb and Socket Kit
- Bypasses Vehicle Wiring
- Tail Light Mount
- Universal
- Roadmaster
Use your towed car's signal lights without tapping into its wiring. This self-contained wiring kit bypasses your Jeep Wrangler's electrical system, eliminating any concerns over violating the manufacturer's warranty.
Features:
- Lets you use your towed vehicle's brake, running and signal lights without tapping into its wiring
- Bypasses towed car's electrical system completely - wiring is routed beneath the car
- Works via independent plugs and sockets mounted inside the tail lights
- Maintains manufacturer's warranty on towed car by avoiding any involvement with its electrical system
- Overall measurement of bulb: 2-1/4"
- Length of bulb from flange to top of bulb: 2"
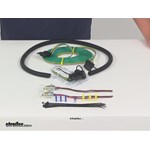
- Includes all necessary wiring, 2 lights, 2 sockets, zip-ties and instructions
- Made in the USA
- Limited Lifetime Warranty
Note: Towed car must have enough room inside the tail light lens housing for an extra bulb and socket.
155 RoadMaster Tail Light Wiring Kit with Bulbs
Installation Details

Videos are provided as a guide only. Refer to manufacturer installation instructions and specs for complete information.
Video Transcript for Roadmaster Tail Light Wiring Kit Installation - 1998 Jeep Wrangler
Today on our 1998 Jeep Wrangler, we'll be installing the Road Master Taillight Wiring Kit with bulbs, part number RM-155. To being with, we're going to go ahead and open up the hood of the vehicle. We're going to cut one end of the four flat off. We will not need this in this application. Next we're going to route our wire through the grill and through the engine compartment. It's a good idea to keep a couple extra feet up near the front of the vehicle in case if you have to replace a plug or move the location where your plug may attach to your vehicle.
Next we'll take the long strand of wire that comes with the kit, that has two ends of the four flat on it. The shorter wire is for jumping between your tow vehicle and your towed vehicle. In this case, we're going to route it behind the grill and then route it up into the engine compartment, following along some factory wires. We'll use some zip ties along the way to help secure it. Now when routing your wire, make sure you stay away from any moving parts, parts that may become hot, or sharp edges. Now that we've got our wire routed through the engine compartment, we'll fish it down towards the underside of the vehicle up near the firewall.
Now we'll go underneath the vehicle and route the wire back to the back end. We're going to end up back near the driver's side taillight at the rear of the vehicle. Again, we'll use some zip ties along the way to help secure it. Now that we're at the rear of the vehicle, we need to pull the plastic section of mud flap or under-body carriage that protects the wiring for both the taillights. We will not be tying into any of the factory wiring, but our wires from the bulb kit will actually be coming out right next to where our factory wiring is already at. Now that we've got our wires run to the back of the vehicle, we're going to strip the wire and we're going to keep the green wire solid and cut off the excess brown, white, and yellow wire.
The yellow wire will stay over at the driver's side. This will be the turn and brake signal for this side. We're going to need to make a jumper wire for the white and brown, so what we'll do is we'll use the excess wire and put it with our green wire that runs over to the passenger side. When routing this, we went ahead and used about five or six feet of half inch wire loom, which you can purchase by the foot, and it's part number 459075-1. Now on the driver's side, that should leave us the yellow, a brown, a white. The extra jumper wire that we carried over on the passenger side now, we should have a brown, a green and a white wire.
You'll also have the jumper wire over on the driver's side coming from the passenger that will be the excess brown and white wire that we ran over. This is how we'll tie our passenger and driver's side lighting together for the running as well as the ground. Now we'll take the covers off the taillight assemblies. We need to choose a location that we can drill a one inch hole so we can insert our bulb. Before drilling your one inch hole, you want to make sure that there's nothing behind it that can be damaged and you also want to put a pilot hole to check to make sure everything will clear. With our pilot hole drilled, we'll use the one inch hole saw. Now that we have our hole drilled, we'll remove the three bolts that hold the light assembly to the body. With this off, we need to take the light assembly and we'll need to bend the tabs out just a little bit so that we get a nice snug fit into the back of the light. A quick tech tip, it's a good idea when messing with any of the light sockets to take the bulb out so you do not damage the bulb. Now that we have our tabs bent out on the light socket and it fits firmly into place, before we put it in, we're going to strip a little wire off of each of the brown, the red and the black wire. Now that we have the light socket pushed into the back of the light assembly, we're going to use a little bit of silicone gasket maker to help seal it off and make sure no water gets into it. This is part number LT37467. We'll feed the three wires from the light socket through the hole that we drilled in the body and put the whole light assembly back on the body by putting the three screws that we removed earlier back on. We'll repeat the same process over here on the passenger side. With both of our light sockets installed in the light assemblies, now we're ready to do the wiring. Over here on the passenger side, we'll connect the green wire with the red wire using a butt connector, the black wire with the white wire using a butt connector, and the brown wire with the brown. Once these connections are made, we'll tape them up with some electrical tape. We'll also use a couple zip ties to help secure the wire. With that done, we can put the under-body panel back up into place and put the push pin fastener back in. Now we'll move over here to the driver's side. We'll connect three white wires, in this case we had to take an extra piece of the white wire that we had already cut off, as we'll need to use this as our ground wire. On this side, since we brought a jumper over from the passenger side, we're going to connect two of the brown wires together so we'll use the larger butt connectors, which are yellow in this case. For our yellow wire, we'll strip that back and put a butt connector on it as well. We'll make the connections with the back of the light socket. On this case, the yellow will go with the red, the brown will go with the brown and the white will go with the black. With all these connections made, we'll put some electrical tape on them as well. For the white wire that we brought down for our ground, we'll put a ring terminal on this one. We'll put some electrical tape on them as well. Now that we've got that done, we can put the under-body panel back up into place and put the push pin fastener back in as well. We're going to use the ground wire and use a self tamping screw and connect it to the frame of the vehicle. Now that our ground wire is in place, we're ready to test out our function of our lights. As you can see here, the running lights as well as the brake and turn are all working fine. Back on the front of our vehicle, we'll do a test as well as securing the four flat up into the grill area. As you can see here, if you use the jumper wire that comes with the kit to go from your towed vehicle to your tow vehicle, you just connect the four flat and then you connect to the back of your tow vehicle. When not in use, you can connect it back into the grill area. In this case, we just use a simple zip tie. Like I said earlier, it's a good idea to keep a couple extra feet of wire up behind the grill here, or up in the engine compartment area in case you ever need to replace this plug on the end. That will conclude the installation of our Road Master Taillight Wiring Kit with bulbs, part number RM-155 on our 1998 Jeep Wrangler. .
Customer Satisfaction Score:
94% were satisfied with this product
6% of customers were not satisfied
- Wrong item was ordered
- etrailer mistake
- Did not arrive in time
Customer Reviews
Roadmaster Tail Light Wiring Kit with Bulbs - RM-155
Average Customer Rating: 4.7 out of 5 stars (244 Customer Reviews)
Use your towed car's signal lights without tapping into its wiring. This self-contained wiring kit bypasses your vehicle's electrical system, eliminating any concerns over violating the manufacturer's warranty.Always completely satisfied with Etrailer service and products! Jamie B is very knowledgable and courteous!
This was a good option for our 2020 Chevy Equinox because it does not tie into the tow vehicle electrical system and runs directly from the Motorhome electrical system.
Put this into a 2002 Jeep Liberty. Good directions. Drilled out the lower part of tail light housing and install bulb sockets into it. You may have to deburr the tail light housing a bit and manipulate the tangs on the bulb socket but is fine. I put in 1157 LED bulbs :) Good stuff!
This product was easy to install but it took some time routing the wiring harness from the front bumper to the rear. Pick up some extra zip ties, you will need several. The lighting system is independent allowing for the use of LED bulbs. Great product.

easy install one year later still working perfectly

it worked well
Found this item was wired with the brake lights for the brown wires and turn/running lights for colored wires and this fact kept me from getting this done very rapidly. Once identified, went together really nicely and actually grounded to frame for higher light output. I upgraded 3 wire into 2 wire converter with "Roadmaster Brite-lite 3 to 2 Wiring Converter" and they are as bright as the lights already in the housing. Except for that wiring issue, it would have been excellent. As to performance after install, great. Customer service was nice from Roadmaster as well. Did receive a call back message from etrailer a couple days later.
I purchased a Blue Ox base plate, Air Force One braking system, and a light kit for my 2013 Durango. I could have not asked for an easier process with selecting and ordering, also the tutorials and videos were a great help in determining what was the best system for me . Everything arrived as planned and in great condition. This is not my first time using etrailer.com and my prior experience was equally good.
Ken G.

10/23/2017
After using the items I reviewed, about 6,000 miles, I am more than satisfied. The towing setup is easy to hook up and unhook and the braking system is second to none. All of the installation was completed by myself and a friend, both of us have a technical background him more than me and we found the videos of the installation extremely helpful.Thank you for following up and providing excellent products as well as support services.
Great customer service fast delivery and reasonable price. Been purchasing from ETrailer for years
great kit i have installed them before

I like this product and would definitely buy it again. I like not having to splice into the vehicle wiring and install diodes, etc. It is a clean installation with good instructions. All I have to do to hook up the lights is raise the hood of the towed car and pull out the pigtail and hook it to the motorhome. It is powered by the motorhome and does not run down the battery in the towed car. Great product.

Gary Y.

8/19/2017
Works great! Would definitely recommend it.
Great idea. After years of towing with magnetic lights now all I have to do is plug it in, and I'm done.
The kit kit comes with more parts and wire than I needed and was simple to install on my 2010 JK.

Frank S.

6/27/2014
Thanks Patrick. It works so well I forgot I had it.
Good instructions. Everything need is included for 4flat connections. One bulb socket arrived with the ground (black) wire loose in the bag. The solder joint had failed. Resoldered but had to remove the other wires and rubber insert from the bulb socket to avoid melting. Not a shining example for Roadmaster.
Joel

8/16/2015
no issues, working as expected
This kit really simplifies wiring tail lights on a vehicle that will be towed. No cutting into the vehicle's wiring and adding isolation diodes. Very functional and easy to install.

Kim P.

1/26/2016
The parts are working perfectly. Thank you.
I have used the brake light wiring kit on 2 other towed vehicles. It is an easy install, does not compromise the original factory wiring and works well.
Robert

11/12/2018
Easy install, working well 1 year later.
Kit was of good quality components. I would recommend about twice a much protective wire wrap along with extra of the smaller butt connectors. Fortunitely I had what I needed on hand. I also used a larger ring terminal.

Jack M.

5/9/2020
Works great. 2002 Jeep Wrangler tail lights have plenty of room for the extra tail light bulbs.
This time it went without a hitch. last time was another thing. hopefully moving forward its all good.
thankyou
Nice to not have to splice into vehicle wiring harness. Separate bulb assembly in existing tail light housing works great for towing our "TOAD" behind motor home.

Kevin M.

9/2/2020
Still works great after a year of towing to many destinations.
A very clever idea for an easy, neat, simple installation to safely operate tail lights on a towed vehicle. We installed this kit on our 2017 Chevy Sonic and it works great.

Edp

8/15/2018
Thanks for the follow up. Everything is working just fine, no problems, nothing but good performance.

Watched video and installed with no issues. Great product! Will buy again for future vehicles.
Great product, not a bad install and works great. I chose to cut off both 4 flat connectors and I installed a 4 round connector with spring cover on the front of my CRV. Looks and work out great.
W. D.

7/19/2017
Still working fine.

I really didn't want to install a separate bulb kit but our Equinox light was not compatible with our motor home. I was also installing a trailer lighting harness for the Equinox at the same time and doing them together made a lot of sense. I found this kit to be easy to manage and that drilling into the rear light housings not nearly as difficult as I had imagined. I would share a picture of the result but fortunately there is nothing to see - everything fit right into the Equinox's rear lamp structure. I compared the original lights with those from the kit driven by the RV and found them to be a great match. I upgraded the kit bulbs to LEDs for greater longevity.
I purchased this wiring kit for use in my 1999 Mazda Miata.
I did not want to cut into the OEM wiring harness, even using the diode method to safeguard the system. I felt that the fully separate wiring harness was more to my way of thinking for getting my car ready to tow.
I did not follow the included instructions that said to run the flat 4 wiring beneath the car, zip tying it along the way free of the exhaust and moving parts. I ran it through the firewall, beneath the dash, under the center console, and under the carpeting back into the trunk area. I then installed the bulb holders as instructed in my OEM Miata taillight fixtures.
I am happy to have all the wiring up and out of the way of potential road hazard damage, as well as the hot and/or moving parts beneath the car.
It works perfectly, and I am glad that I purchased this kit, and also that I decided to install it the way I felt best to do so.
It took much longer my way, but I'll never have to mess with it again.
I ordered a Bulb and Socket kit for my 2019 Chevy Equinox. I’m getting ready to install it this weekend. I am disappointed in a couple of things so far. The kit was clearly a return from another customer. The packaging was cut open and taped closed, and the inside bag of small parts was also cut open and stapled. I don’t know if something was defective. So that is concerning.
Also odd is that the online instructions refer to using “the self-tapping screw” for a ground, but it’s not included. Had I known, I could have ordered it with the baseplate and kit, but too late now. Why not include it?
The online instructions and video depict and give instructions for wiring the harness to the 6way plug, again, not included. This kit included some rather flimsy flat 4way plugs on the wiring harness. I will need to cut those off and order a 6 way receptacle. Again, had I known ... since shipping is included only with orders of $100, not excited to find I need small extra parts, that I now have to get elsewhere, and quickly.
So hopefully the install will go well. I like the videos.

Easy to install works great
See what our Experts say about this Roadmaster Tow Bar Wiring
- What Size Hole Is Needed For Mounting Bulb And Socket For Taillight AssemblyTo install the Roadmaster Bulb and Socket Kit, part # RM-155-2, you will need to drill a 1 inch diameter hole in the rear of your taillight assemblies. You want to make sure you have at least 2-1/2 inches of available depth, because the heat from the bulb could melt the lens if mounted too close. A hole saw is probably the best option for drilling a 1 inch hole. If the entire kit is needed, you can order part # RM-155. I have attached an installation video you can check out.
view full answer... - Hole Size Required to Install Roadmaster Bulb and Socket Kit RM-155-2To use the Roadmaster Bulb and Socket kit you referenced, part # RM-155-2, you'll need to drill a 1 inch diameter hole in the rear of your taillight assemblies. You'll want to make sure you have at least 2-1/2 inches of available depth, because if the bulb is too close to the inside of the lens, the lens could melt. The full kit that includes the connectors and wire is part # RM-155.
view full answer... - Tow Bar Lighting Recommendations for a 2012 Honda CRVI checked with Roadmaster and the Bulb and Socket Set # RM-155-2 that you referenced will work on your 2012 Honda CRV. For the entire kit you would want part # RM-155 though.
view full answer... - Size of Hole Needed to Install Roadmaster Bulb and Socket Kit # RM-155 In Taillight AssemblyTo use the Roadmaster Bulb and Socket kit you referenced, part # RM-155-2, you'll need to drill a 1 inch diameter hole in the rear of your taillight assemblies. You'll want to make sure you have at least 2-1/2 inches of available depth, because if the bulb is too close to the inside of the lens, the lens could melt. The full kit that includes the connectors and wire is part # RM-155. I'll link you to an install video that you should find helpful.
view full answer... - Will the Roadmaster Bulb and Socket Kit Fit a 2010 Honda CR-VI checked with Roadmaster and they do list the bulb and socket kit, # RM-155, as a fit for the 2010 and 2012 Honda CR-V. However, to be certain I recommend drilling a 1/16 inch hole in the back of the tail light housing and then using a small piece of rigid wire or something similar that will fit in the hole, push it in as far as it will go, and then measure how much of the wire goes inside the housing. This will tell you how much space there is. You will need about 2-1/4 inches of depth.
view full answer... - Installing Ground Wires of Roadmaster Tail Light Bulb Kit for a Flat Towed VehicleGenerally, when installing # RM-155 the ground wires are combined and connected to the vehicle frame in one location. However, as long as you're using a good, clean mounting point the grounds can be connected on each side.
view full answer... - Are Light Sockets in # RM-155 Available Separately From Rest of KitThe lights sockets you refer to are indeed available without the rest of the kit. You would need part # RM-155-2, which you can see by clicking on the provided link.
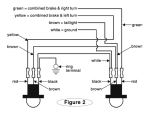
view full answer... - Why Ground Wire Is Required On Towed Vehicle When Installing Tow Bar WiringAs with the installation of lights on a trailer, the lights must be grounded, either through the mounting hardware which is the case for many lights. As with trailer wiring the # RM-155 needs the bulbs to be grounded to the vehicle to complete the circuit. It is true you get the ground from the towing vehicle but the in order for the circuit to be complete the towed vehicle wiring has to be grounded to the towed vehicle as well. I have attached a drawing from the installation instructions...
view full answer... - Are Diodes Needed When Using the Roadmaster Tail Light Wiring Kit # RM-155 on 2014 Buick EnclaveDiodes are only for situations where you are using the towed vehicles factory tail lights and wires. When using the Roadmaster Tail Light Wiring Kit, # RM-155, it provides dedicated tail lights and wires so diodes are not needed. I have attached a picture which shows the recommended location for drilling and installing the bulb and socket.
view full answer... - Trailer Lights Only Work When Uncoupled from Hitch BallThe issue you described sounds like a ground issue which could be on the lighting assemblies, trailer side trailer connector, or vehicle side trailer connector. I recommend removing the ground wire on each of these and then sanding down the surface with some sandpaper and then using new mounting hardware to reattach the wires. The ground pin/wire inside the trailer connectors could also be loose as well. Once you have performed the above please let me know if that fixes your problem and...
view full answer... - Will the Roadmaster Tail Light Wiring Kit, # RM-155, Fit in 2010 Ford Escape Lens HousingThe Roadmaster Tail Light Wiring Kit with Bulbs, # RM-155, is a universal wiring kit, so it can be used on your 2010 Ford Escape as long as you have room in your taillight housing to drill a 1 inch hole under the red lens. It uses the standard #1157 bulb which measures 1.83 inches tall and .97 inches width of the bulb. The sockets measures .95 inches where it goes into the lense. The instructions show to drill a 1 inch hole in the taillight housing beneath a red lens to fit the socket...
view full answer... - Will the Roadmaster Tail Light Wiring Kit, # RM-155, Fit in 2011 Honda Fit Lens HousingThe Roadmaster Tail Light Wiring Kit with Bulbs, # RM-155, is a universal wiring kit, so it can be used on your 2011 Honda Fit as long as you have room in your taillight housing to drill a 1 inch hole under the red lens. It uses the standard #1157 bulb which measures 1.83 inches tall and .97 inches width of the bulb. The sockets measures .95 inches where it goes into the lens. The instructions show to drill a 1 inch hole in the taillight housing beneath a red lens to fit the socket and...
view full answer... - Recommended Tow Bar Wiring For 2017 Chevrolet Sonic LTThe Roadmaster Tail Light Wiring Kit with Bulbs # RM-155 you mentioned is confirmed to fit your 2017 Chevrolet Sonic, and is exactly what you need for your tow vehicle to power the lights on your Sonic while it is being flat towed. If your tow vehicle has a 7-way connector you will also need the # HM47075 to connect the 4-way connector on the # RM-155 to the 7-way connector. Since your Sonic does not have a key, you will need to press the start button without having your foot on the brake...
view full answer... - Where To Install Bulb Socket Kit for Flat Towing 2005 Jeep Grand CherokeeRoadmaster doesn't give us the exact location to install the Bulb Socket kits like the part # RM-155 you mentioned but we do know these are a fit for your vehicle. You will want to go with the bulb housing with the most room. It looks like the lowest housing is the one to use but you'll want to mock it up to see if it would clear as needed when the housing is reinstalled.
view full answer... - What Are Drilling Specifications When Installing RoadMaster Wiring Kit # RM-155 on 2014 GMC SierraIn the instructions, which I have attached for the RoadMaster Tail Light Wiring Kit # RM-155 does not give you specific mounting points. What they do give you are parameters to guide you to the correct location. According to the RoadMaster fit guide, if your 2014 GMC Sierra is the 1500 then this wiring kit will fit. My RoadMaster technical contact confirms that this kit has not been tested on the 2014 GMC Sierra 2500 or 3500 so they cannot verify this kit will fit. RoadMaster states...
view full answer... - Pulling Fuses to Flat Tow 2010 Ford EscapeAccording to Roadmaster, only one fuse needs to be pulled in order to flat tow your Escape. According to Roadmaster, the fuse is located in the power distribution box under the hood. You would remove the 20 AMP Main Ignition Fuse in position # 28. Roadmaster highly recommends you confirm the fuse location with your Ford dealer. For more info about flat towing, you can check out the Flat Towing articles I have linked to.
view full answer... - Will the RoadMaster Tail Light Wiring Kit # RM-155 fit a 2011 Ford FusionYes, I checked with Roadmaster and the RoadMaster Tail Light Wiring Kit # RM-155 that you referenced will work on your 2011 Ford Fusion. I attached a couple FAQ articles on tow bar wiring that you might find informative also.
view full answer... - Will the Roadmaster Bulb and SOcket Tow Bar Wiring Kit Fit a 2011 Nissan Versa HatchbackWe have not had anyone come to us with specific problems related to a 2011 Nissan Versa hatchback and tow bar wiring kit # RM-155. There are some things about the bulb and socket kit that you need to be aware of. There is drilling involved with the installation of this kit. You have to drill into the back of the tail light housing to mount the bulbs. There needs to be enough space inside the housing for the bulbs to fit without melting the tail light lens. There needs to be 1/4 inch of...
view full answer... - Will Roadmaster Tail Light Wiring Kit with Bulbs # RM-155 Fit a 2008 Saturn VueAccording to the Roadmaster, the Roadmaster Tail Light Wiring Kit with Bulbs, part # RM-155, will fit in the tail lights of your 2008 Saturn Vue. The # RM-155 kit will require you to drill a 1-inch hole in the back of the taillight housing right under the red lens. It uses the standard #1157 bulb which measures 1.83 inches tall and .97 inches width of the bulb. The sockets measures .95 inches where it goes into the lens. The instructions show to drill a 1 inch hole in the taillight housing...
view full answer... - Wire Color Code For Roadmaster RM-155 Bulb and Socket Flat Towing Wiring KitFor the Roadmaster Bulb and Socket kit you referred to, part # RM-155, the wire color code is as follows: Yellow wire carries left turn/brake lamp signal Green wire carries right turn/brake lamp signal Brown wire carries running lamp signal White wire is ground To see product description video of the # RM-155, click the provided link.
view full answer... - Is There a Hopkins Custom Tail Light Wiring Kit for Towed Vehicles for a 2010 Toyota TacomaIt sounds like you are looking for a flat-tow wiring harness for a 2010 Toyota Tacoma and if that is the case we have some great options. That said, none are plug-in-play like the Hopkins Custom Tail Light Wiring Kit for Towed Vehicles as this is not available for a Toyota Tacoma. If you don't want to do any splicing we still have an option in the Roadmaster Tail Light Wiring Kit with Bulbs part # RM-155 so that is what I recommend.
view full answer... - Tow Bar Lighting Recommendation for a 2008 Jeep WranglerYes, I checked with Roadmaster and the Tow Bar lighting kit part # RM-155 that you referenced has been confirmed as a fit for your 2008 Jeep Wrangler. I attached an install video that shows this kit being installed in a similar Wrangler as yours for you to check out as well.
view full answer... - Flat Towing Taillight Wiring Options for 2014 Jeep Grand CherokeeAccording to Roadmaster, their Bulb and Socket Taillight Wiring Kit, part # RM-155 is indeed a fit for your 2015 Grand Cherokee. I don't have any installation photos or video footage of it being installed on your vehicle, but I've linked you to a video showing the kit being installed on a 2014 Jeep Patriot. It's a different vehicle, but the procedure would be similar. I'll link you to some help articles about flat towing, as well as other flat towing accessories that are a fit for your...
view full answer... - Will Roadmaster Tail Light Wiring Kit with Bulbs Part # RM-155 Work on a 2007 Jeep Wrangler XThe Roadmaster Tail Light Wiring Kit with Bulbs, part # RM-155 is a universal fit item that will fit many different vehicles. According to my contacts at Roadmaster, the bulb kit is a fit, and would work well for your Wrangler X. This kit is relatively easy to install, and will remain completely independent of the tail light circuits on your Jeep. I linked some information on selecting tow bar wiring that you may find helpful.
view full answer...
Do you have a question about this Tow Bar Wiring?
Info for this part was:


At etrailer.com we provide the best information available about the products we sell. We take the quality of our information seriously so that you can get the right part the first time. Let us know if anything is missing or if you have any questions.





Robertbenita
6/30/2014
Continues to work as it should! Very pleased with end product after installation by myself and continue to be happy every time I hook up since! Nice item! And customer service...Well they checked back with me a year later to see if I needed anything. How is that for the best customer service around! A