
 Product Experts Available Now!
Call 1-800-940-8924


Thank you! Your comment has been submitted successfully. You should be able to view your question/comment here within a few days.
Error submitting comment. Please try again momentarily.


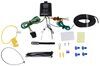
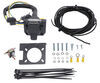
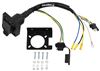
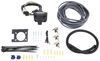
If your vehicle has a 4-way flat but your trailer uses a 6-way round plug, this adapter makes them work together instantly. The Hopkins Adapter 4 Pole to 6 Pole and 4 Pole Trailer Wiring Adapter plugs into the existing 4-flat connector and gives you both a 4-flat and a 6-round at the back of your vehicle. It’s a quick, plug-in solution for connecting trailers with different wiring styles.
The adapter includes three loose wire leads so you can add more functions when needed. The white wire grounds to the frame, while the blue wire handles brake controller output and the black wire supplies 12-volt auxiliary power. When hooked up through a 40-amp circuit breaker, the black lead can charge a trailer battery or power accessories. The setup uses 10-gauge wire for each of these circuits, ensuring solid current handling when you expand your wiring later.
With both a 6-round and a standard 4-flat plug built into one housing, you don’t have to switch cords or adapters every time you hook up a different trailer. Whether you’re pulling a simple utility trailer or one equipped with brakes or onboard power, this dual connector keeps your rig ready for either type.
The snug-fitting connector makes a solid link to your existing 4-way without play or looseness. A protective cover on the round socket shields the terminals from dirt and moisture when not in use, keeping corrosion out so it stays reliable season after season.
Videos are provided as a guide only. Refer to manufacturer installation instructions and specs for complete information.
Today on this 2008 Chevrolet Express we are going to install part number 37175 from Hopkins. What this is is a 4-pole to 6-pole and 4-pole adapter. It will install on the existing 4-pole that is on the vehicle and convert it. The first thing we are going to do is tidy up the wires. We are just going to use some electric tape to secure everything together. While we are at it, we will go ahead and show you the functions of the wires. First off we will cover the function of the wires. This is the 4-pole itself and this will plug in to the 4-pole that is already existing on the vehicle. The white wire is the ground and that will get connected to the frame. And then we have the red and blue wires. Traditionally, blue is for brakes. However, on this particular 6-pole, the blue wire is ran to the center pin. So a lot of times the outside pin is going to be for brakes. It just depends on how your trailer is wired up. The red wire here is typically used for a hot lead. However, this is run to the outside pin. So you can actually use either one of these for the hot lead for 12 volts or brake lead, depending on how your trailer is wired up. On this install, we are actually not going to be using these. We are just going to use the 6-pole for lights only. 1:09
OK, here we are all finished. Let us go ahead and set this to the side and go ahead and install the bracket on to the bumper of the vehicle. We are going to take our bracket and install it right on the bottom edge of the bumper. We are going to use a set of vice grips to go ahead and just clamp it into place. Get it straight with the hitch. Alright, then we will go ahead and use some self-tapping screws to go ahead and attach it. Now we will go ahead and install our wire harness. Push it into place and then attach it with the existing hardware. Now we are going to take the 4-pole that is already installed on the vehicle and we will plug these two together. Now it is a good idea to use some dielectric grease to help protect the contacts. This will end up being a permanent connection when it is all done. And then we will thread a zip-tie around it. Now our two other ends that are not going to be used, we will just cover those with electric tape as well so they will be safe for future use. OK, now we will take our white wire. What I think we will do is just go ahead and push it inside of the frame. And then we will actually attach it to the bottom of the frame behind the hitch. We will go ahead and zip-tie our wires to take up the excess slack. There is a nice little hole in the frame here, so we will use that. Alright, with that that finishes our install. One other thing you might want to do is go ahead and test it with a light tester and make sure everything is functioning. And then try it on your trailer. And that will finish it for part number 37175 from Hopkins.
Customer Satisfaction Score:
89% were satisfied with this product
11% of customers were not satisfied
Ratings & Reviews




Mike L.
3/23/2026
Sorry about that, Tim. I'll get that taken care of for you.
Keith C.

3/1/2020
Installed it, connected it, its working just as it should


Do you have a question about this Custom Fit Vehicle Wiring?
Info for this part was:
At etrailer we provide the best information available about the products we sell. We take the quality of our information seriously so that you can get the right part the first time. Let us know if anything is missing or if you have any questions.





























Ed
6/27/2020
Works well but bracket is rusting