

 Arrives before Christmas
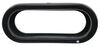
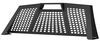
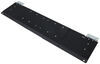
 This red GloLight is bright, easy to see, waterproof, and just looks cool. The outer band is a tail light and the center LEDs are a turn signal and brake light. Mounts in a cutout using a grommet (sold separately) and has a weathertight connector.
Features:
Specs:
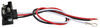
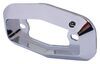
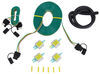
This GloLight has a weathertight plug that's designed to block out moisture and protect your wiring. It needs a particular adapter (AL45PWTB - sold separately) to plug into a 3-plug pigtail and connect to your vehicle or trailer. Pick up a right-angle pigtail (A47PB - sold separately) or a straight pigtail (A45PB - sold separately) if you don't have one already.
This light installs in a grommet (A70GB - sold separately) and requires cutting a hole into your trailer if it doesn't already have one.
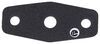
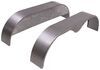
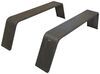
If you'd rather not cut a hole in your trailer, you can use an optional mounting bracket (BK70BB - sold separately) instead. You will still need the A70GB grommet.
California residents: click here
Videos are provided as a guide only. Refer to manufacturer installation instructions and specs for complete information.
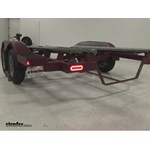
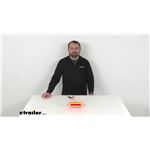
Today, we're going to be taking a look at the Optronics GloLight LED Trailer Tail Light, part number STL111RMB. Here on the back of our trailer, you can see the comparison between our old incandescent bulb on the right hand side, and our new Optronics LED light on the left. It features 22 DOT approved LED lights, and because it's LED, it's going to be more efficient, and there are no bulbs to replace. It's a 6.5 inch oval light that serves three functions. You have your brakes, and then your turn signal, and then your tail lights. As you can see, when you're running your tail lights, you have the halo effect.
When the brakes are applied, everything lights up. It features a sonically sealed waterproof housing, and fits flush with a grommet, which is not included. The grommet we recommend is part number A70GB. It comes in a quantity of one, so if you're looking to replace both tail lights, which is what we recommend, you'll need to pick up a second one. Now I'll go ahead and show you how we got it installed. First, let's go ahead and start by removing our old, incandescent bulb. You can simply use a flat head screwdriver, or you can just pry it out by hand, whichever works for you.
Also, if you're not replacing the grommet, you're going to want to leave that in place. So let's pry it out. Now, with the light out, let's go ahead and disconnect this. We're just going to take two fingers here, and just kind of work it off. Now, you'll notice that our trailer here has come with a standard molded 3 volt connection here, so in order to get it to work with our new Optronics light, we're going to use an adapter.
If you have to as well, you can use part number AL45PWTB. What that's going to do, it's just going to simply plug into our old connection, and convert it to the new connection. We'll just line it up and plug it in. Press firmly to do so. Once we've got it, we can then grab our new light. It's going to come pre-greased.
We'll line it up to where the tab clips over, and once it snaps in, we've got it. Just like that. Let's test our brake first. Good, that works. Now, let's go ahead and try the turn signal. Great. Then finally, our tail light. Perfect. Now we've got it. Now that we know that everything works, we'll just simply bundle up everything and put it in place. Perfect. If anything we're to ever happen to the LEDs, they feature a lifetime warranty. That's going to complete our look at the Optronics GloLight LED Trailer Tail Light, part number STL111RMB.

Info for this part was:
At etrailer.com we provide the best information available about the products we sell. We take the quality of our information seriously so that you can get the right part the first time. Let us know if anything is missing or if you have any questions.


Thank you! Your comment has been submitted successfully. You should be able to view your question/comment here within a few days.
Error submitting comment. Please try again momentarily.