

 Arrives before Christmas


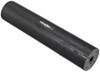
D-L roller bunks provide a quick, easy, and inexpensive way to upgrade bunk-style trailers to rollers.
Features:
Specs:
Videos are provided as a guide only. Refer to manufacturer installation instructions and specs for complete information.
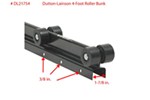
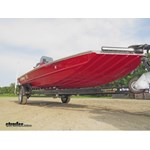
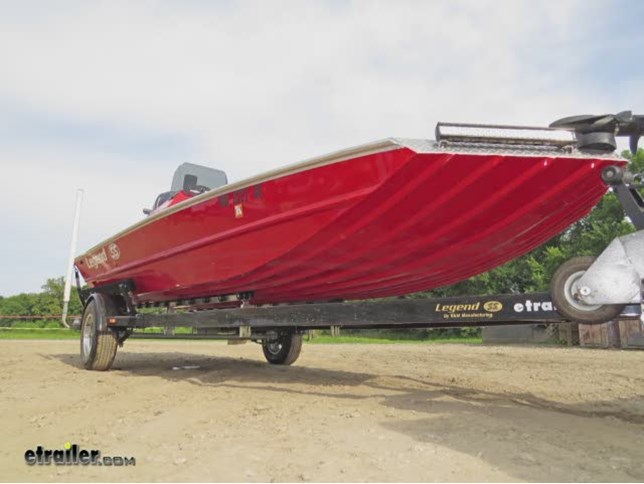
Today on our trailer, we're going to take a look at the Dutton-Lainson boat trailer, Deluxe Roller bunk, part number D-L-2-1-7-4-1, and our five foot section, part number D-L-2-1-7-4-0 for our four foot bunk. Here we are with our boat trailer in the water, and we've got the standard boards. To launch our boat, especially when you're doing it by yourself, can be difficult because you've got to push the boat off. I'm in the water and it's not very easy. But with our rollers installed, the boat simply slides off. You almost don't even need to push it in. Also, just as easy as we launch our boat into the water, it's that easy to load the boat back onto the trailer.
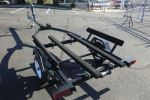
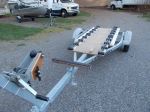
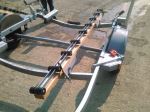
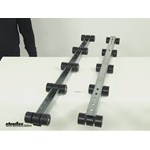
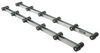
Here's what the complete install's going to look like with our roller bunks in place on our trailer. This'll come with two sets of five foot rollers for a total of twelve sets of rollers. Dutton-Lainson also makes a four foot set of bunk rollers. The four foot long ones are one foot shorter than the five-footers here, and they have one less set of the bunk rollers. Now let's go ahead and show you how to install it. To begin our install, we're going to remove the old manufacturer's boards and brackets.
Since we're removing the bunk boards and brackets, we're just going to take the U-bolts off the frame. Quick tech tip. Before you remove your boards, take a tape measure and get the height of your board. That way, when you install your new brackets and rollers, you can set it back to the same height. Now that we have the boards loose we'll go ahead and take them off the trailer and set them aside, as they will not be reinstalled. For our new rollers, we're going to install a new bracket.
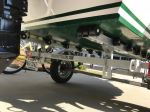
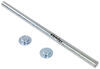
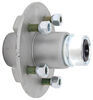
This is the Dutton-Lainson universal mounting bracket, part number D-L-2-1-7-4-2. To secure it to the trailer, we're just going to reuse the old manufacturer's U-bolt. Now once that's set in place I'm going to go ahead and tighten it down. Note for additional security, we can add a second set of U-bolts here on the other side. Now here at the center of support, we're going to have two five-foot rollers come in together.
We'll need two brackets, both getting attached to the same spot. To do that, we'll bring in a U-bolt from each side. This will secure our bracket. Now I've got my first one in place, the back side here of the center support. We've got our second U-bolt and support bracket. Now after all our hardware is in place, we'll make sure she's in position, and then tighten down the U-bolts. Keep in mind when tightening down your U-bolts, make sure you tighten them down evenly. Now once we have the center support done, we'll go ahead and install our last bracket here at the very end and repeat the same process we did for the very first bracket. Now with all our brackets secured, we'll go ahead and put our bunk rollers in place. Starting here at the rear set of bunk rollers, we'll set it onto the brackets first. Now supplied with the install kit, you'll need to add a bolt or bolt and washer for this application that'll go down through your bunk roller, then through the bracket. Underneath, I'm going to add a flat washer and nut. It's recommended to use nylon lock nuts. This will help prevent the hardware from loosening. Let's go ahead and install it finger tight this time. Now we've got our front attachment point in place we'll go ahead and do the same process here for the rear attachment point. Next, we're going to install our front bunk and rollers. It'll sit here on our forward and second bracket. But because of how close we are oriented to the rear bunk, we're going to remove the rear set of rollers and we'll need to drill at our attachment point so that we can secure it to the bracket. Let's start with removing the rollers. Using a couple three quarter inch sockets, we can simply just go ahead and remove the bolt that holds the rollers in place pause. I'm just going to slide the rollers back onto my bolt, thread that nut back on. You've got to hold them together while I set them aside. Now we'll go ahead and put our front bunk in place, set it in position on the bracket, and mark the hole. Now we'll take our bunk back off, we turn it over and drill out the hole. Now to drill out the hole, I'm going to use this small pallet bit and then open it up to my final size using the step-bit process. We're now ready to go ahead and put the bunk back in place, drop in our hardware, and secure it. Now with all our hardware in place, we'll go ahead and tighten down all our fasteners. Now with one side done, we'll go ahead and repeat the same process on the other side. There you have it for the review and install of the Dutton-Lainson boat trailer deluxe roller bunk, part number D-L-2-1-7-4-1.

I'M HAPPY


Do you have a question about this Boat Trailer Part?
Info for this part was:
At etrailer.com we provide the best information available about the products we sell. We take the quality of our information seriously so that you can get the right part the first time. Let us know if anything is missing or if you have any questions.


Thank you! Your comment has been submitted successfully. You should be able to view your question/comment here within a few days.
Error submitting comment. Please try again momentarily.