


Thank you! Your comment has been submitted successfully. You should be able to view your question/comment here within a few days.
Error submitting comment. Please try again momentarily.


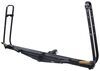
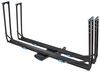
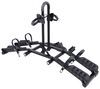
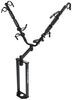
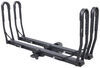
This carrier lets you transport 1 bike by the wheels on your vehicle's roof. Pivoting upright arms hold your bike firmly by the wheels. Full-length tray accommodates most wheelbases. Tool-free installation on most crossbars. Includes chain lock.
Features:
Specs:

Videos are provided as a guide only. Refer to manufacturer installation instructions and specs for complete information.
Hello, neighbor. This is Curt with etrailer and today, we're gonna take a look at the RockyMounts MachTen bike carrier for your roof rack. Roof rack bike carrier can come in really handy if you don't have a hitch available or if your hitch is being used for something else all the time. Maybe it's just busy pulling trailers or having a rooftop cargo box or basket back there. And really your roof rack is gonna be the best place for you to transport your bike. Now the MachTen is gonna allow you to carry a single bike up to 45 pounds.
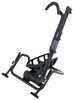
It can accommodate bikes with up to a 29 inch wheel diameter down to a 20 inch wheel diameter. It can also accommodate up to a 55 inch wheel base and tires up to three inches wide. It's wheel-mounted. These brackets are gonna ratchet together and kind of sandwich the bike upright so that it can't move forward and it's not gonna be moving from side to side. So it's a really, really sturdy platform.
It's pretty easy to use. And this type of system is making it a little bit easier if you're out on your own getting your bike up onto the rooftop. The MachTen is gonna be constructed with a powder-coated aluminum, which is gonna make it extremely corrosion-resistant, but also keep it light weighted only about 20 pounds. So keep that number in mind, plus the weight of your bike whenever you're calculating how much rooftop weight capacity you have and just making sure you're staying under that threshold. It's also gonna be pretty narrow, which most rooftop bike carriers are.
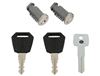
So if you've got it mounted more to the side of the vehicle, which is what I would recommend for ease of loading and unloading, it should leave you plenty of space on the other side of your bars to mount another accessory if need be, whether it be a kayak carrier or a rooftop cargo box or something of that nature. It's also come gonna come with the added bonus of coming with its own chain lock. And while it's not recommended to drive around with it, it's gonna be a great way to secure your bike to the rack on your roof, you know, without having to worry about someone coming along to steal it. It's very heavy and very thick. You do get this, you know, a key to go with it and it locks in place right here.
Also comes with a nice dust cover for when you are traveling just to keep any debris and things out of there for you. It can accommodate, as I mentioned before, between 20 and 29 inch wheel diameters. And the way that you could change your bracket through that is they do provide you with an Allen tool, and you'll be able to use that to move this bar up and down accordingly depending on the diameter of your wheel. This is also dimension a clamp mount, and these clamps are gonna fit most standard crossbars that are out there. In fact, you are gonna get two different bolt lengths with it in case your application has a thicker crossbar. So you shouldn't really have any problem fitting this onto just about any roof rack that's out there on the market. And while we're talking about it, if you decide this is the rack that you want to go with and you get it and you use it a few times, please share with us what you think about it in the comments below. We'd love to share your experience with our other neighbors so they can make the best decision for themselves. Now we had talked about this being a roof mount and getting it installed with the clamps and everything else, so just stick around. We're gonna show you right now exactly how we got our MachTen mounted on our crossbars and our bike loaded up. To start our installation, it's always a good idea to kinda lay everything out and make sure we've got all of our parts. So we've got our bike tray itself right here. You're going to get a chain lock along with a key for that lock here. We're gonna have four sets of brackets to go around our crossbars. We are gonna have a few different bolts here. Now we've got M6 bolts here in 50 millimeter and an M6 bolt here in 65 millimeter, along with these M6 washers. Now these bolts are gonna serve the same purpose essentially. It really has to do with getting these brackets put together that go around your crossbars. So if you want to kind of wrap these around your crossbars and drop the bolts through just to test which one you may need, go ahead and do that. But these are generally made for longer thicker crossbars. The ones that we're using today, we're gonna stick with our 50 millimeter bolts and not use these 65. And then we also have a couple of tools here as well. We've got a T30 and a T40 hex tool, and we've also got this hex tool. In order to start the installation, the first thing we need to do is line up our mounting plates. So we're gonna go ahead and turn over our bike tray, and what we'll find are these two plates at the bottom here. And what we'll need to do first is we are going to take our larger, our T40 wrench right here, and we're gonna loosen these bolts up just enough that we're gonna be able to slide and maneuver this plate back and forth. Just like that. We're gonna make sure we do that on both of them, so they could slide back and forth just like that. Now we can take our tray and get it up on our crossbars and get our mounting plates lined up. When you're mounting your bike rack, you always wanna make sure that, you know, everything that's operating it is on the outside so it just makes it that much more easy for you to load and unload the rack. So just make sure these latches and things are facing outside of the vehicle. You don't wanna make it difficult for you by having to reach across it. So remember, we left these plates maneuverable. So what I'm gonna do right now is just kinda lift up a little bit, slide 'em to where I need 'em to where they're gonna look a little bit more centered on the bar. And the thing that I did too was I maneuvered this to be as close to the outside edge of the vehicle as I can get. That's just gonna make it a lot more convenient getting up and down and removing and installing that bike up on the rack. I always think it's a good idea to center it between the two bars, which is the way we have it right now. But you also wanna make sure that you're gonna have clearance for a hatchback or anything back here as well. It's looking to me like it is, you know, forward enough that it's not gonna interfere with this, but it's always a good idea to double check. You don't wanna do that after everything is tightened down and the bike's loaded up only to find out you can't get into your hatchback. So yeah, we have plenty of room back here for clearance. The bike tires aren't gonna really come that far past here, so I'm not worried about it. I think our placement is good. And now we're ready to make sure that they're centered on our crossbars. It could be a little difficult on these mounting plates to determine where the exact center of them are. So I've experimented a little bit with getting this mounted up and down from the roof rack, and I think the best way to ensure that these are centered is to go ahead and take the top half of our brackets. Now the way you're gonna be able to identify those is that they are gonna have a flat top to 'em just like this, and then of course, the contour on the bottom. So with this, this is actually going to go underneath our mounting plate in this position right here. And I'm gonna do the same thing on the other side. Just make sure I get everything lined up for it. And if I get everything lined up right, it's gonna give me the exact center of that crossbar. Now I'm gonna go ahead and do the same thing back here on the rear bar. Now that I've got everything centered up, it's really in a perfect position. Now you can take that T40 tool, it's the same bolts that we use to loosen 'em up. Obviously we're gonna use it to tighten it. But it can be a little bit difficult under here 'cause of the clearance to tighten every bolt while it's up here. So what I'm going to do is I'm gonna tighten one bolt down on each mounting plate that's gonna stop it from shifting back and forth. And once I do that, I'll be able to take it over to our table and tighten the other bolts up properly. But the important thing is, is that I'm not gonna lose my place here. We've got it centered perfectly so I don't want that to be off by even a little bit. With that one bolt tightened down, they're not moving anywhere, but it is important to make sure you tighten all four on each plate down. So bringing it to the table and doing it, I think that's gonna give you the best leverage just to ensure that you get it as tight as you can. We've got everything back up on the crossbars the way it was. We've got our mounting plates tightened down. We put the top half of our brackets back underneath. Everything's lining up really well for us just as expected. And now it's time to mount the bottom end of our bracket. We've got our 50 millimeter bolts here because again, we don't have the thicker crossbars, the 50 millimeter we'll do just fine, and we've got our T30 tool as well. So the idea is the bottom end of the bracket's gonna go underneath the bar. These bolts are gonna drop through our mounting plate, the top half of our bracket, and they're gonna anchor right here in the bottom. However, with all this in the way, there's really no room for us to drop this down. So what we're gonna want to do is open our latch here all the way, clear this up a little bit, and really I'm just trying to, you know, make some room in here that I can get these bolts dropped in. So I'm gonna try to put this in a position to allow me to do that, get that line back up. And now I can take one of my 50 millimeter bolts. I could drop it right through the top here. I've got both bolts in into the bottom bracket. I am gonna leave it loose for now. I wanna make sure that I get it on all four of my mounting sections there. And once I do that, I'll show you exactly how you should get these tightened up. Got all of our bottom brackets set now. Everything is still lined up really nice. So it's time to go ahead and get these tightened down around our crossbars. So I'm gonna be using that same T30 tool. And what you really wanna make sure you're doing is as you're tightening down, you're not over tightening one side compared to the other. We really want to keep 'em as even as possible. So all four of our brackets tightened down. I'm just gonna give it a little shake test, make sure it's not going anywhere up here on my rack. And now I'm ready to go ahead and get a bike loaded up. So to do that, what I'm gonna do first is I'm gonna open my front wheel mount. I'm gonna lift that tab all the way out. And I'm gonna get it to where it's about right here. It may be a 45 degree angle like that, and I'm gonna latch it back down so it stays in place. The rear tire, I'm gonna go ahead and pretty much open up all the way just like that. Now I'll grab my bike, and I'm gonna feed the front tire in first just because it's got all that maneuverability to it. I kind of want to keep it in place using this front bracket here. I'm gonna keep it up and in balance and I'm gonna ratchet this back upright right there. I'm gonna keep good control of my frame now that the front tire is immobile and won't spin on me and I'm gonna do the same back here in the back. Just like so. We're gonna tighten up that front a little bit more. All right, now I got a really good upright hold on it. So the MachTen comes with a pretty heavy chain lock as well. I don't recommend that you use this while you're traveling with the bike on the roof. Again, it's pretty heavy. I think all that moving around could mess a bit with your gears, might damage your frame, and if there's enough slack to it, we don't wanna do any damage to the rack. But we do want to keep our bike secure when we have it parked somewhere. So whenever you need to do that, all you want to do is just kind of feed this through your frame just like that. We're going to loop this through right here. And we could feed it in here and get it locked in. Now I could feel free to run into a restaurant, run into the store wherever it may be and I could, you know, feel pretty good about nobody coming along and stealing my bike. But that was a look at the RockyMounts MachTen rooftop bike rack. I think a really good choice for somebody if they need a a rooftop bike rack, they don't feel like taking the front wheel off and doing a fork mount and going through all of that mess. Fairly simple to operate compared to other rooftop bike racks and getting your bike up there and actually getting it latched in. So I think a good choice for anybody that would like to have a really nice, easy to use rooftop bike rack. I'm Curt with etrailer. Thanks for stopping by.
Customer Satisfaction Score:
92% were satisfied with this product
8% of customers were not satisfied
Ratings & Reviews

Great rack
Exceeded my expectations!!!
Build quality is outstanding and the locking feature is awesome too! Worth every penny.
Excellent bike rack at substantially less money than the Kuat Piston. Was able to mount to a Kuat Ibex truck bed rack with the Kuat Piston SR mount by making minor modifications to the mount to fit different fasteners required by the Mach Ten rack
Do you have a question about this Roof Bike Rack?
Info for this part was:
At etrailer we provide the best information available about the products we sell. We take the quality of our information seriously so that you can get the right part the first time. Let us know if anything is missing or if you have any questions.
























Kate F.
9/24/2025
Wow Thomas, your set-up looks great! Do you have a specific trail you like to go out riding on? We have the Katy Trail here in Missouri and it is always loaded with bikes.