


Thank you! Your comment has been submitted successfully. You should be able to view your question/comment here within a few days.
Error submitting comment. Please try again momentarily.


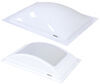
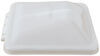
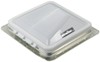
A cracked skylight can quickly turn into leaks and water damage if left unchecked. This white-tinted replacement fits 14" x 14" openings, seals tight with included sealant, and holds up to sun exposure to keep your RV dry and comfortable.
When your RV skylight cracks and starts leaking during a storm or you notice water stains forming around the opening, the repair becomes urgent because water doesn't wait. This replacement comes with polycarbonate-safe sealant for installation, so you can apply a continuous seal on the roof surface and finish with a watertight barrier over the flange and fasteners. Once it's installed correctly, you're not chasing drips or watching water work its way into the roof.
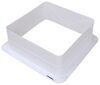
A big part of replacing a skylight is confirming the opening size when the old unit doesn't provide clear measurements. This one is sized for a 14" x 14" cutout, with complete outer flange dimensions of 18-1/2" x 18-1/2", so you have the key measurements before removing the old unit from the roof. That lets you confirm the fit before removing the old unit so you're not stuck mid-project with the wrong size.
Sun-baked plastic is usually what sends people shopping for another skylight in the first place. This one uses UV-resistant polycarbonate that stands up to sun exposure without cracking or discoloring. Over time, that gives you a skylight that keeps its shape and appearance instead of turning brittle and worn after living on the roof.
Sometimes the problem isn't just a broken skylight, it's dealing with harsh sunlight and heat building up inside your RV. This white-tinted skylight helps reduce glare and manage heat while still allowing natural light into the space. The 4" bubble height raises the skylight above the roofline, allowing light to enter from more angles so your RV still feels bright and open during the day.
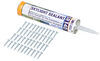
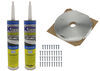
Get a waterproof install using the included sealant approved for use with polycarbonate plastic. Carefully remove the old skylight, then clean and prep the roof surface so it's dry and debris-free. For additional sealing, you can apply butyl tape (sold separately) along the flange before setting the skylight in place. Secure it with screws (1" zinc or stainless steel screws not included), then seal over the flange edges and fasteners to create a watertight barrier that holds up over time and helps prevent leaks from turning into costly roof repairs. There is an install kit with screws and an additional tube of sealant sold separately (SR76RR). If you'd like help installing your skylight, check out our Installer Locator to find an installer near you.
Videos are provided as a guide only. Refer to manufacturer installation instructions and specs for complete information.
Hi, everybody. Andy here with etrailer.com. Let's take a real quick look at this Specialty Recreation White Replacement RV Skylight. Now, replacing your skylight should not be a regular job. This exterior portion is made from UV-resistant polycarbonate, so it's built to resist sun damage and last for many years to come, keeping your RV protected from leaks and exposure. Now, you're gonna use this in a 14-inch by 14-inch cutout, and this is sized with an 18 1/2-inch by 18 1/2-inch flange.
And the rigid design is going to stay put, so no warping or lifting between screws after installation. And this is going to soften harsh sunlight. It's white polycarbonate, so it's going to diffuse white for a comfortable interior. And there's really not gonna be any need for modifications. Once installed, the flange is going to sit flush with the ceiling with about a 3 1/2 inch bubble height here.
And now that's approximate. That could vary. Now, speaking of variations, in my experience, some of these sunlight replacements do come with sealants and some do not. So I would recommend just to be prepared to pick up the Specialty Recreation Skylight Installation Kit that you see there on your screen. That's going to include the sealant that I have, but also the screws that you're going to need to get this installed because this is just for the replacement skylight.
This is not going to include the hardware. It might include the sealant, but it might not either. So some of these skylights, like I said, will have a tube of sealant with them, some won't. So just to be prepared, I would recommend adding that kit to your cart just so you have it in case yours doesn't come with it. So I just wanted to give you a heads up on that.
When you do get this installed, we would love to hear back from you regarding the installation experience and how this is working out for you. And you can share your experiences with us by dropping a comment or leaving a review on this product page. We would love to hear back from you. Well, I think that's gonna wrap up our look today. I do hope that it was helpful for you. Again, my name is Andy. Thank you for joining me.
Customer Satisfaction Score:
97% were satisfied with this product
3% of customers were not satisfied
Ratings & Reviews


Info for this part was:
At etrailer we provide the best information available about the products we sell. We take the quality of our information seriously so that you can get the right part the first time. Let us know if anything is missing or if you have any questions.


















Victoria H.
4/1/2025
I appreciate your insight Thomas, this is valuable feedback! Even with the hole issue, I'm glad you were able to get this installed and seal the deal. Looks like you’ll have the perfect view once the weather cooperates, keep those positive vibes shining through :)