
DeeZee Rough Step Running Boards w/ Custom Installation Kit - 7" Wide - Steel - Black


To see if this custom-fit item will work for you please tell us what vehicle you'll use it with.


Made of corrosion-resistant black powder coated steel, the running boards offer unmatched traction and durability. Grated step surface provides sure footing and allows dirt and water to drain. Custom installation kit and full-length boards included.
Features:
Specs:
Videos are provided as a guide only. Refer to manufacturer installation instructions and specs for complete information.
Hello, neighbor, this is Curt with etrailer and today we're gonna take a look at the DeeZee Rough Step running boards and we're gonna see how they fit and how they install on our 2025 Chevy Silverado 2500. Now running boards are a great way to cut down how high that step up is into your vehicle, and in the case of the 2500, we actually have a lot of lift off of the ground. So having something that's gonna really knock that down is gonna help you out getting in and out safely. And in the case of the Rough Step, this is a really nice running board for anybody that likes to use their Silverado for work purposes, especially because of this industrial grating that they put on here that's gonna make an excellent boot scrape and an excellent grip as far as not, you know, being able to slip on and off of it. It's got a matte finish, black powder coat over steel, so it's very sturdy and it's gonna give us a 350 pound weight capacity. It's also gonna have a seven-inch wide step, which is pretty generous compared to a lot of running boards.
So you won't have to worry if you have a wider foot or a larger shoe size of being able to fit up and down on these running boards. So when it comes to this grated surface, it's also well-perforated. There are holes through this everywhere and there's really no flat surfaces. And the idea behind this is that any kind of water, mud, ice, snow, whatever it might be, is just gonna run off and fall right through. So you're not gonna have to worry about any kind of pooling up or anything on it.
And it's also gonna make it very easy to just hose off and clean. So let's take a look at just how much this is gonna help us with getting in and out of our Silverado. From the ground to the door threshold here, if we had no running board at all, we'd be looking at a step up of about 27 inches. That's a pretty generous leap up from the ground. It's a bit over two feet and I don't think anybody wants to do that over and over no matter how tall you are.
With the running boards on, we're gonna reduce that step to about 17 inches. So we're gonna take 10 inches off of that and that's just gonna make it really easy to get in and out of your truck safely. It's only a three-bracket, no drill installation. It's gonna use the existing mounts that are already underneath your Silverado. So stick around and we'll show you exactly how we got these on our truck today.
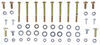
To begin our install, let's talk a little bit first about our mounting location. Now there are six pre-drilled mounting points underneath your Silverado 2500. If you don't have running boards already on the truck, you're gonna find these plugs. So you'll find a plug and then one of the same size directly above it, and that's how you would locate them. Now I am back here toward the truck bed end. We are actually replacing factory running boards today. So luckily, our mounting points are already exposed for us, but I had mentioned that there are six mounting points. We're back here by the bed, so we see our fourth, fifth, and sixth mounting points back here. Toward the front of the truck, we're gonna find it kind of in the same pattern. You'll find one up by the front and then a short space back, you'll find another one and then another one kind of close behind it. The mounting locations that we're gonna use, because we're using three brackets, and out of those six mounting locations, if we start from the front of the truck, we'll be using the first mounting location, skipping the second, using the third, skipping the fourth, skipping the fifth, and using the sixth. So we're gonna go ahead and grab our bracket. Now it's important to realize too that the brackets aren't side-specific to the driver or the passenger side. So just grab whichever of the six that you want to and go ahead and put it up just like this. Now if you have plugs in these locations because you didn't have a running board on it before, you'll have to take these off using a flathead screwdriver or a trim tool or a combination of both. But with that undone and your bolt holes exposed, go ahead and just set the bracket up there, just like that. And grab two of these bolts here. These bolts have a washer attached to it already and you could just go ahead and hold your bracket up. And I'm just gonna hand thread this in for now, just to keep it up and in place. And I'm just gonna get it not tight, just a little bit snug. I still wanna be able to move it a little bit, help me get in this second bolt, which is gonna be up here at the top and going inward. So if I get that started, I can come around and go ahead and tighten that in as well. Now again, I'm looking to get these snug, not completely tight all the way. I want to have a little bit of maneuverability in this bracket for when I get the running board on it. It's just gonna help it line up a little bit easier if I have a little bit of play in these. So with our brackets all in place, go ahead and grab one of your running boards. Now these aren't side-specific either to driver or passenger. So go ahead and grab whichever one is first out of the box. The hardware that you're going to need, you're gonna wanna grab a 7/16th wrench along with a 7/16th socket, three of these mounting plates. The hardware is all gonna be a black finish, so it'll be really easy to spot. You're gonna need nine of these bolts, 18 flat washers, nine lock washers, and nine nuts. Now the first thing that you wanna do is go ahead and take your plate and through the open end here on the running board, we're gonna just slide these three plates in. It could be a little bit of a tight fit, so you might have to angle 'em some, but go ahead and slide those in. And once you do that, just kinda roughly line your board up to about how you want it to be on the truck. So at this point, you know, we've got the mud flaps up at the front. I'm just gonna make sure it's not going out beyond that. And all I'm gonna do is kind of just roughly put these plates close to where the brackets are gonna be, where they're going to attach. Once they do that, I'm gonna just grab my board, turn it over, and I'm going to rest it up on my bracket. Now we could see through the top here, we've got our plate and we've got our bracket. So what we want to do is just kind of slide it over until we get these bolt holes lined up. It might be that we have to move it in and out a little bit to do it as well, but once we have it lined up, what we're gonna do at that point is we will, oops, we will go ahead and take a bolt and washer. And in each of these plates, we're gonna drop three of these in. And we're gonna do this on each of our three plates. Now at this point, you do have a little bit of freedom to move your board forward and back or closer or further away from the vehicle. Personally, I like having my running boards a little bit further out. I just want to be able to have as much of the step as possible for my use. As far as how far forward or back I've got it, I've got the front of it lined right up with this door seam right here. I do have room to move it forward a little bit, but I kind of like the idea of having a little bit more step back there toward the bed. Even though we do have that factory step in the bed right there, I kinda like the idea of just having a little extra step up to get in and out of there. Now I'm gonna take a flat washer, lock washer and a nut. And for each of my bolts, all nine of them, I'm gonna put it on flat washer first, then lock washer, and then I'm gonna go ahead and just thread on the nut. And I'm just going to kind of snug it up by hand to start with. And I'm gonna do this on each of those nine bolts. And with my nine bolts in place, I'm gonna take my 7/16th-inch wrench. I'm gonna brace the top bolt. (wrench clanking) And using my socket wrench from the bottom, I'm gonna go ahead and get that tightened down really well. Once you've got all nine of those bolts on the board tightened down completely, go ahead and grab your 13 millimeter socket and completely tighten down the brackets onto your vehicle. Now there are no torque specs provided by DeeZee for either of these bolt locations, so my advice would be just tighten 'em down as much as you can using the socket wrench you have available. And once you get all your bolts tightened down, that's really it for the installation. And if after watching this video, you decide that this is still a little bit more than you want to take on as far as the install goes, go ahead and check out our dealer locator. It'll help you find an installer near you that can help you get these running boards on your Silverado 2500. And if after watching this video, you've got some questions still, or maybe you went ahead and purchased them and got 'em installed, go ahead and share those questions and share your experience with them in the comments below. We would love to show other neighbors just like you all about it so they can make the best decision for themselves. Once again, this is Curt with etrailer. Thanks for stopping by.
Ratings & Reviews

Product is just what we needed, shipped quickly, and the price was good.
The rough steps are perfect because they are wide and provide excellent grip with wet or muddy boots. Very sturdy and durable finish. The brackets fit perfectly on my Silverado 3500hd without having to drill holes in my mew truck.
Perfect fit, no drilling, easy intstall, look great.
These are the toughest running boards I have ever bought. Looks good, the soil/mud drops out the bottom, and the foot traction is great. Never slip.
They arrived. First nice day got outside to install. Opened boxes to lay all parts out to check off with parts sheet. NO nuts or bolts and one bracket missing. Took over 3 weeks to get missing parts. NOT HAPPY AT ALL. Way over priced also for 2 short running boards. Would have done better to just order boards for a regular van the cut off the one for passenger side. All in all I wasn't very satisfied
Years ago I had a jacked up truck and had a welder make me custom steps. When I saw these, it reminded me so much of the ones I had then. I waited and when I was ready I bought them from Etrailer. My past experience with Etrailer was very good.I always found that in the beginning all the types of side steps look nice, but after a while no one is able to keep them nice. These are durable. Water, dirt, snow, everything will just fall through. Granted, the truck I have them on doesn't get beat up at all, so these will last a lifetime. Not only that, its different than everyone else's. I would buy them again for any truck. P.S. I had them installed, so not sure how hard it is. Seemed easy enough , I just work a lot. Looking for durable with good looks, this is for you. Get the Black Aluminum.
Info for this part was:
At etrailer we provide the best information available about the products we sell. We take the quality of our information seriously so that you can get the right part the first time. Let us know if anything is missing or if you have any questions.



















Thank you! Your comment has been submitted successfully. You should be able to view your question/comment here within a few days.
Error submitting comment. Please try again momentarily.