


To see if this custom-fit item will work for you please tell us what vehicle you'll use it with.


Thank you! Your comment has been submitted successfully. You should be able to view your question/comment here within a few days.
Error submitting comment. Please try again momentarily.


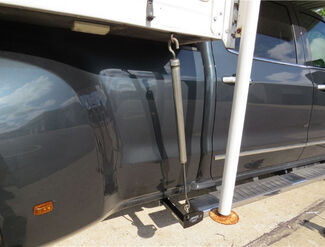
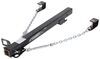
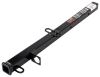
Long-distance hauls can test any camper setup. These custom-fit TorkLift tie-downs mount directly to your truck’s frame—the strongest part of the vehicle—for rock-solid stability and better handling on the road. By securing your camper lower and distributing its weight evenly, you avoid a top-heavy setup that can sway in strong winds. The result is a ride that feels balanced and confident, whether you’re heading across town or across the country.
No cutting or heavy modification needed here. These tie-downs bolt into pre-existing holes in the frame for a straightforward, no-drill install. Once tightened up, they sit tight against the frame with minimal loss of ground clearance, so they’re easy to live with even when you’re not hauling. It’s a simple setup that keeps your truck’s structure intact while giving your camper a secure anchor point.
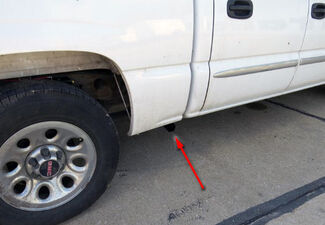
When you’re not carrying a camper, you don’t want gear hanging off your truck. With these tie-downs, you can remove the arms and the frame brackets are nearly invisible beneath the body. The low-profile design keeps your truck looking clean and uncluttered while still giving you a ready-to-use system whenever you need it.
Road salt, rain, and rough terrain demand durable gear. These tie-downs are made of strong steel and finished with a high-impact powder coat for extra protection against rust and wear. That means they’ll hold up trip after trip, keeping their strength and good looks even after years of use.
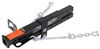
To match different camper setups, each arm offers two pin holes so you can extend them just far enough to clear sidewalls or fenders. Two anchor holes in each plate give you flexibility for turnbuckle alignment, helping keep tension even from multiple angles. This makes it easier to fine-tune your setup for a snug, secure hold every time you load up your camper.
Videos are provided as a guide only. Refer to manufacturer installation instructions and specs for complete information.
Clayton: Hey guys, how's it going Clayton here at etrailer.com. And today, we'll be taking a look at and I'll show you how to install, the Torklift rear mount camper tie-downs on our 2015 Ram 3500. These braces are going to allow us to attach our in-bed campers to our truck's frame. These tie-downs are really nice because they're adjustable. So if our tie-down's for our camper are a little bit narrow, we can put it here. And then if our camper's more wide, we can slide these arms out and attach it here.As you can see, there's quite a bit of adjustability.
These are going to be a steel construction so they're going to hold up well over time. They are finished in a black powder coat finish, so you don't have to worry about any rust or corrosion over time as well. These do mount right up to our frame so they are going to be really strong. We are going to have two holes here for tie-downs as well. So wherever our camper falls, we can make sure to get a really strong connection.These are really nice because when we're not hauling your camper, we can simply pull our arms out, and we're not going to have anything sticking out from the side of our truck.
Our tube here is pretty visible, but again, we don't have to worry about our arm sticking out of our bumper. In terms of an installation, getting these put on really isn't that bad. It's three or four bolts, pretty easy to mount up. We didn't have to do any drilling. So speaking of installation, I'll go ahead and show you how we got ours installed.To start our installation, we're going to be working right back here in the corner of our frame.
We're going to be working right where our bumper beam attaches to our frame rail. We're going to be removing these three bolts here. I do suggest using penetrating oil and at least cleaning it up a little bit before, just to make it easier to work with. Now, these are all 21 millimeters, and I do suggest breaking them loose with a breaker bar. They are going to be pretty tight because they're holding on our bumper.
I went ahead and broke ours loose. Now we'll take them off with an impact. And these will be getting reinstalled.Our instructions don't mention this, but there is a wiring harness right here. We do have to remove this to get our bracket installed. We're just going to grab a trim panel tool and pop this one clip out. With that clip removed, we can get our bracket fully mounted inside of our frame. I do suggest spraying out the holes with some lubricant and maybe a wire brush depending on how dirty they are. This is just going to help those bolts thread in a lot easier. We're now ready to grab our bracket. We can lift it up into place.I'm going to start this second bolt up here. I just want to push the bolt through and start to get it threaded to where it can support itself. Then we'll come back and add the rest of our hardware. It is important to leave these hand tight. That way we can get the hardware added to the back of our bracket. We're going to be reinstalling these bolts in the same locations that we took them off. For our other hardware, we need to grab our carriage bolt, our spiral washer, and our flat spacer. We'll put that usher on and then our spacer, then we'll lift it up.And we're going to slide it through this oval hole behind our wiring. We'll just grab it like that. On the backside, we're going to add our two flat washers like this and then our lock washer, and our hex nut on top. Go ahead and get this one hand tight. And this'll be the first one that we tightened down all the way. We'll use a 19 millimeter socket and wrench. Now we can tighten down the rest of our hardware all the way. With all of our hardware completely tightened down, we're ready to come back and torque it down. All of our torque specs will be listed in our instructions.Once we torqued everything down, we can move over to our passenger side and follow the exact same steps. We're now ready to slide in the arms for our tie-down. There are a couple different holes depending on where your camper falls. Since we don't have one on our truck now, I'm going to put it on the inside position. We'll add our pin and clip, and secure it down. With everything on and torqued down, and our tie-down arm in, that's going to complete our look and installation at the Torklift camper tie-downs for the rear on our 2015 Ram 3500.
Ratings & Reviews


Straw

8/24/2026
A year later, no issues with tie downs, except normal wear and tear and metal to metal wearrust progression. These tiedowns are designed great and fit function was clearly created by someone who knows not only design but install ! E-trailer is “the” place to buy rv, camper, towing etc products - the install videos are sooooo helpful ! Thx ET !


Lazer S.
9/16/2025
It definitely is safe the way you have them, Paul! In a perfect world, the turn buckles would be perfect vertical, but this an imperfect world and not all campers have the attachment points in the same place. If you take a look at some of the installed pictures on the TorkLift Locking FastGun Turnbuckles # TLS9529-2-LK page, you can see most of them are at an angle. It's perfectly normal. Are you running any suspension enhancement on your Silverado?

Paul
9/27/2026
These tie downs are great, so easy to use. Camper never budged a hair


Kate F.
8/10/2026
Thanks for the pictures Rich. We will be reaching out =)
Bob
11/1/2025
I have not had any issues at all with the tie downs.

Heather A.
4/10/2026
Looks great! What kind of camper do you have?
Lazer S.
10/14/2025
Install looks great, Megan! Especially for it only taking two hours! They were moving. : ) Happy we confirmed what you found as well. Tie downs can be a pain in the rear with all the options out there. Now I do have to ask though, have you guys thought about any kind of suspension enhancement for the rear axle? It's a little hard to tell, but it looks like the back is sagging a bit in your last picture.
Clay
7/31/2026
A year later and I would not do anything different. Absolutely the best system available especially paired with the fast guns. The camper is solid mounted and does not move. Yet can still be off loaded in just a few minutes. Remember good stuff isn’t cheap and cheap stuff isn’t good.

Kate F.
6/5/2026
Great set-up Viviana!! Glad to see you went with the best =) Where did you go for your first trip?

Nick S.
1/12/2026
I love these TorkLift tie downs, and it is great to hear you are liking the quality as well. What kind of truck camper are you going to be running with these?
Kate F.
8/20/2026
We appreciate the kind words Charles! Where did you take the in-bed camper for the first trip?
Do you have a question about this Truck Camper Tie Down?
Info for this part was:
At etrailer we provide the best information available about the products we sell. We take the quality of our information seriously so that you can get the right part the first time. Let us know if anything is missing or if you have any questions.

























Steven
5/14/2026
Still working great. Trouble free.