
Thank you! Your comment has been submitted successfully. You should be able to view your question/comment here within a few days.
Error submitting comment. Please try again momentarily.


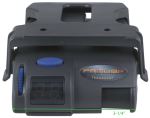
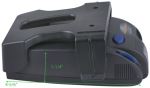
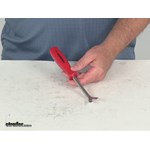
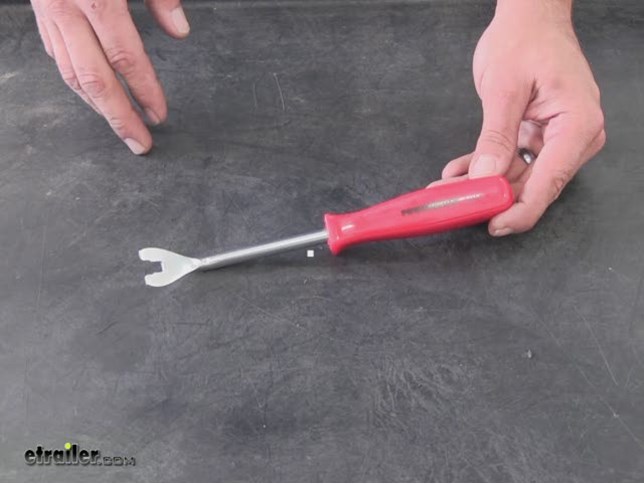
The trim pad remover is perfect for easily prying up plastic or metal trim fasteners to safely open up panels in your vehicle. The contoured handle allows easy access to fasteners. The trim pad remover helps to prevent blemishes on surfaces.
Features:
California residents: click here
Videos are provided as a guide only. Refer to manufacturer installation instructions and specs for complete information.
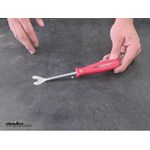
Today, we're going to be taking a look at the Powerbuilt Trim Panel Remover Tool. This is where it comes in handy for all types of fasteners, whether they're plastic or metal. Part number on it is ALL648544. Now, let's take a quick look since we're here in the hatch area. There are few different uses or a few different areas where our Powerbuilt trim remover tool will really come in handy. To start our push pin fasteners here, we'll be able to use the almost similar to a screwdriver edge there.
To pull out the center core, then we can go right in behind it with the panel tool and pull that right out. Another place where it really works out well is being able to get that along the underside of our trim panels themselves, and then you can see all we have to do is kind of tip up on it slightly. Then, we can hear our fasteners popping out of place. We can continue that all the way across to free up that rear panel. Another great aspect. Again, the screwdriver kind of style here, we'll be able to tip that right in there.
Pop off our panel giving us access into the bolts below, if we wanted to remove that or something of that nature. That's going to complete today's look at the Powerbuilt Trim Panel Remover Tool, part number ALL648544. .
Customer Satisfaction Score:
99% were satisfied with this product
1% of customers were not satisfied
Ratings & Reviews


Installed myself with help of one friend. Assistance with install using the videows was invaluable. The installation on a brand new vehicle brought praise and comments on how clean the install looked. Great job etrailer.
Glad I got this. I did not damage the plastic fasteners during removal.
Great price, quality and delivery. This tool worked great for the job.
After watching the etrailer video I installed the hitch in about 2 hours. The rear panel popped out and back on easily. I removed the lower bumper panel after removing the main panel, installed the hitch, reinstalled the main bumper panel, cut the subpanel around the hitch and reinstalled it last. I also bought the
Trim Pad Remover Tool to take out the securing clips and it was worth the $10.00. You guys have great videos.
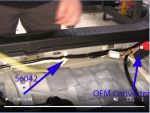
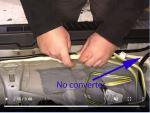
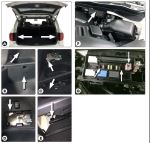
Ultimately the product is excellent I am completely satisfied with the end result. I included a few installation tips for those of you who plan to install this by yourself. (1st jpg) The trailer hitch + bumper are heavy and are difficult to hold up and get the bolts started. I stacked up some blocks and scrap wood and threw a towel over it to protect the paint on the hitch. This holds the hitch to the right height and makes it much easier to hold up just the aluminum bumper to get the bolts started. (2nd jpg) Because the hitch has slotted bolt holes it is easy to accidently install it off center. I thought I had it installed right the first time because I measured the outside of the hitch to outside of the aluminum bumper on both sides, but it ended up being installed 3/16 of an inch off to the passenger side which way off of where it needs to be. To correct this I drew a line down the center of the Honda aluminum bumper and made sure the center of the hitch was lined up to the center of aluminum bumper before I tightened the bolts. The outside of the hitch mount may seem off alignment compared to the Honda aluminum bumper, but this doesn't matter. The center of the hitch being dead center to your car is what matters. (3rd jpg) The end result is excellent so I am happy! :-)
Actually didn’t need it. Screwdriver was sufficient for Subaru clips.
A great tool to have when working with push pins. I would highly recommend this one tool. I have taken the rear bumper cover off twice, once with and once without this tool. I was able to remove the push pins much more efficiently and stress free with this tool and also prevented any of the push pins from breaking.
Good price on an excellent tool.
Haven't been able to use it yet. UPS delivery was delayed 2 days so I gotten fasteners out with a screwdriver and with a home-shop-made tool. Looking forward to using it later.

Robert

7/2/2025
Dont use it often, but it remains a go-to tool in my tool box.

The video made installation simple!! I almost bought a hitch from uhaul with installation would of cost me $[XX] total. I just saved around $[XX] and learned the process. I’m not a professional and did it myself in about an hour. Freakin love the hitch and etrailer’s highly competitive pricing and very informative video!
Helped removing the trim clips and hold them in place for replacement. Glad I bought it. I put it in the back of the car to help remove the 2020 Subaru ascent hitch cover.
The tool looks like it should hold up well for removing plastic clips. Would be five stars but made in China like almost everything else.
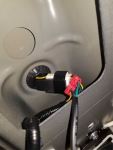
This was a relatively simple and straightforward installation on my 2019 Volvo XC40. The directions were clear, although the black and white pics can be a bit hard to follow. I would add the following points. First, the left plastic rail in the spare tire compartment needs to be removed, and it has an odd hook at the front that is a challenge. It will come with some wiggling. It's equally challenging to put back on. Second, I used the Volvo ground terminal to ground the T-One module. Third, I ran the wire from the module to the positive terminal down through a grommet in the spare tire compartment, then along the brake lines under the car to the battery. This was easy to do with the vehicle on a hoist, but will be more challenging if you don't have access to a hoist. I removed 2 of the protective panels under the car to route the wire. It was fairly straightforward. The product works as advertised and fits very well in the car.
The products are great and easy to install. I am disappointed that the hitch has no provision for mounting the trailer light connector.
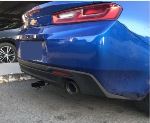
I want to thank "Tom" for his review on 1/10/2019 as it helped me out tremendously to use his same parts list for my own installation on our 2015 Toyota Highlander XLE vehicle. I luckily had a friend from church that had a lift so it made it a lot easier to get all the bolts in place and reassemble all the parts of the vehicle after installation. Here is my parts purchase list from etrailer: The Draw Tite 76156, 18144 plug mounting Bracket, Curt C56217 wiring kit, the ALL648544 Trim Pad Remover, and the Curt I26 Light Tester. You may not need the Trim Pad Remover but it was handy to have so we didn't break the plastic Grommets that hold a lot of the trimmings of the car together. These items also made for a clean look on the installation and this particular hitch (Draw Tite 76156) hides real well behind the bumber. I am very happy with the experience. I will definitely be using etrailer.com in the future.
P.S. definitely watch all the videos attached to this product page. They were very helpful in find your way around the car and tricks for making the installation easier and cleaner.
I have not used it yet but it looks good
Essential tool for the inexperienced such as myself. I use it for removing trim for the purpose of hiding the trailer wiring. Works much better than the standard screwdrivers I have in my tool collection.

Daryl
2/8/2022
I used it the day I installed my hitch but havent used it since.
Delivered on time
Excellent Quality. Package was great with no damage. Happy with my purchase. Fast delivery and easy to install. I installed by myself in my garage using 1 jack.
The Powerbuilt trim pad remover worked perfectly. I was able to remove all of the plastic fasteners around the entire front end of my vehicle enabling me to to do a necessary upgrade and repair. I purchased this item knowing how difficult it can be to remove the fasteners without damaging them or surrounding parts. I can't recommended this inexpensive tool enough!
It made removal much easier for my first time doing this. I would not have been as content had I just pried with a flat screwdriver or a needle-nose pliers.
Worked like a charm in getting the bumper off
I don't remember using it.
Worked perfectly
We bought and mounted this hitch for our Subaru Outback. First, the install went like the instructions said. Then, it has worked very well. We have hauled various trailers 10 times over the last year moving our sons to and from college and jobs as well as other moves.
We also bought the wiring harness and that is wonderful It is long enough that we keep it stored inside the car in the spare tire well. That will make it last longer and works perfectly every time we hook up a trailer.
Very satisfied


Do you have a question about this Automotive Tool?
Info for this part was:
At etrailer we provide the best information available about the products we sell. We take the quality of our information seriously so that you can get the right part the first time. Let us know if anything is missing or if you have any questions.


Larry
12/22/2024
Still looks great and performing well for us. Hauled the car all the way to Canada and back from Texas with no issues.