Reese Quick-Install Custom Installation Kit w/ Base Rails for 5th Wheel Trailer Hitches
2012 BMW X5
Will this fit?
To see if this custom-fit item will work for you please tell us what vehicle you'll use it with.
Thank you! Your comment has been submitted successfully. You should be able to view your question/comment here within a few days.
Error submitting comment. Please try again momentarily.
- All Info
- Reviews (39)
- Q & A (0)
- Videos (4)
- Photos
Reese 5th Wheel Hitch Rails
- Above the Bed
- Custom
- Reese
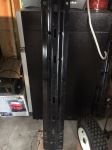
Custom brackets reduce the amount of drilling and time required to install your fifth-wheel trailer hitch. Brackets, base rails and hardware included.
Features:
- Custom brackets mount beneath your truck bed to provide attachment points for 5th-wheel rails
- Base rails sit in truck bed and allow installation of 5th-wheel trailer hitch
- Vehicle-specific brackets mount to existing holes in your vehicle's frame
- Minimizes drilling and measuring
- Cuts installation time in half when compared with universal bracket systems
- Kit includes custom brackets, rails and hardware
- Compatible hitches: Curt, Draw-Tite, Hidden Hitch, Reese, Valley and Husky
- Will not fit Reese Elite Series (Signature Series) or Valley UBS hitches
- Black powder coat finish resists corrosion
- 5-Year limited warranty
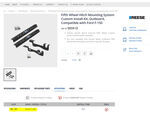
50087-58 Reese Custom Quick Installation Kit
Replaces 50086-58
Installation Details
This Product Fits The Following Vehicles
- 2015 - 2020 Ford F-150 5-1/2 Foot Bed
- 2015 - 2020 Ford F-150 6-1/2 Foot Bed
- 2015 - 2020 Ford F-150 8 Foot Bed
California residents: click here


Videos are provided as a guide only. Refer to manufacturer installation instructions and specs for complete information.
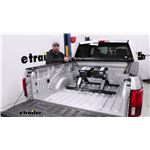
Video Transcript for Reese Quick-Install Custom Base Rails Kit Installation - 2016 Ford F-150
Today on our 2016 Ford F-150 we're going to take a look at and also show you how to install the Reese Quick Install Custom Base Rails and Installation Kit for Fifth Wheel Trailer Hitches. Part number is RP50087-58. Now to begin our installation on the bottom of our rails here we need to place on the galvanic strip. This is going to protect against any corrosion. You can see it's pre-cut to where our bolts will pass through there fine with no issues. They come in strips like this.
It's kind of a universal strip. You want to center the middle hole location here with the middle hole in the rail, and then apply it from there because these will have a little bit of overrun. See on the end there how it kind of hangs over If you start at one end you might run into an issue where your holes won't line up. Now, it's not the end of the world, you can just cut some notches out, cut it with a cross in each one of them, but save you a little time if you center it up with that hole. We want to do this on each of our 4 lips on our base rails here. Then we can just trim those off at the end there, just like that. You'll have some smaller galvanic strips as well.
That's going to go anywhere that we've got steel to aluminum contact there in the bed, just to prevent corrosion, so keep that in mind. Now with our strips in place we're going to get our rear rail mounted into position. We'll measure up from the rear of the bed. We need to be at 28 and 3/4 of an inch. It's going to take you a little bit.
You really want to take your time in getting this positioned properly. First we'll establish where that 28 and 3/4 is on each side. When you move one side you're probably going to move the other side, so double check it there. Now we're going to measure out from each wheel well here. We need to get it centered on the truck. All right, now what we'll do is mark our hole locations.
We're going to use the very outside hole here in the rear of the rail. Then we're going to come to the front side and we're going to go over to the third hole location. Get that marked as close to the center as possible. For the middle hole here we're going to use the rear hole for the back rail and then the same holes here on the outside. Now we can move our rail out of the way, center punch those locations and we're going to drill them out with a 1/8 inch drill bit. Now, as you drill out your holes you want to make sure that you don't run into anything that may be underneath the bed as well. Once we've got our holes drilled it's a good idea to vacuum up the shavings so you don't track it around the bed and scratch it up. Now we're going to get our side plates installed here. We want to use on the driver side, we'll want the double holes to be forward. You can see we've already got one of our galvanic isolators in place here. We may have to position a couple on the front; we'll see when we get there. Anywhere that the steel makes contact with the bed again, you want to make sure that you drop that in place. 2 holes forward and those lips or those tabs that stick off, those go in. We'll get our hardware in position. To do that we're going to use a pull wire. You can see we've got a hat channel here, a hat channel here. We're going to be using this large hole, we're going to be using this hole to attach. Take our pull wire that's going to go in, and there's a larger hole inside the frame rail. You'll see it's going to come out right there. We'll go in there and take a look at where that came out for you. Now we've got the tires off of the vehicle. It just makes it a lot easier for you to see. This wouldn't be a requirement in installing it. They do recommend lowering down the spare tire. We also removed the heat shield, again, that's just so you can see. It's not a requirement to do the installation, so keep that in mind. Here you see where that's come out that large oval shaped hole. Just beware that you've got brake lines there that you don't want to do any damage to. We're going to slide on the thinner of the spacer blocks. This one's going to be a little bit longer. Once that's slid on we'll thread on our carriage bolt just like that. It's a good idea to feed these in separately. We'll bring them back and they're going to come out of the hole the inside of our frame rail there. Once we've brought that through you're going to slide on the smaller round hole spacer block. It's thicker, but it's smaller in overall size. That gets slid on. Take our pull wire off there. Slide our bracket in place. Now we've got a conical tooth washer that's going to slide on, and we'll thread on a hex nut. This is just going to be loosely for now. Now, for our forward hole location we're going to do the same thing with our pull wire. We want it to come out of the same larger hole. It's a little bit further back there, but it'll reach. Now we'll slide on the round square hole spacer block. Now, you want the square hole on that round block to be at the bottom here so we can rotate that until it's at the bottom and it's going to fit into that larger hole that's right behind it there. Sitting just like that. Now we're ready to pull this fish wire off and we'll place on a conical tooth washer and a hex nut here. Again, this is just loosely installed. All right, now we'll head over to the passenger side and repeat that same process. Now for the forward attachment point here on the passenger side there's a large heat shield that's in the way. We tried to leave it in place as we did the installation, but the U shaped spacer blocks are getting hung up on this fabric, so we need to get rid of it. I'd like you to keep that in mind for when you're doing your install, you may also want to do the same thing. It's got a real sticky material on the back of it and our spacers just won't slide across the top. We're going to get rid of that. You can see where our block is actually just stuck there; no way to get it in position. Just pull that down, just taking out a small section here. That's your first bed corrugation. It'll go through the second one, and then right on that edge is where you'll cut it. Now we want to do a quick visual inspection. We want to look down through our 1/8 inch hole here and we want to confirm that it lines up with the hole that's in our frame bracket. Once we've confirmed that we're going to get our 5 holes enlarged to 9/16 of an inch. Now we're ready to re-position our rear rail here. We've got the U shaped spacer blocks, and those are meant to go in the low side of the corrugation. Since this dips down here and our rail's going to sit over it, we're going to place that one under. Going to do the same thing for this position and for this position all the way across. Now, just like before where our U shaped spacer is going to make contact with the bed we need to have a galvanic isolator in place. Put that right over our hole there. Give that a little trim, and I'm going to do that in my remaining locations here because all of my spacers are going on top. Now I'm just going to kind of pre-position my spacer blocks here. The ones on the very outside, right in that area, they're not going to go fully around our bolt. It's just kind of the way it lines up; it's not a terribly big deal there. What these are going to do is when we start tightening down our bolts it's going to prevent us from crushing the corrugation on the bed. With those positioned over our holes, start bringing our carriage bolts down through the top through those hole locations. You can see those are going to be positioned there so when we tighten down we don't have any crushing affect. Now, the ones that actually go through the frame brackets here, you might have to wiggle them around a little bit from the top, or actually go down and move your frame bracket to allow those to come down through. We can go down there now and take a look at it. Now at all 5 locations we're going to go around and place on a conical tooth washer. The teeth of that need to face up towards the bed, and also one of our hex nuts there. We can go around and do that at all 5 locations. Now we'll use a 3/4 inch socket or a 19 millimeter, and it's time to get all these snugged down. What we're doing here is, we want to prevent our rail from moving. Now the forward attachment points here, those are right over top of the frame rail. You probably have to use a wrench to snug these down, and then a cat paw 00:12:22 would be ideal for torquing it later on. Now we're going to get our fifth wheel put into place. You want to put in place whatever you're going to be using. If you're using more than one accessory, fit them both. What we'll do is put our back tabs in that back rail, then we can position our front rail under it, push it in snugly, and mark our locations for our holes. Allow that to come down in our slots and then the tabs that we have here in the front, we're going to put those in the same hole location we put on our forward rail. Now we just force back on that so we have a nice snug fit. Now we need to center it to make sure we've got it in the same location on both sides. All right, that looks good from side to side. Now you might have to pull back your isolator there, that galvanic material. We'll have to get our center of our hole marked for each of our 4 locations. On the front rails you're going to use the third hole in from the outside in all of our locations there. 2 on this side, same spot on the other side. For our forward location we're going to be using the hole that's on the front to be closer to the cab here. Now for our middle hole location here in the bed, that's going to be the only one that's sitting down in the corrugation, so this one's going to need one of the galvanic isolators there. Take our spacer block and put it over. Of course we should clear the middle of that out so we can get our bolt through it. You can placed right there on top, set our rail in place over the top of that, and we'll start putting our carriage bolts down through. Now we'll just go under and repeat that same process that we did on the rear rail, putting on our conical tooth washer and our hex nut. However, on our 2 outside bolts on each side we want a U shaped spacer in between the conical tooth washer and the bed with one of the galvanic isolators applied. Just fold it over, it's a little bit bigger than it needs to be. Just want to make sure that the side that you've got the solid coverage on, that that's facing up. Now it didn't say in the instructions, but our rear bolt for that rail is right here, and the forward bolt's right here. Really the only way to get these in place is going to be to slide them in from the front back to that rear bolt. We'll have to have that forward bolt out of position there so we can just pop it up and out. Do that on both sides. Once we have that in that slot, a small screwdriver or a pick allows us to bring that back. Just want to make sure it goes around that bolt. Now for that location we'll place on our conical tooth washer and a hex nut. At that point we'll just go back up top and put that bolt down through, put another U shaped spacer in, another conical tooth washer and nut. Now with the rear in place we've brought our forward carriage bolt back down and in. Get that spacer slid around our bolt. That's going to get the same hardware. Now we're going to go through and get these all snugged down. Once they're snug we're going to torque them down to the specifications that are listed in our instructions. Now once our rails are torqued down we're going to move out here to our side plates and get those torqued down. Do the same thing over on the driver side, we'll be ready to drop in our favorite attachment and start hauling. Now with our spare tire back in position that's going to complete our installation of the Reese Quick Install Custom Base Rails and Installation Kit for Fifth Wheel Trailer Hitches, part number RP50087-58 on our 2016 Ford F-150.
Ratings & Reviews
4.7
39 reviews

The hitch was a perfect fit, clear directions on how to install provided! Just takes a while, but can be done by one person! About 4 hours to install it completely! I did not have access to a vehicle lift but was able to do this job on a creeper, I have a 4WD so it sits up a little bit higher than a 2WD!
Overall- I am satisfied with the brackets and rails. I use them to attach a 15k Reese sliding hitch to which I attach a short 5th wheel (K-Z 231RK Sportsmen) behind that I tow my boat. The rails and custom brackets have done very well while towing.
My only complaint is accessing 4 of the nuts that hold the rails in place. The nuts are difficult to access from under the bed. They are located between the frame rail and bed, not much room to work and traditional sockets won't fit. I ended up using wrenches that attach to a ratchet, in this case my torque wrench.

This kit was definitely worth the money and I’d buy it again. I installed it myself in my 2018 F150 to tow my gooseneck. (I have a custom gooseneck hitch made for the rails) The heaviest I weighed across a scale was 26,000lbs and this kit never gave me an issue. I highly recommend, you won’t be disappointed.
I spent a whole day installing the Reese 16k hitch and custom quick mounting rails in a 2020 F150. Video was great and I advise you to watch it a couple of times before installing. Paper instructions not so good. If you have a 36 gallon fuel tank, I recommend you to do this install on a lift. I do not recommend you to install on your garage floor especially if you are 67 years old, still sore from laying on my back. You must remove spare tire and heat shield. I installed with tires on and very tight working around large fuel tank area. Going on a test drive to see if everything holds together.

I recently purchased a Reese Quick-Install Custom Installation Kit w/ Base Rails for 5th Wheel Trailer Hitches
Item # RP50087-58. Prior to this purchase I bought a similar item for a different vehicle from e-trailer. I have purchased other items and have requested information by phone and email as well. Every experience I have had with e-trailer has been excellent. I have found ease of ordering, availability, delivery time, price, service, and the quality of the products to be very good. E-trailer is one of the best companies I have ever experienced.

This product worked out perfectly. My son, using instructions from etrailer, installed the rails in our new-to-us Ford F-150 in Massachusetts before we drove about 3,000 miles to Edmonton, AB to pick up a new-to-us fifth wheel trailer and Anderson hitch. I was a little apprehensive that it wouldn’t fit. No need. It dropped in exactly as it should. We hitched up the fifth wheel and drove back without incident. We have had only good experiences buying from etrailer.
Laurie B.

5/8/2021
We continue to be very pleased. Absolutely no problems.

The Rails I installed my self and they where easy to do. They are of good quality and I am very happy with them. They are still looking good with no rust on them after 1 year (I live in Michigan and the winters are a little ruff some times here) I have used them about 15-20 times and have had no issue with putting the hitch in and out of the truck. The pins always line up good each time.
It was easy to install would have been better if they would have had measurements for the front mounting bar.
J T.

12/31/2020
It works well. Installation was easy.
Quick fast ordering and shipping, good diagram showing parts and assembly but the printed instructions were hard to follow when it came to installing the shims and how to install the anti corrosion tape since I had an aluminum box in my truck. The instructions called for mounting both base plate using 5 -1/2" bolts to mount each plate but only 2 bolts for the rear plate actually fastened to the lower brackets and 4 for the front plate. The other bolts just went through the box with a shim washer and the aluminum box to hold it in place. But all in all its a good product that needs a little tweaking for the instructions. maybe a link with a video?
Just received my Reese rail system. My wife and I plan on doing some travel so I needed a hitch for our new 5th wheel trailer. It came exactly when Crystal K said it would. Packages were in great shape. I read lots of reviews about how most packages were damaged. Crystal K was extremely knowledgable and helpful with my selection. This is my first purchase from etrailer but it won't be the last!
I will share more on my experience that I have with the product once I install my hitch.
Thank you and thank Crystal K also please.
Richard
This company is the best. When we bought a hitch mount it was short one piece we needed one simple call and they sent it right out. Thanks a bunch I will use this company from now on,Bruce

Have had no trouble with my e trailer. 5th wheel quick install. Been a great product.

This was a lot easier installation the one I did on a 2014 GMC. The package had broken on shipment and the bolts were missing. However, the company sent out replacement bolts right away.

Excellent hitch and super easy to insta ll!!

Jeff

6/20/2022
Great product
answered all my questions, even called the factory to make sure the rail kit for my Raptor truck would fit. Great customer service.

Everything fits and installs well, except there should be a wider selection of spacers to fit the corrugations of the truck bed.
The installation went very well on my 2017 ford F150. I have a 36 gallon tank so the left side was a little tough but I was able to get it very happy with your product thanks again ...
I was a little nervous about the product initially because it was such a great price. I was pleasantly surprised with the product and service. Quality parts. Instructions were detailed and easy to follow. Parts came about 4 days earlier than I expected and the price was great. I will be doing business with these folks in the future.
Item was exactly what I needed. Arrived promptly and was packaged well. Would not hesitate to order from your company again. Thank you.

Lori A.

7/15/2023
Item has worked out excellently for us. This item is A-1 and I would recommend it.
Arrived as expected. Haven’t installed it yet, but watching the video makes the installation seem easy.
Box boxes came destroyed and missing the hardware and instructions. Maybe they are too heavy to ship just in cardboard with no reinforcement etc.


Heather A.
7/3/2024
I am really sorry that happened Mark. I am going to get that taken care of for you. We will be in touch to make this right.
just got my order looks good

Install was a snap. Good directions, no issues.
Looked at a video to install rails
Made it much easier to figure out
Some places are very tight under a truck
but everything worked as it should
Very pleased
Looked at a video to install rails
Made it much easier to figure out
Some places are very tight under a truck
but everything worked as it should
Very pleased
See what our Experts say about this Reese 5th Wheel Hitch Rails
- 5th Wheel Hitch Recommendation for 2018 Ford F150 5.5 with Lippert Turning Point Pin BoxSince your 2022 Grand Design Reflection Series 280RS has a Lippert Turning Point pin box you can use a fixed hitch will weigh less than a slider hitch. So the lightest weight and easiest to use hitch would be the Demco Recon part # DM8550043 which weighs which is about 50 lbs lighter than most at 89 lbs.
view full answer... - Recommended 5th Wheel Rail Kit and Hitch for 2017 F-150 & Highland Ridge Open Range Light 5th WheelThe 2018 Highland Ridge Open Range Light lf318rls has a gross vehicle weight rating (GVWR) of 9,995 lbs and an unloaded weight of 7,895 lbs. According to Ford, your 2017 F-150 Ecoboost 3.5L Supercrew 4x4 has a towing capacity of 10,200 lbs. So, you won't have any problem towing this 5th wheel trailer. For your 2017 F-150, I recommend the Reese Quick-Install Custom Base Rails and Installation Kit for 5th Wheel Trailer Hitches # RP50087-58 which is a custom fit for your vehicle. Then...
view full answer... - Auto Slider Fifth Wheel Hitch for 2020 Ford F-150 5-1/2 ft BedWe only have on auto slider fifth wheel hitch that slides far enough to be used in a 5-1/2 foot bed like what you have with your 2020 Ford F-150 and that's the Demco Hijacker part # DM8550040 which is a 13k slider that moves back 22-1/2 inches. We don't have an underbed rail kit that fits your truck so you'd need the custom install kit part # RP50087-58.
view full answer... - Custom Bracket Kit For 5th Wheel Trailer Hitches For A 2016 Ford F-150 With 6-1/2 Foot BedI reached out to Cequent, the maker of Pro Series, and they have discontinued the 4 bolt rails you mentioned, but still have mounts for some vehicles. Unfortunately your 2016 Ford F-150 with 6-1/2 foot bed isn't one of the models that has those mounts available. They said that with the switch to the aluminum bed, there was enough reason for them to focus on making things right for their current rails to function properly that they let those 4 bolt rails and mounts go. I asked if you...
view full answer... - Custom 5th Wheel Install Kit Recommended for Use with Air Spring Suspension on 2019 Ford F-150I appreciate the time you've spent researching all the different products; I'm happy to offer you my expert recommendation to facilitate your purchasing decision. The Curt E16 5th Wheel Trailer Hitch - Slide Bar Jaw - 16,000 lbs # C16115 and the Reese 16K # RP30047 are very similar but I'm going to give the advantage to the Curt because of its autolocking jaw and excellent price point. The Reese Custom Installation Kit # RP50087-58 will pair up nicely with this hitch. To prevent your...
view full answer... - Recommendation for Lightest 5th Wheel Hitch for 2018 Ford F-150If your 2018 Ford F-150 has an 8 foot bed, the lightest solution for a fifth wheel hitch is going to be with the Andersen Ultimate Connection # AM3200. This is a uniquely designed system that includes a coupler adapter to attach to the fifth wheel trailer's king pin. The base itself will then mount to any industry-standard, above-bed base rails in the truck bed. The entire assembly weighs just 40 pounds and has a towing capacity of 20,000 pounds. If you still need base rails for your...
view full answer... - Towing 5th Wheel Trailer with 2018 Ford F-150 with 5-1/2 Foot BedI was able to pull up the online towing specs for your 2018 Ford F-150 and it looks like there is still a somewhat large potential range even within the specs that you provided depending on your axle ratio, drivetrain, and wheelbase. At the low end on your F-150 SuperCrew with the 3.5 V6 engine it shows a 5th wheel towing capacity of 6,500 pounds for the 4X4 model with a 145 inch wheelbase and the 3.55 axle ratio. At the high end your F-150 can have a 5th wheel towing capacity of up to...
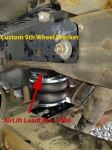
view full answer... - Recommended Air Springs Compatible with 5th Wheel Hitch on 2016 Ford F-150For your 2016 Ford F-150 with 6-1/2 foot bed, I recommend the Reese Quick-Install Custom Base Rails and Installation Kit for 5th Wheel Trailer Hitches # RP50087-58. This will give you the rails you need to install a sliding 5th wheel hitch. Then you can use the Air Lift LoadLifter 5000 Air Helper Springs - Rear Axle # AL57268 or LoadLifter 5000 Ultimate Air Helper Springs with Internal Jounce Bumpers # AL88268 to level your load. The internal jounce protects you if the air spring were...
view full answer... - 2017 Ford F-150 Reese Bracket Kit for a Reese 5th Wheel HitchHey Greg, thanks for reaching out! For just the brackets you'll need the Reese Bracket Kit # RP50087, but if you don't have the Reese rails either, then the full kit for your 2017 Ford F-150 is part # RP50087-58 instead. Attached is an installation video of this kit on a 2016 F-150 that you can follow along with if you plan on doing the installation yourself. Where is your favorite place to take your 5th wheel to when you travel?
view full answer... - Which Reese Fifth Wheel Rail Kit Fits 2021 Ford F-150 The reason the Reese fifth wheel rail kit part # RP50087-58 is interfering with your sensor is because it doesn't fit the 2021 models of the truck. Reese made a new rail kit for your truck with the part # RP56034-53 which would be what you'd need.
view full answer... - Fifth Wheel Hitch, Rail Kit and Suspension Enhancement for 2018 Ford F-150 5.5 Foot BedFor your 2018 Ford F-150 5-1/2 foot bed we have suspension enhancement that is a fit and works well with an in-bed fifth wheel hitch, but none of the air bag kits will work. Instead you'd want to go with the Timbren kit part # TFR1504E which fits your vehicle and can be used with an in-bed hitch rail kit. I attached an install video for this kit for you to check out as well. Then for a fifth wheel rail kit the best option is the Reese custom fit kit part # RP50087-58 which is a no-drill...
view full answer... - Will Sidewinder Work With 2017 Ford F-150?The compatibility of a Sidewinder is not with the truck, it is with your fifth wheel's pin box and the fifth wheel hitch you have (although with a 5-1/2 foot bed you have to use a Sidewinder to get the proper clearance). A Sidewinder is going to replace your pin box so in order to find the correct one you need to find the manufacturer and pin box model number, which will generally be stamped on the pin box. For example, Sidewinder # RP34FR will replace Fabex 663 and 665, Lippert 0719,...
view full answer... - Curt E16 5th Wheel Hitch and Base Rail Compatibility with 2017 Ford F150 5-1/2 Foot BedThe Curt E16 5th Wheel Trailer Hitch # C16115 will fit the industry standard base rails compatible with your 2017 Ford F-150. If you don't have the base rails yet, then I recommend the Reese Quick-Install Custom Installation Kit w/ Base Rails for 5th Wheel Trailer Hitches # RP50087-58 confirmed to fit your truck. These brackets won't require drilling into your truck frame. If you want to use the kit # C16116, it will work with your truck, but you will need to drill into your frame for...
view full answer... - Recommended 5th Wheel Towing Kit Needed for a 2017 Ford F-150 with a 5-1/2 foot BedAlthough autosliding 5th wheel hitches, like the Demco Hijacker Autoslide # DM8550034 that you referenced, are a great option to use for a short bed truck, since your 2017 Ford F-150 has a 5-1/2 foot bed a sliding or autosliding hitch will not provide enough turning clearance for tight turns. We do have a solution for you though! To allow you to make up to 90 degree turns with your short bed F-150 you will want to change out your current pin box to a Sidewinder. A Sidewinder pin box, like...
view full answer... - Reese 5th Wheel Mounting Bracket/Rail Kit for Husky 5th Wheel Hitch on 2021 Ford F-150Your Husky 5th wheel hitch is indeed compatible with industry standard 5th wheel bed rails which is what is provided by a Reese 5th wheel hitch install bracket/rail kit. However, the # RP50087-58 kit you'd looked at doesn't carry over to the 2021 F-150 model which is year 1 of the 14th generation of the truck, which you kind of alluded to. For your 2021, you'd want to use the # RP56034-53 kit. If you'd like to install a 7-way in the truck bed so you don't have to run the trailer connector...
view full answer... - Will Reese 15k Slider Hitch Fit Reese Fifth Wheel Rail Kit # RP50087-58Hey Greg, yes a Reese 15k slider hitch will fit the Reese rail kit part # RP50087-58 since they are both designed to fit the industry standard fifth wheel rails. Most likely your Reese hitch is a little older since they had updated their 15k hitches to 16k but the rails they are designed to fit have not changed. Let me know if you have any other questions.
view full answer... - How to Use the Valley 7054 5th Wheel Hitch on a 2018 Ford F-150Yes, you can use the Valley 7054 5th Wheel Hitch on your 2018 Ford F-150. There won't be any issues with the aluminum bed. In order to do so you will need an install kit for which I recommend using the Reese Quick-Install Custom Installation Kit part # RP50087-58. This kit is a custom fit so no drilling is required. It will then provide you with the above bed base rails that you will need to install the Valley 7054 5th Wheel Hitch. Please note that because you have the 6-1/2' long bed...
view full answer... - Will Andersen Ultimate Connection 5th Wheel Trailer Hitch Work on 2016 Ford F-150 with Standard BedYes, the Andersen Ultimate Connection 5th Wheel Trailer Hitch # AM3200 will work on your 2016 Ford F-150 as long as you have a set of above-bed, industry standard base rails installed. For this I recommend the Reese Quick-Install Custom Installation Kit # RP50087-58, which includes custom mounting brackets that will use existing holes in the frame rails of the truck so you don't have to drill into them during installation. When you mentioned that you have a "standard bed" I assume you...
view full answer... - Where Do Fifth Wheel Rails Install in Bed of 2015 Ford F-150 5.5' BedIn general when installing a set of fifth wheel rails the rails will need to be located in the bed of the truck so that the center of the fifth wheel hitch head is centered above the rear axle. But for your 2015 Ford F-150 5-1/2 ft bed we have the Reese custom fit kit part # RP50087-58 which when installed will be 1 inch in front of the axle center. You'd need to have the rear edge of the rear rail 28-3/4 inches from the rear edge of the truck bed and then once placed you'd use a hitch...
view full answer... - Custom Installation Kit w/ Base Rails for Valley 7054 5th Wheel Hitch 2006 Dodge Ram PickupFor your Valley 7054 5th Wheel Hitch you will simply need to install a set of ISR base rails. I recommend using a custom fit base rail kit on your 2006 Ram 2500 such as the B&W Custom Installation Kit w/ Base Rails for 5th Wheel Trailer Hitches, # BWRVK2600. The advantage of using a custom-fit bracket kit is that it mounts to existing holes in your vehicle's frame. This minimizes drilling and measuring which reduces installation time and most importantly it avoids known obstacles along...
view full answer... - Measurements for Installing Reese Fifth Wheel Rail Kit in Bed of 2017 Ford F-150 5-1/2 foot BedThe correct fifth wheel rail kit for your 2017 Ford F-150 5-1/2 foot bed is the Reese kit part # RP50087-58 which is a confirmed, custom-fit. The rear rail edge will be exactly 28-3/4 inches from the rear edge of the truck bed when installed and you'll use the front legs of your hitch to place the front rail once set in the rear rail. I attached a picture that shows the measurement diagram from Reese as well. There's only one slider hitch available for your truck that will allow it the...
view full answer... - What Length of 5th Wheel Base Rails are OfferedThey do not make 5th wheel base rails that are 34"-36" long. If they did make a set in this length then they would not be long enough to reach the frame brackets. Instead, they offer two different lengths of base rails which are 43" long and 48" long. They cannot be trimmed. The 43" long rails are known as inboard rails which attach to frame brackets that have mounting holes positioned inside the frame rail. The 48" long rails are known as outboard rails which attach to frame brackets that...
view full answer... - How To Mount a Reese/Pro Series 15K 5th Wheel Hitch On a 2019 Ford F-150In order to mount the Reese/Pro Series 15K 5th Wheel Hitch on a 2019 Ford F-150 you will need the Reese Quick-Install Custom Installation Kit w/ Base Rails part # RP50087-58. If you already have the Reese Universal Base Rails for 5th Wheel Trailer Hitches part # RP58058 then you will just need the Reese Quick-Install Custom Bracket Kit for 5th Wheel Trailer Hitches part # RP50087. Don't forget the Replacement Hardware Kit for Fifth Wheel Base Rails part # RP58430.
view full answer... - Fifth Wheel Hitch Recommend for 2016 Ford F-150 5.5 ft Bed Towing Trailer w Reese Revolution BoxThe Reese Revolution is exactly what you need with a fixed hitch to be towed by a truck with a 5-1/2 foot bed like your 2016 Ford F-150. A slider hitch wouldn't give you the needed clearance and a slider hitch can't be used with a Reese Revolution so that's just bad advice all around. So what you'll want is fixed hitch like the # RP30047 and a custom rail kit for your truck like the Reese part # RP50087-58 and you'll be in very good shape with the Reese Revolution. Only other thing you'd...
view full answer...
Do you have a question about this 5th Wheel Hitch Rail?
Info for this part was:


At etrailer.com we provide the best information available about the products we sell. We take the quality of our information seriously so that you can get the right part the first time. Let us know if anything is missing or if you have any questions.






David T.
12/6/2019
Perfect ... absolutely no issues.