


To see if this custom-fit item will work for you please tell us what vehicle you'll use it with.


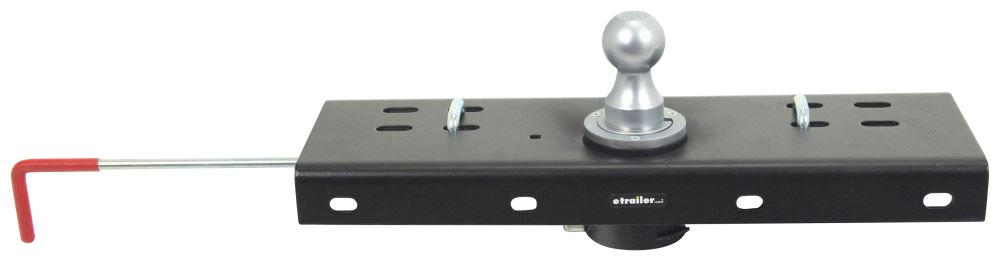

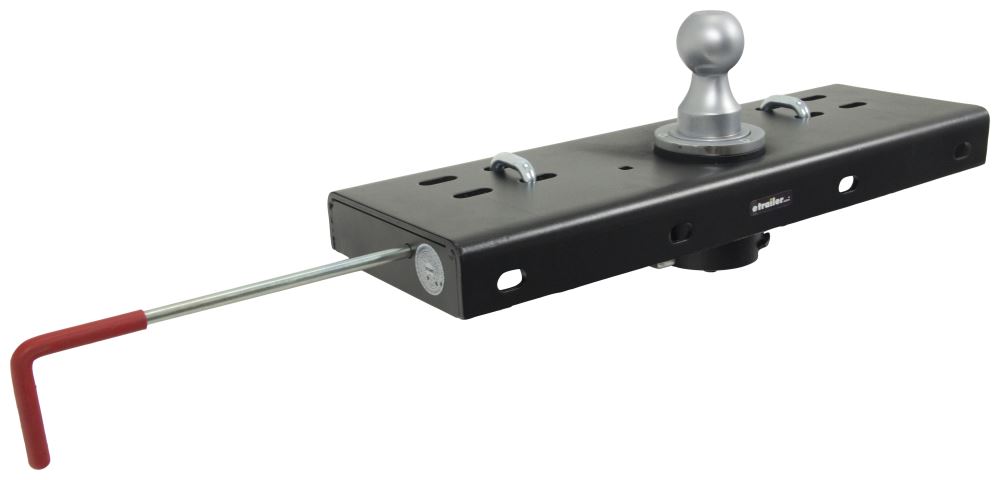
You tow a 5th wheel but still use your truck bed for lumber or pallets. This system gives you a complete 5th wheel hitch with a custom underbed mounting kit, then breaks into three pieces when you're not towing so it takes up less space to store.
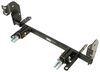
This Demco Recon Stealth separates into three sections when you need to remove it from the truck bed. That changes the job from pulling one large hitch to lifting smaller sections one at a time. The base also folds down when the hitch is not assembled, so it does not leave the same upright profile in the bed. If you add a compatible Demco MOLLE panel kit, the disassembled sections can be strapped at the front of the bed for storage in the truck.
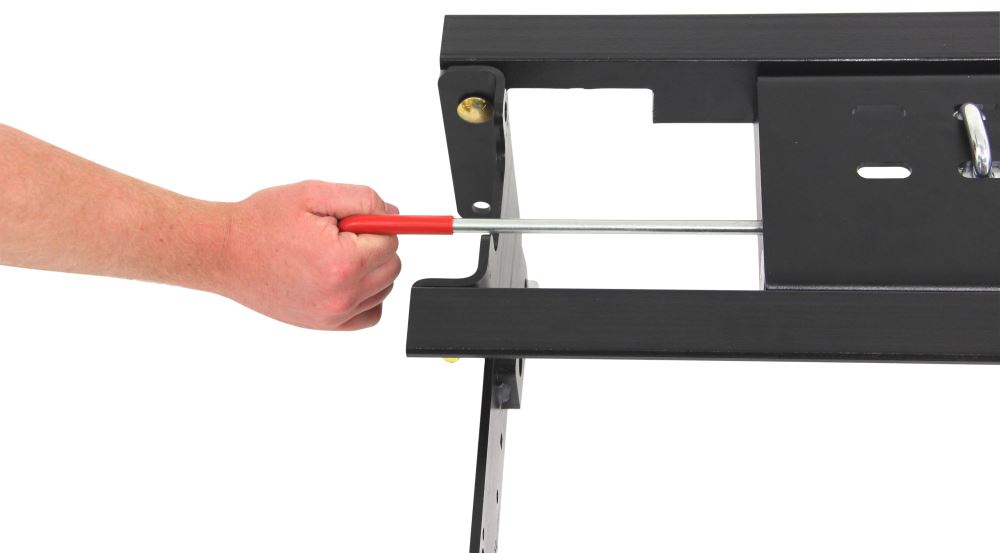
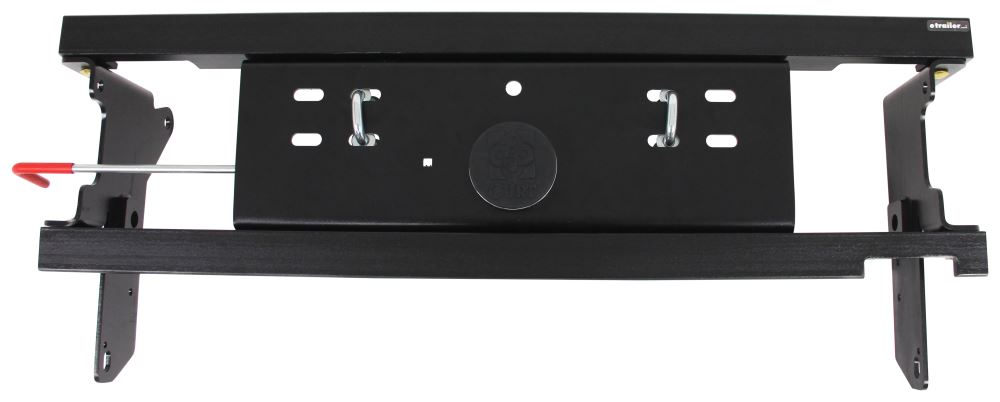
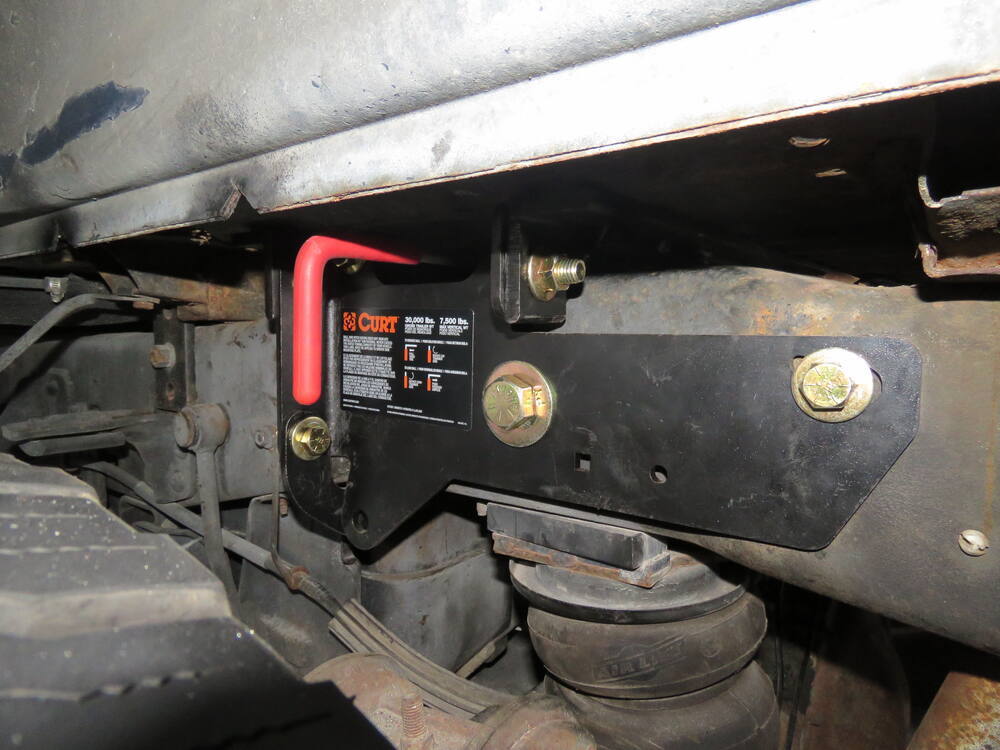
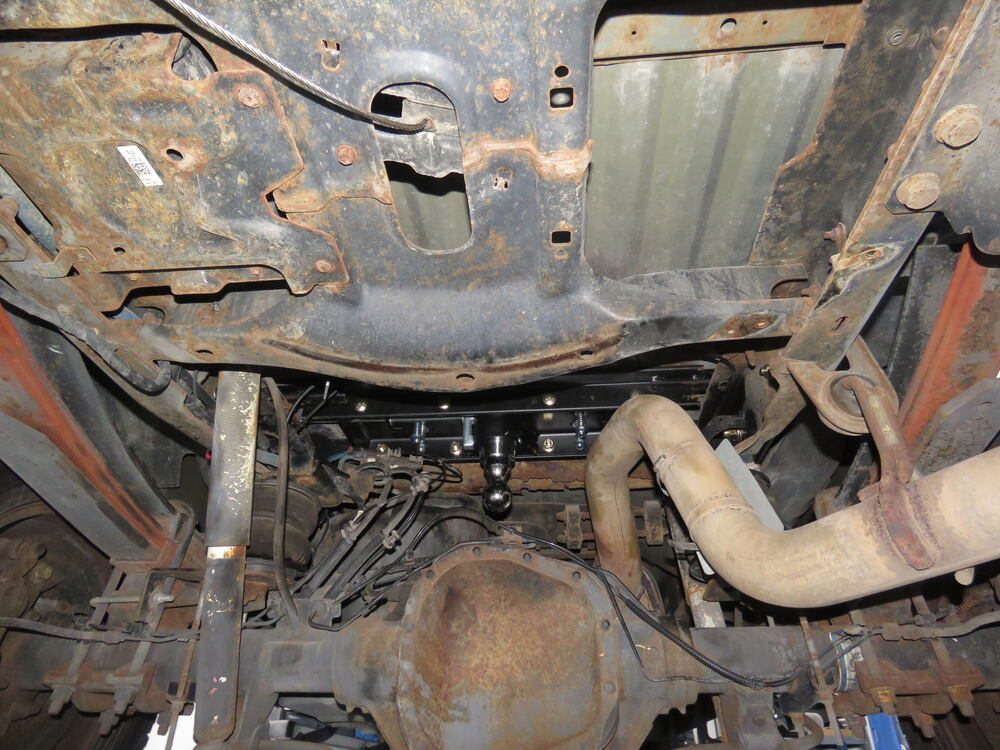
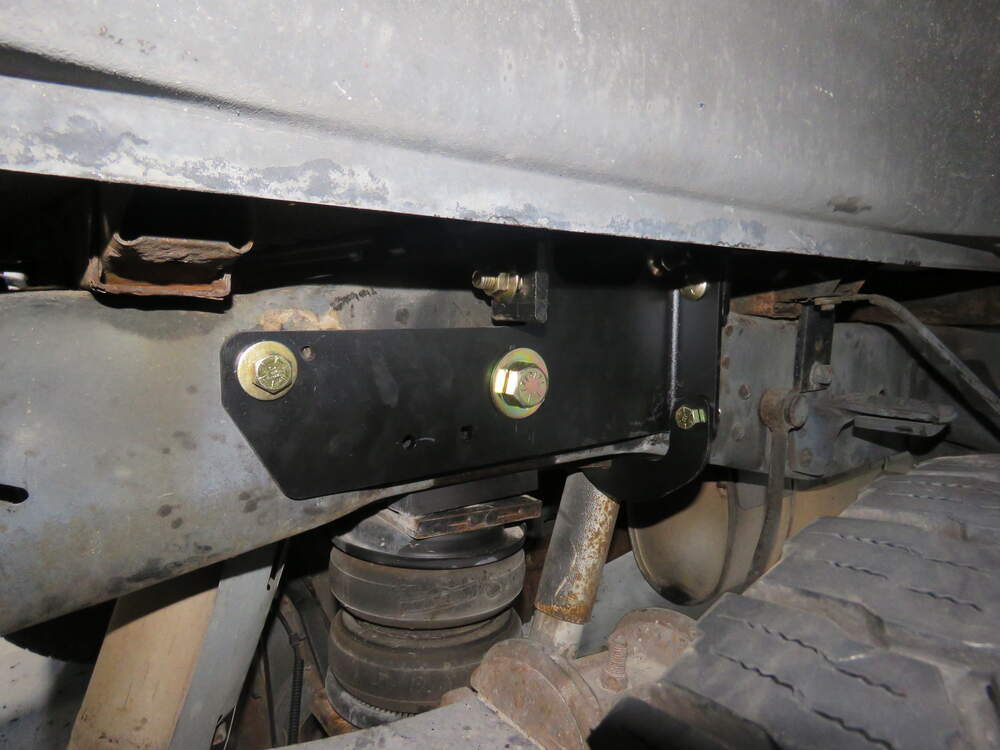
The included Curt underbed kit installs beneath your truck bed and gives you a solid mounting point for the Recon hitch without adding above-bed rails. It also functions as a Double Lock gooseneck hitch, using dual locking pins to secure the 2-5/16" ball in place. That design adds an extra layer of holding strength compared to single-pin setups while keeping everything contained below the bed.
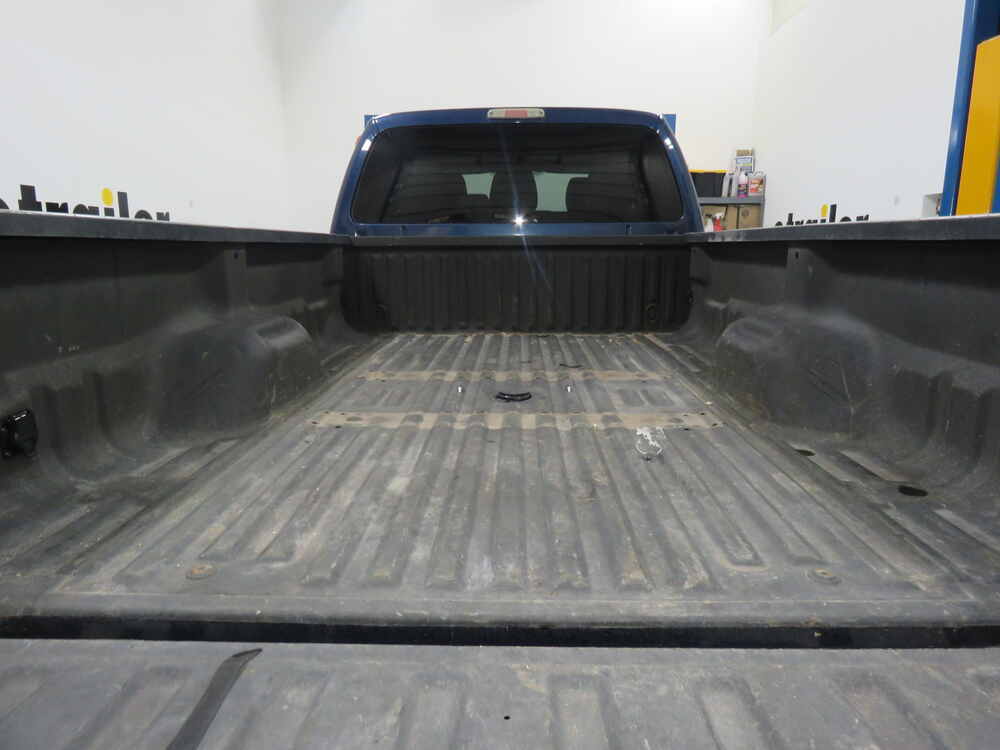
Once the fifth wheel hitch is removed, the bed is clear for hauling materials or equipment. The gooseneck ball can be removed or flipped upside down and stored in the hitch, and a rubber cover seals the opening to keep out dirt and debris. Safety chain loops stay flush in the bed, so nothing sticks up when you're not towing.
The hitch head uses a wraparound jaw and locking bar that fully enclose the kingpin. That tighter fit cuts down on the movement you can get from looser coupler styles at the hitch. The head pivots front-to-back and side-to-side, which helps it stay aligned as the truck and trailer move through turns, dips, and uneven ground.
The upright uses stacked pin holes so the hitch head can be set at different heights. That lets you match the trailer to the truck more closely instead of towing nose high or nose low. The hitch connects directly to the underbed mounting point, so the adjustment happens at the hitch without changing the setup underneath.
Videos are provided as a guide only. Refer to manufacturer installation instructions and specs for complete information.
Hello neighbors, it's Brad here at etrailer and today we're taking a look and installing the Curt under-bed gooseneck kit with the ability to use the demco recon for fifth wheel adapter on a 2013 F250 Super Duty. Now, it has all the same features of your normal gooseneck kit, but if you pick up the Demco Recon and plan on doing a gooseneck or a fifth wheel, you're gonna have that adapter and be able to hook up to both of them. Great part about this kit is it does actually come with the ball included so you'll be ready to use your gooseneck right away without having to pick up that recon. Now, this gooseneck kit is rated at 30000 pounds and it's got a vertical limit of 7500, so this is gonna be pretty heavy duty. So, whatever you're be pulling with your gooseneck this should hold up to it. Now, you're gonna wanna check to see what your vehicle's capable before just hooking up to anything.
But overall with those numbers this is not gonna be the weak point of your towing system. Now, when not using your ball, it's pretty nice here, you can just drop this in upside down. It's got this nice handle and there's also this cap here. So, that's gonna prevent any water from getting in there. So, you also have your ball stored for whenever you need it.
So, whenever you're ready to hook up, pretty simple you'll just simply pull that out, flip it over, drop that in place, lock your handle and you're ready to go. To begin our installation, we're gonna need to first find our center point, we're actually gonna be drilling this out first thing. So, using the measurements that's in the instruction manual I'm gonna use my tape measure. Now, this does have a spray and bed liner, so I'm gonna count for that thickness, about an eighth of an inch maybe a little bit less, but taking my measurement I'm just gonna kind of reduce that down just a hair, I'm gonna make by mark here in the center. And then I'm gonna measure from wheel well to wheel well just to make sure that I have it perfectly centered.
Now, once we're happy with that, we can go ahead and grab our hole saw we're gonna be using a four inch on this one in particular, you're gonna want to check to make sure that your truck model fits that same size but this one's gonna be a four inch so I'll grab my hole saw, then we'll get to drilling. Now during this process, if you're using a drill like this be careful because as it catches it can throw you pretty good and you can hurt your wrist pretty easily. So, I'm gonna be using my legs here to kind of center this up, that way it doesn't move too much on me. So, I'll go ahead, put my pilot hole right exactly where I made my mark and then we'll start drilling away. Now, once you've made your whole, you're gonna want to go back with a file and get some of those burrs off and just kind of rub it around the edge here and that way you don't have any burrs while you put it up.
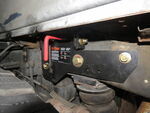
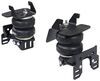
But also once it's in place it's gonna be really hard to get those. So, just go through kind of make sure those are all knocked down, vacuum up any of those metal shavings. And then, I'm gonna go through and use a little bit of black spray paint here just because we have our bed line here you can get paint that kind of matches your bed so if it's a white truck or whatever. But this is basically just to coat this raw edge and protect it long term so it doesn't become rusted or corroded, so just put a little bit of paint there. You can also use a clear coat and that'll work just the same, but again, just coating that raw metal for that added protection is key. Next, we're gonna lower down our spare tire, that's just gonna give us a lot more real estate to work underneath the vehicle. So go ahead, get that lowered down and moved out of the way. Also, to gain us a little bit more access we're gonna be wanting to pull off our heat shield. So, there's gonna be two 10 millimeter bolts here, and then there's gonna be two thirteens that are tucked back here. So, we'll go ahead and get these taken down. So now, underneath on the bed, you're gonna have this heat shield here that's kind of stuck on there. It's not bolted on or anything like that but we're gonna wanna peel this off. It's gonna give us that clearance to get our rails in place, so go ahead, take this off. So, now we're gonna wanna grab our rear cross member here and you're gonna see there's two notches on this side and there's gonna be one on the other side. And you're gonna want the holes, these oval holes as well as these square holes facing towards the cab of the truck. Now, it's gonna slide on this front section and some vehicles will have to have a notch cut out of it and you're gonna see why here. So, as I try to slide this through it is gonna bind up there. So, putting a little notch here just on this edge where the frame or the bed is actually welded together kind of like a pinch weld here. We're gonna go ahead and just notch this out and that's gonna allow us to slide our cross members in. So I'm gonna go ahead, get this cut out. There are some measurements in the instructions so if you follow those, it's gonna be about an inch and a half back here and it's 7/8 inch wide. So, go ahead and notch this out and eventually I'm gonna go back with some spray paint to touch that raw metal up but we're gonna be sliding our cross members through so I'll wait until we have everything in place to do that. But for now, I'm just gonna use an oscillating tool here kind of get some nice clean cuts made. So, with that notch cut out, we'll go ahead and make sure you have the three notched cross member here. And we're just gonna slide this over to our other frame rail. So, just make sure you slide this over where that shock mount is. And then, once we get those notches kind of placed over the frame rails, we'll go ahead and we'll be able to slide this back. So, this is actually gonna live back here. So, once we make that notch over the frame we're gonna slide this in and we're gonna wanna make sure that we have our holes facing towards the front as this is actually gonna slide back and become our rear cross member. So, just be careful here, you're gonna have your your shock mount that you're gonna want to make sure to clear. Now, in order to get it in this point you basically just wanna get over that shock, and then along here you're gonna have your notches that's just gonna go on the frame rail. And now, fought us a little bit just because there's some rust underneath here that caused some abrasion. If your truck is a little bit cleaner underneath it's probably gonna help it move it along. But we're looking for this basically it's gonna be about four inches behind the circle that we cut out. So, just kind of have this set here. And this is gonna create our mounting bracket here for that center section. So, next we need to get the front end and we're gonna have the holes facing towards the rear of the truck, but we're gonna slide it in the same way. We're using our same notch to go ahead and just kind of feed this through. And we're on our driver's side here and I'm looking up at the frame rail. I have our C-bracket, what we're gonna want is this threaded section on the top of the frame and we're gonna need to make sure that we're not catching anything as far as electrical connections or anything along those lines. There is a large wire loom here so I'm gonna try to keep that in the frame rail and this is gonna have to kind of slide around. So, we're gonna work this little bit here to kind of get it in place. And then, I'm gonna slide our threaded section up. Now you may need to move some of these here. So, if you do have a diesel you're gonna be using your U-bolt on this side. If you're a gasser like we are installing here it does fit in here, you're gonna have to kind of finagle it around and just kind of make sure that it's safely run through here. But this is gonna create a nice mounting pocket and kind of sandwich around our frame. So, with this in place we're gonna go ahead and grab our side bracket. Now, I'm putting our side bracket in place but we need to make sure that this is aligned with that threaded portion. And you can see this is kind of where it's gonna lock into our bracket. So, we need to make sure that we have this orientated right that way we can get those threads passed through. We may need to drop the C-bracket out in order to get this orientated properly. I'm gonna get our bracket here in place and our C-bracket here is gonna align on this side. So, just to make sure that we have this on the inside here and that way our thread can actually bolt through the top. Now this is gonna get tricky to get this to all interlock together as this has to kind of sit in between these portions of the bracket and you also still have to thread this in, but the best way I found is kind of moving the bracket back as well as the C to where this whole kind of almost aligns with it and then just kind of keep that in place and then shove it forward and that should get this to align up. Now, it is gonna be a little bit tricky, so just take your time here and it does work, but you will be kind of messing around with this for a little bit to get this in place. So now, once we have that in place, we can go ahead and get our bolt pass through. Make sure you have your conal tooth washer with the teeth facing towards the metal. It's gonna be kind of tight here, so I'm gonna just kind of push our bracket forward to get this to align and then we're gonna finish it up with a flare nut once we get this passed through. You can see we have airbags installed on our vehicle and these are aftermarket. So, there was a bolt that passed through here. And in order to get this seat properly, we're gonna have to go ahead and remove that bolt and then I'll be replacing it with our large hardware that we have here. So, I'll run this through where we took that original bolt out and then I'm gonna just use our block here. This is gonna create a nice little mounting point to where it's nice and evenly dispersed along the bolt. And it is kind of tight here. You might wanna put that bolt plate in place first and then we're gonna follow it up with our nut. Now, if you don't have airbags the process is gonna be the exact same you're just not gonna have a bolt removed there. So, now we're gonna go ahead and get our bracket on the other side in place. Now, we're gonna go ahead and grab our center section and we're gonna want to align this with our rails that we put up previously. So, I'm gonna kind of just get this up in place and then we're gonna be using our carriage bolts, we're gonna pass it through our frame here. So, you'll see we have, we're gonna kind of rotate our cross members that we had here and that's gonna be where we pass our carriage bolts through. So, we'll go ahead and get these going through and that way we can start to at least thread the start of our bolts in place. Once we get one with a nut behind it that's gonna kind of hold it up there. Allow us to get the rest of them in there nice and easy. Now, we're gonna go ahead and get the rest of the three here bolted up. And then, we're gonna go ahead and do the same on the other side. Now, on each side we're gonna go ahead and take our bolts and we're gonna use our conal tooth washer here and we're gonna just bolt this lower portion down and get those hand tightened on. And we'll go ahead and do the other side as well. Now, these two are gonna be carriage bolts, so we'll come back and do those a little bit later. And go ahead and take our carriage bolts and you'll see that we have one side that's slotted. One side is a little bit smaller, so we're gonna make sure to pass these through that way they're all aligned up and our carriage bolts locked in place. And if you're having trouble getting these to align you might need to use a pry bar. And on this side you're gonna have this portion of that C-bolt that kind of comes around here. You may need to tighten down that knot just a little bit. That way you have room to get your carriage bolt passed through. So, using a little pry bar here, I'm able to kind of get this to get a little bit more aligned and then we're gonna pass this from the inside going out to get that aligned. And then we'll go head and just finish this up with our flange nut. Go ahead and do the same on the other side. And with those in place, I'll go ahead on the other side of the truck and we'll get those bolted in as well. So now, we're gonna get ready to tighten down our hardware and there is a proper way to do this. We're gonna start by doing our center section by getting those eight carriage bolts in. So, just make sure they're pressed into the slot as you tighten them. And we're gonna go ahead and do the bolts that go into the frame. And then, we're gonna go ahead and do our side bolts as well as our C-bolt here. So, go ahead and tighten them down on that order. And then, we're gonna come back with our torque wrench and get these all properly torqued. So now, we're gonna go back in that same pattern that we just tightened them down and you might have found out that you're gonna have to put a wrench on some of the nuts on some of them on the back end. Now, when it comes to those larger bolts, we're gonna be you know, using a pretty high torque setting. So, you might have to get a specialty torque wrench for that. But as far as normal torquing here we're gonna be using our torque wrench to at least get these down to the manufacturer's recommendations. Now, if you need a torque wrench, we have them available here at etrailer and this is gonna be important to make sure that these aren't too tight, putting stress on the threads but also that they're gonna be tight enough and not become loose over time. Oh, some of these are gonna get pretty tight to get to and we may need to use a crow's foot to get to them to properly torque them, but go ahead and just take your time here. It's important to make sure these are all properly torqued. Now, for the large bolts, it has a very very high torque setting, then you may need to rent a large torque wrench like you see here. This is pretty higher than a standard torque wrench, so in order to get this, you may need to go to an auto parts store or you might even need the specialty fined one to rent somewhere. But again, this is important to make sure that it's gonna hold up long term and you're also gonna wanna try to get a socket or a wrench on that backside to really hold that in place while torquing. With everything tightened and torqued. You're gonna hop up in the bed, we're gonna put our ring around our cut edge and that's gonna give it a nice clean look and also keep that sharp edge from causing any damage or cutting ourselves. We also have this collar here, so with our Allen heads, we're gonna go ahead and get this tight in place. Next we're gonna go ahead and drill some pilot holes underneath here for our safety chains and that way we can go up and use a little step bit to get this lined up and you may enlarge that hole to make those slide through. So, I'm gonna go ahead and just try to make it as perpendicular as possible and center this up. Now when drilling these out, I'm using a step bit and it's good to have your U-bolts handy and that way you can determine to make sure that it's just the right width for this to fit through. So, you can go ahead and test fit this as you go. That way you're not mergin the holes too much, you're basically just making sure that these are able to drop in. So let's go ahead, we'll enlarge these out. So, once you're able to just kind of drop these in, that's what you're looking for there. Go ahead and get the other one done and then we'll head underneath and we'll get the spring portion attached. So now, with those dropped down we're gonna go ahead and put our flat washer and then we'll go ahead and get our spring in place. And then, we're gonna follow it up with another flat washer and we can go ahead and kind of push our spring up here And then, we're gonna follow it with our nylon lock nut. Now, normally with these I just kind of tighten them down to where they're gonna be. Just flush with that bottom of the U-bolt. Now, I'm gonna just kind of get this hand tightened on that way I can get my other sides all put to the same part. And then, we'll go ahead and tighten those down till they're flush done. And last thing we're gonna slide our handle through here and we're gonna try to feed it through the center. Now, we may need to hop in the middle of the truck there to feed that through. So, we'll feed our handle in and we need to put them through the bolt channels here. So, just kind of line those properly. And then, we're gonna go ahead and put a flat washer in. And then we're gonna take our spring and feed that on. So now, what we're gonna do is just gonna take our handle push this back enough to where we have our locking channel, we can get this put in place here. We may have to pull our handle back a little bit here And then we'll put our spring back in place, flat washer back in place. And this is gonna slide into this channel and we're gonna be able to put our hardware in and that's gonna keep this all put together. So, we're gonna align our hole with the rod and the locking channel here and your handle should be vertical for that to be aligned. So, once we have that in place we'll go ahead put our hardware through and then we'll get this tightened down. We may have to kind of play with the handle a little bit but it should allow this to pass through. And then, we'll just get this tightened down. So now, that we have this tightened in place we're gonna go up top with our ball and make sure we can get that locked in. So now, we'll drop our ball in place and then we'll release our latch. And with that locked in place our gooseneck is ready to use. And that was a look and installation of the curt under-bed gooseneck kit with the ability to use the demco recon fifth wheel adapter on a 2013 Ford F 250 Super Duty..
Info for this part was:
At etrailer we provide the best information available about the products we sell. We take the quality of our information seriously so that you can get the right part the first time.













Thank you! Your comment has been submitted successfully. You should be able to view your question/comment here within a few days.
Error submitting comment. Please try again momentarily.