Kat Heaters Frost Plug Style Block Heater Installation
Updated 12/06/2016 | Published 12/05/2016
Products Featured in This Question

Question:
How to install In a 2001 Buick century 3.1
asked by: Pat V
Expert Reply:
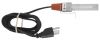
The engine block heater I recommend is the Kat's Heaters Custom Engine Block Heater - Frost Plug Style - 120V - 400 Watts - 34 mm, # KH11415. It is a confirmed fit for your 2001 Buick Century 3.1. The easiest mounting location for your vehicle will be the center rear of your block. The element must face 9 o'clock position to avoid contact with engine wall.
This how you will install it.
1. Drain and flush radiator and block.
2. Remove correct frost plug or core plug - depending on type of engine.
3. Clean frost plug hole with a cleaning agent to remove any dirt, grease or paint. (Lubricate “O” ring with a light weight grease only, oil is not as satisfactory) before installing heater in frost plug opening.
4. Place engine heater in frost plug opening. Position of element is dependent on specific engine. The shoulder on the steel section of the heater must be against the face of the engine block wall. This allows the “O” ring to seal the unit for a leak proof installation.
5. Models with a toggle or flat cross bar on the back side of steel adapter must be installed with bar behind block wall. Tighten the Hex head or nut to 15 to 18 inch pounds torque until the cross bar is tight against inside block wall. Only use these models where recommended.
6. Models with a curved cross bar need to be torqued to 80 to 90 inch pounds to expand the cross bar on the back side of the heater in the frost plug opening. Only use these models where recommended.
7. Models with a butterfly cross bar need to be tightened to 14 to 19 inch pounds. Only use these models where recommended.
8. Place the electric cord from the heater through radiator grille or other convenient opening and tape or fasten in position, making sure it is clear of all moving parts (fan blades) and heater parts (manifold).
9. Refill radiator, run engine long enough to build up a maximum pressure and check for leaks to complete installation.
10. Connect the Kat’s Engine Heater to any 120 volt AC or DC electric outlet. Use your heater for 60 minutes or longer before vehicle is to be operated. Heater can be left on all night without overheating.
11. This heater is equipped with a three prong (grounding) plug and should be connected to a properly grounded circuit.
12. If an extension cord is used in conjunction with this heater, be certain that the wire size of the extension cord is of adequate size for the wattage of the heater and distance from the receptacle to the heater Consult a licensed electrician if further information is required.


Product Page this Question was Asked From
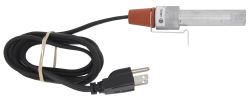
Kat's Heaters Custom Fit Engine Block Heater - Cartridge Style - 120V - 400 Watts

- Vehicle Heaters
- Engine Block Heater
- Cartridge Style
- 400 Watts
- Kats Heaters
more information >

Continue Researching
- Shop: Towing Mirrors
- Shop: Brake Controller
- Shop: Vehicle Engine Heaters
- Shop: CIPA Custom Towing Mirrors - Slip On - Driver Side and Passenger Side
- Shop: Longview Custom Towing Mirrors - Slip On - Driver and Passenger Side
- Video: Review of Zerostart Oil Pan Heater - Silicone Pad Heater - ZE85MR
- Video: Kat's Heaters Oil or Transmission Pan Heating Pad Review
- Shop: Kat's Heaters Oil or Transmission Pan Heating Pad - 4" x 5" - 120V - 150 Watts
- Shop: Zerostart Silicone Pad Heater - Oil, Hydraulic, Transmission Fluid - 6" Long - 120V/125 Watts
- Shop: Kat's Heaters Oil or Transmission Pan Heating Pad - 4" x 5" - 120V - 100 Watts
- Video: What to Know About the Kat's Heaters Custom Fit Engine Block Heater
- Q&A: Block Heater that Fits 2007 Hyundai Tucson with 2.0 liter Engine
- Shop: Kat's Heaters Custom Engine Block Heater - Frost Plug Style - 120V - 400 Watts - 35 mm
- Shop: Kat's Heaters Ether Start Fluid Injection System - 1.6L to 4.9L Engine - 12V - Push Button
- Video: How to Choose a Trailer Brake Controller
- Shop: Trailer Hitch
- Q&A: What is the Difference Between a Class II and a Class III Hitch?
- Search Results: trailer hitch
- Article: Trailer Wiring Diagrams
- Shop: Trailer Wiring
- Q&A: What is the Difference Between a 4-Way and 7-Way Trailer Connector
- Video: Firestone Ride-Rite Air Bags with Easy Mount Compressor Feature Breakdown
- Article: Brake Controller 7- and 4-Way Installation Kit (ETBC7)
- Search Results: trailer wiring
- Q&A: Installation Time for Blue Ox BX1128 Flat Tow Base Plate Kit for 2016 Jeep Grand Cherokee
- Article: How to Measure for Trailer Hitch Drop
- Video: Redarc Tow-Pro Liberty Brake Controller Review RED24FR
- Search Results: trailer tires and wheels
- Shop: Suspension Enhancement
- Video: What to Know About the Curt TriFlex NEXT Trailer Brake Controller

on Vehicle Heaters