- All Info
- Reviews (104)
- Q & A (0)
- Videos (2)
- Photos
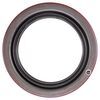
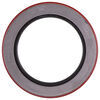
Redline Trailer Bearings Races Seals Caps - 10-56
Highlights
- Perfect fit for Dexter Axles: Designed for 10k, 12k, and 15k axles.
- Reliable oil sealing: Features a 3.125" I.D. and 4.500" O.D.
- Versatile application: Ideal for AL-KO 12K, Hayes 10K-12K, and more.
- Cross-referenced part numbers: Matches National #370014, Chicago Rawhide #CR318281.
- Upgrade for oil-to-grease: Enables easy conversion maintaining leak prevention.
- High-use durability: Withstands high temperatures and varied axle conditions.
Features to know about
Effortless Compatibility: Perfect Fit for Dexter Axles
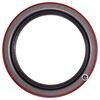
Worrying about finding the right oil seal for various axle sizes? The Oil Seal # 10-56 is specifically designed for Dexter 10K, 12K, and 15K axles, making it an ideal solution for large trailers and commercial vehicles. With its 3.125-inch inner diameter and 4.500-inch outer diameter, it ensures a snug fit, preventing leaks and prolonging axle performance.
Reliable Sealing Power: Robust Construction for Demanding Environments
When it comes to securing your trailer's hub assemblies, this oil seal doesn't compromise. Its sturdy build withstands the intense demands of both oil bath and grease-filled hub systems. Whether you're tackling rough terrains or racking up highway miles, the Oil Seal # 10-56 promises unwavering sealing integrity, giving peace of mind for your travels.
Enhanced Versatility: Seamless Transition from Oil to Grease
Thinking about converting your trailer from an oil bath system to grease? This seal handles it with ease. Built to manage the tighter requirements of oil applications, it effortlessly accommodates grease, providing flexibility for different maintenance preferences. Enjoy simplified conversions without the hassle of switching seals.
Comprehensive Application Support: Support for Multiple Trailer Models
Running multiple trailers with different configurations? No problem! This versatile seal fits a variety of trailer models, including AL-KO 12K, Dexter 10K, 12K, 15K, and Hayes 10K - 12K. Its universal fit reduces guesswork and ensures reliable sealing across your fleet, streamlining maintenance tasks.
Cross-Compatible Assurance: Trusted Across Brands
Cross-referencing with brands like Dexter, National, and Chicago Rawhide? The Oil Seal # 10-56 is compatible with Dexter # 010-056-00, National # 370014, and Chicago Rawhide # CR318281. Eliminate uncertainty and shop with confidence, knowing this seal matches up with well-regarded industry standards.
10-56 Oil Seal
California residents: click here


Videos are provided as a guide only. Refer to manufacturer installation instructions and specs for complete information.
Video Transcript for Checking Out the Oil Seal
Hi there, trailer owners. today, we're gonna take a look at Redline's replacement wheel bearing oil seal. We're going to be using number 10-56, 10-56 today. And it's designed for axles that are 10, 12, and even some 15,000 pounds from manufacturers such as Dexter, AL-KO, or Haze. And with this the seal here main thing is double checking your size to make sure it's gonna fit properly over your spindle and inside of your hub, your drum. And with this, we're looking at an inner diameter of 3.125 inches and an outer diameter of 4.5 inches.
So now we've covered some of the specs on it. We've got a seal that's failed here and caused some issues with our brakes. So if you wanna follow along with us we're gonna show you how to get that seal removed and replaced and get this thing back up and running once again. So we've got our customer's trailer here. We just got the wheels off of it.
So let's get it disassembled. We're gonna remove the outer hub here. So we're gonna start with the cap here on the end. I'm just gonna use a pair of channel locks to remove it. And you might wanna use a screwdriver, or a pry bar, just to hold the hub as you're removing these.
And normally once you get about this far you start to get a drip or two coming out of it from the oil. But yeah, it's pretty dry in there. So it's definitely got a leakin' seal on it, 'cause we don't have any oil inside of it. But we didn't really see traces of oil out here, so it's unlikely that this seal here is what's causing the issue. Based on where we see the contamination, it's looking like it's probably that inner seal there on the back.
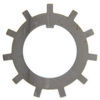
So now we've got that cap removed, we're going to remove the nuts here on the end of the spindle. You'll see, it's got these, it's like a star washer here but it's got some tabs on it. Need to bend those tabs straight or back. We need to get 'em out of the way so we can get the nut off of there. So we're just using our flat bladed screwdriver and a little hammer here just to knock those ears up. Check around, you may or may not have another one on there. A lot of times they put two of the tabs over make sure it's on a couple of faces, not always the case but just kinda look around and check. Looks like we're probably pretty good there. We'll then switch back to our channel locks here and we'll remove our nut. All right, just set that down. Behind that we have the locking star washer and you can see that one was bent over there, holding the other nut on the other side. Will then grab the nut behind it. And behind this nut, you'll have a washer as well. We'll grab that off of there. We can go ahead and now just slide the hub off. We've got all the nuts removed that's holdin' on. I'm not gonna slide the hub completely off. I'm just gonna slide it out some and I got my screwdriver here on the end of the shaft, and this way we can use that to kinda catch our bearing. Boy, it's a heavy assembly. Oh, there we go. We got our napkins down there. They just fell in there, that's all right. If you have a seal puller, and we do have seal pullers here at etrailer that you can use to pull seals, you can use that method to remove the seal. I'm gonna show you just kind of a little bit of a backyard tech way to get that inner seal removed. If you don't have any of those tools available, what we're gonna do, we're gonna take our washer and our nut, just cleaning it off real quick. We're gonna slide our washer on there, and then we're gonna thread a nut on here. And when we go to pull this hub off, that washer is gonna hit the face here of our bearing. And then when we pull it, it can hit that bearing, and then the seal will press out with the bearing here. Just like that, one quick motion. I wasn't even pulling that hard. If you pull this thing and it doesn't come out. 'Cause I just kind of a easy pull motion, I really wasn't pulling that hard. If you pull it, boom and it slams and it stops, that method's probably not gonna work for you. It works in most cases, but there are some instances where just something gets pressed in there just right. it gets kinda cocked a certain way. That may not work out so well for you, and you have to actually use a seal puller on it. And we're gonna take our bearing and put it into place. This is the larger of the two if you remember, and you can always just double check while dropping it down in there, it should fit right back into the race. Now we're not gonna reassemble it dry. We're gonna put a little bit of lubricant on there. So we've got some oil here, this is 80, 90 weight, and we're just gonna get it kinda worked around all the way on this and kinda work it inside here a little bit, just so that way we're not a assembling it completely dry. Kinda working it around to get it across all the rollers and on that inner race as it works around. And then we can drop it in there. And I'll sit in place right inside our assembly there. Next we'll install our seal. Now to install the seal you are gonna need a seal driver. We have seal drivers available here at etrailer. I'm gonna take a little bit of oil and put it on the outside. This can just help it slide in a little bit easier. We'll drop that down in there. And these are labeled too, if you we're curious, you know so it shows air side there, which will make this the oil side. So there is a label on that there, if you're confused. And now we'll drive this in. And we're just double checkin' looks like we're just a hair crooked so we're gonna try to straighten it out a little. All right then, then just keep working at it until you get it all the way down in there. It should be flush with the lip all the way across here at the top. And your gap should be about the same all the way around. So once it feels like it's all the way even around you may or may not get a couple of pieces of the rubber outside, that kinda just rip off, you can just pull those little pieces out of there. 'Cause if you look at the seal, it kinda had like stripes around it help it seal better. Every now and then those outer pieces, you know, the old chunk that kinda comes off. It'll still seal properly inside there. All right, and now this is one of the most important parts of your reassembly is actually sliding the drum back on. So here we go. Get your whole body in there, get it to the right height where you can see and then just, without touching anything on that seal, slide it right on. All right, now that we've got it slid up there, we're just putting in the rest of our parts. All right, now we just need to fill it up. If you look at your cap here, it says oil level on it. So we're just gonna fill it until we're at the oil level. This is something that you're gonna wanna double check multiple times, just because this is a thick oil, and it takes it a while to fully gravitate and fill all the cavities. So you might end up filling this thing. You spin this thing around a few times, come back and check it like 10, 15 minutes later. It's probably gonna be low. Fill it back up, do it again. And then I would even let this thing sit overnight and recheck it again in the morning, just 'cause this oil gets so thick. And it's pretty cold out right now, you know, we're in February here in the middle of the country. So it's cold. That makes the oil just a little bit more viscous, or a little bit thicker because of the temperature. All right, so now we've got it filled up here, just reinstall our cap. And that completes our look at Redline's replacement wheel bearing oil seal..
Customer Satisfaction Score:
98% were satisfied with this product
2% of customers were not satisfied
- etrailer mistake
- Wrong item was ordered
- Did not arrive in time
Ratings & Reviews
4.5
104 reviews

Good seal at a reasonable price.
worked well thank you.
delivery on time,the correct parts,and i will be using your help again!!!----thanks ron
A great seal
Justin finally got it right talked to three people and got three different seal numbers but thanks Justin

The right seal

PERFECT FIT AND GREAT PRICE

All parts ordered were of excellent quality, Thanks!
Everything fit good. Thanks Calvin
Great product and fast shipping
See what our Experts say about this Redline Trailer Bearings Races Seals Caps
- Axle Hub That Uses Bearings JM511946 and JM205149, Race JM511910 and JM205110The Kodiak Disc Brake Kit # K2HR12A11-120DW is the only hub we have that uses the Inner Bearing # TRJM511946, Outer Bearing # JM205149, Inner Race # TRJM511910, and Outer Race # JM205110. Those bearings are what fits with an ALKO axles using #120 spindles. If that hub is what you are looking for you will need to purchase the Bearings # TRJM511946 and # JM205149 separately along with a Oil Seal # 10-56 for each hub.
view full answer... - Recommended Grease Conversion for Dexter 12k Oil Bath AxlesThe Dexter 12K oil bath axles can be changed over to grease without any issues. The oil does keep the bearings lubricated well, but there is a much higher risk of leaking which leads to a much higher risk of failure. I'd personally move to grease # L11390 and make sure it is packed well into the bearings using # PTW1218. This will allow you to use your same bearings and oil cap, but you will need to replace the seal once removed to pack the inner bearing. For that you can use # 10-56.
view full answer... - Dexter D120 Axle Replacement PartsYour Dexter D120 axle is rated for 11,999.80lbs, has a spring center measurement of 45.5" and track width of 74". It is an underslung axle that uses 3" wide 30" slipper springs rated at 6,000lbs each. The brakes are 12-1/4" x 5" electric brakes and the hub is an oil bath with 8 on 6.5" wheel bolt pattern. It was produced in March of 2000. Electric Trailer Brake Kit # AKEBRK-12 Dexter Trailer Idler Hub Assembly # 8-214-8UC1 Inner Hub Bearing # 3984 Inner Race # 3920 Outer Hub Bearing #...
view full answer... - Oil Seal for Dexter 12K Heavy Duty Axle with Disc BrakesYes, the Oil Seal part # 10-56 is exactly what you need for your Dexter 12K Heavy Duty axle with disc brakes. If you wanted to be absolutely certain you could measure the inner and outer diameter of the one you have now and it should be 3.125" and 4.500" respectively.
view full answer... - Disc Brake Kit That Fits Hayes/AL-KO 12,000 lb Axle With #120 SpindleYes, your Hayes/AL-KO 12,000 lb axle with a #120 spindle is absolutely compatible with the brake kit you mentioned, the Kodiak Disc Brake Kit # K2HR12A11-120DW. This kit does require you get the bearings and seal separately, but comes with the races so you don't have to purchase those as well. What you will need are two each of the following: - Replacement Trailer Hub Bearing # TRJM511946 - Replacement Trailer Hub Bearing # JM205149 - Seal # 10-56
view full answer... - Disc Brake Assemblies For Changing A 12,000LB Dexter Axle To Hydraulic Disc BrakesWe have the Kodiak Disc Brake Kit # K2R1258L12 that is designed to fit your 12,000lb Dexter axle. You will need to ensure that you have the Standard Duty 12,000lb axle as this kit will not fit if its a Heavy Duty 12,000lb axle. If you need help determining which you have please let me know your axle serial number that is on the information sticker for the axle or can also be found stamped in the axle tube on the rear of the axle on the passenger side. The Kodiak Disc Brake Kit # K2HR12A11-120DW...
view full answer... - Recommended Replacement Oil Seal For A 2015 Big Tex 22GN TrailerFrom what I could find out, the Big Tex 22GN tandem axle trailers use 10,000 pound axles. However, this is the brand new ones so I highly recommend double checking this with Big Tex if you are unsure. They will need the VIN for your trailer, so have that near by. If they confirm this information or if you are already sure you have 10,000 pound axles, it does narrow the search down to 2 options. First is the # 10-51. This will have an inner diameter of 2.875" and an outer diameter of 3.880"....
view full answer... - Dexter 12k Trailer Axle Calipers, Bolts, Brake Pads, Mounts and Hub Seal ReplacementFor Dexter 12k replacement brake calipers you'd want the part # BP18-045, for caliper bolts # BP18-105, for brake pads # BP04-395, for caliper mounts # KOD64FR, and for seals # 10-56.
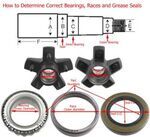
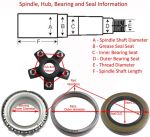
view full answer... - Determining Correct Oil Bath Seal For Dexter D100G 10000lb Axle Thank you for the picture! I reached out to my contact at Dexter and your axle is indeed a 10000lb axle, but with the axles age they were unable to confirm the oil seal or bearings used. With that said your axle being a general duty 10000lb axle should use the Oil seal # 10-51, but could use # 10-56. To determine the correct seal you will want to use digital calipers like # PTW80157 to precisely measure the spindle where the seal rides as shown in the included diagram, and the diameter...
view full answer... - Bearings, Seal, & Electric Brakes For Big Tex 22GN 35+5 Gooseneck TrailerI was able to find the correct electric brakes, as well as oil seal (which is what I assume you were referring to by wheel seal), and also the bearings for your Big Tex 22GN 35+5 gooseneck trailer. I'll go ahead and list out the parts for you below. - Oil Seal # 10-56 - Replacement Trailer Hub Bearing # 395S & Race # 394A - Replacement Trailer Hub Bearing # 387A & Race # 382A - Dexter Electric Trailer Brake Assembly - Left Hand # 23-438 & Right Hand # 23-439
view full answer... - Availability of Spindle and Hubs for 10,000 lb Trailer AxleAs you may have noticed, the highest capacity spindle we carry is for a 7,000 lb axle, # TRU37FR. Your best bet is to source the spindles for a 10,000 lb axle through a local trailer shop or dealer. If are able to source the spindles, we do have hubs for 10,000 lb axles. I'll list them below: # 8-430-5UC3 - Dexter Hub Drum for 9K to 10K axles manufactured after July 2009 (for non ABS brakes) - uses inner bearing # 387A, outer bearing # 25580 and oil seal # 10-51 # K08-288-90 - Dexter...
view full answer... - Replacement Hub and Drum Assembly for 15,000 Pound AxlesAlthough I do not have an option to retrofit your hubs I do have a solution. What I can offer is a complete replacement with the Dexter Trailer Hub and Drum Assembly for Heavy-Duty 15K Axles # DX78QR. If you're just looking for replacement races, bearings, and seals we have those available as well. This hub uses an 8 on 275 mm bolt pattern. It would also require switching to oil bath from the grease. In addition to the hub and drum assembly, or for replacement bearings and seals, you would...
view full answer... - Replacement Bearings and Seals for Dexter Axle 10K Axle with Oil BathI can give you a few different options but to know the exact bearings, races, and seals you need for an oil bath on your 10K Dexter Axle you will need to take some measurements on your spindle using a digital caliper or by finding the part numbers on these pieces. Attached is a photo to show you where the part numbers are located as well as where you will need to measure on your spindle. One set of common bearings/seals are inner bearing # 387A (2.250" inner diameter) with race # 382A,...
view full answer... - Replacement Hub Seals for Dexter 12,000 lb AxleFor your Dexter 12,000 lb axle the seal you are looking for based on my research is the # 10-56. It has an inner diameter of 3.125 inches and an outer diameter of 4.5 inches. This will work well for oil or grease. If you are needing the other seal for an oil bath, you would also want the Replacement Oil Cap Kit for 9,000-lb to 15,000-lb Dexter Axle # RG04-270 which comes with the cap, o-ring, and rubber plug.
view full answer... - Replacement Oil Seal Recommendation for Dexter 10,000 lb Trailer AxleThe correct oil seal for a Dexter 10k trailer axle is the part # 10-56 that you referenced.
view full answer... - Replacement Oil Bath Seal Recommendation for Dexter 12k AxleFor Dexter 12k oil bath hubs we have the seal part # 10-56 which would be exactly what you are looking for.
view full answer... - Replacement Oil Seal for LCI 295924Yes we do, the correct oil seal you would need is the part # 10-56 which I verified has same dimensions as the 295924 that you have now.
view full answer... - Replacement Oil Seal for a Big Tex Trailer with 12K Dexter AxlesThanks for reaching out, Cole! It sounds like you're looking for the Oil Seal # 10-56 which has a 3.125" inner diameter and a 4.5" outer diameter. I recommend verifying the dimensions with what you have just to make sure everything matches up. If you find different dimensions please let me know and I'll be happy to further assist!
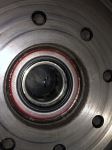
view full answer... - How Far Do Trailer Hub Seals Need to be Installed Into HubBasically you need the seal in the hub to sit either totally flush or slightly recessed and it will do it's job. Based on the picture you sent in your seal is properly seated.
view full answer... - Replacement Rotor For Kodiak Disc Brake Kit # K2HR12A11-120DW and CompatibilityThe Kodiak Disc Brake Kit # K2HR12A11-120DW will use the Kodiak 11" Rotor # KR1110Q which is 11.35" in diameter. Your current rotor only being 10-3/4" will not fit with this kit. The disc brake kit is designed to fit on ALKO 12,000lb axles that use a # 120 spindle. You can verify the fit by checking your current bearings or the dimensions of your spindle. Inner Bearing # TRJM511946(2.559" inner diameter) Outer Bearing # JM205149(1.969" inner diameter) Oil Seal # 10-56(3.125" inner diameter)
view full answer... - Bearings, Races and Oil Seals For Dexter 10K Axle On a 2018 Big Tex 22GN TrailerWhen you replace your Brakes # 23-450-451 it is a good idea to inspect the bearings at that time. The bearings and races will only need to be replaced if they are damaged or grooved. A visual inspection of the seal will tell you if it leaking or you notice any damage to the seal. Depending on if your Dexter 10K axle is a general duty or heavy duty will decide the bearings and oil seal you will need. If you are unsure you can send me the axle serial number that is stamped in the rear portion...
view full answer... - Replacement Bearings and Seal for an Al-Ko 12K AxleThanks for reaching out! In order to replace the bearings and seal for your 12K hub assembly you'll need to piece the following parts together as we currently (December 2022) don't have a whole bearing kit that includes all of the parts you're needing: Inner Bearing - # TRJM511946 Inner Race - # TRJM511910 Outer Bering - # JM205149 Outer Race - # JM205110 Oil Seal - # 10-56 (inner diameter of 3.125" and outer diameter of 4.500") These are the parts that come with the Kodiak Disc Brake...
view full answer... - Disc Brakes For 12,000 lb AL-KO Axles on Gooseneck TrailerWe do offer one kit for disc brakes for 12,000 lb AL-KO axles, which is the following from Kodiak: - Kodiak Disc Brake Kit - 11.35" Rotor - #120 Spindle - 12K - ALKO # K2HR12A11-120DW These come with the races, but do require the bearings and seal to be purchased separately. You'll need Seal # 10-56, Bearing # TRJM511946, and Bearing # JM205149. As for the suspension unfortunately we do not offer that for the 12k AL-KO axles.
view full answer... - Troubleshooting Oil Leaking from 12,000 lb AxleFor your 12,000 lb axles with Oil, you either have an oil cap or oil seal leaking. For the oil cap I recommend the Oil Cap Kit for 9K, 10K and 12K Axles # RG04-300. For the replacement oil seal, you most likely need # 10-56 which has an inner diameter of 3.125 and outer diameter of 4.500 inches. Finally, for your oil I recommend the Kodiak Synthetic Bearing Oil for Oil Bath Hubs - 8 oz Bottle # XLPROLUBE.
view full answer...
Do you have a question about this Trailer Bearings Races Seals Cap?
Info for this part was:


At etrailer we provide the best information available about the products we sell. We take the quality of our information seriously so that you can get the right part the first time. Let us know if anything is missing or if you have any questions.









Thank you! Your comment has been submitted successfully. You should be able to view your question/comment here within a few days.
Error submitting comment. Please try again momentarily.