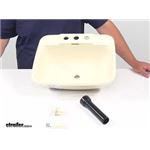
Ready to refresh a tight RV bath or galley? 15 x 12 inch drop-in sinks mount on top of the counter, making replacements straightforward and clean. Check your countertop opening to be sure the rim will cover the cutout, and plan your install around existing holes if needed. This size works well when moving from an old small basin or converting an undercounter setup to a top-mount look.
They are above mount Drop-In sinks. If replacing an undermount, plan to mount it on top of the counter or consider modifications, which aren't recommended. Check your setup for mounting clips/holes and confirm your counter supports a top-mount rim.
A cutout pattern is typically not included; use the listed dimensions to mark your opening. An adapter to connect the drain to a 1-1/2" trap is not offered. Check what's included—some come with a drain tube, mounting brackets, and installation hardware, or a tailpiece, sink, and clips. If drain extension instructions are unclear, verify whether an adhesive is required before assembly.
Check whether 12 x 15 refers to the inside bowl, with an extra 3/4" lip around the sink. You'll typically need a hole at least 12" x 15" for a Drop-In mount, and if your opening matches the outer dimensions it may not fit. If the cutout is a bit too large, epoxy filler can help. If too small, carefully enlarge it; an oscillating saw worked well for removing the old sink. Verify rim overlap all around.
Installation is generally straightforward. Removing the old sink with an oscillating saw worked well, and you may need to drill out mounting holes on the new sink for your setup. If the existing cutout is a bit too large, epoxy filler can fix small gaps. Dry-fit the sink first and confirm clip engagement before sealing.


 Filters