


 Arrives before Christmas
 To see if this custom-fit item will work for you please tell us what vehicle you'll use it with.

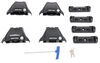
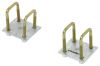
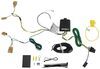
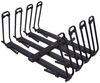
This custom fit kit lets you mount 4 Rhino-Rack 2500 legs to your vehicle with a naked roof. Clamps mount to legs with bolts. Includes 4 clamps and 4 pads.
Features:
Specs:

California residents: click here
Videos are provided as a guide only. Refer to manufacturer installation instructions and specs for complete information.
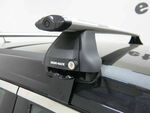
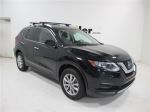
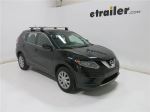
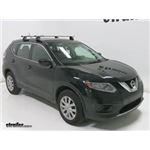
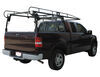
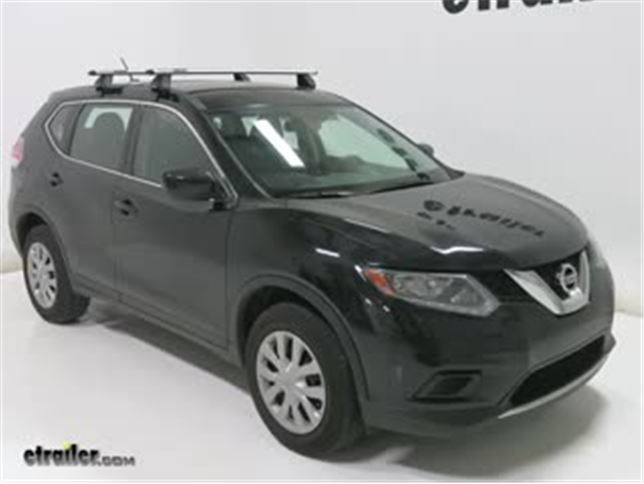
Today on our 2016 Nissan Rogue we're going to be taking a look at the Rhino Rack Roof Rack System, consisting of part numbers RRVA126S-2. That's going to be the Vortex arrow bars. Part number RRRLKVA, that's going to be the 2500-series legs and part number DK396, that's going to be the fit kit. The crossbars are made of an anodized aluminum, so they're going to be strong and durable and resist corrosion. The elliptical design of the bar is going to reduce wind noise and drag. The weather stripping is going to keep dirt and debris out of the channels as well as provide a slip-resistant surface for any of your mounted accessories.
The crossbars are 49 inches long. They have a weight capacity of 165 pounds. Now you do want to make sure you check with the manufacturer that your roof can handle that. They also come in a quantity of two. Now everything you see does come with a kit. We already have one bar installed on our vehicle and one side of our other bar completed.
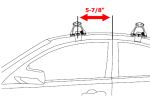
We'll go ahead and put the other side together. First, you're going to take your base plate here and mind the position of the arrow. That's always going to be facing away from the vehicle. Then you're going to take your rubber pad, and you're going to put it on to the bottom of here. Again, you want to mind the arrow.
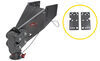
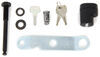
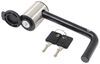
The arrow is going to be facing towards the front of the vehicle. We're just going to take our pad, and we're going to slip it on there. You'll see these grooves right here and on the bottom of your foot, these two rods. You're just going to pop it on to there. Now you're going to take your clamp and you're going to remove this bolt. You're going to place your clamp with the hook facing in like that, line up the hole, and replace the bolt loosely for now.
You will notice there's a little plate right here. You may have to loosen this bolt up, but we're going to take that plate, and we're going to line up our foot with our crossbar. Now we're going to measure from the end of the channel right here, and we're going to line up our foot pad, the edge of our footpad, like so. You'll find the measurement for your application in the instructions. Once we have it in the position we need, we'll go ahead and tighten up our foot pad. I do want to mention one of the nice things about the included tool, it is a torque tool. The curved piece here, when you know you've reached the right torque, it will straighten out, and you don't need to tighten it any more. Now with the bar fully assembled, we can go ahead an open up the doors and get ready to place it on our vehicle. With your bar in a general position that you want it, the manufacturer does say you need to measure from the center of this crossbar to the center of this crossbar. You'll find that measurement in your instructions. We do want to make sure that we measure both sides, so everything is square. With our bar in position, we're going to go ahead and tighten it up, making sure that we alternate between both sides. What I like to do is tighten up one side until I make contact, switch to the other side, and alternate, making sure that I tighten each side equally. Again, the provided torque tool, the curved part, is going to straighten out when you know you've reached the proper torque. Like that, and then you know you don't need to tighten it any more. Another nice feature is that the end caps are locking, so you don't have to worry about any tampering or theft. We'll go ahead and put those on now. In our final step, we'll be putting our end caps in. Simply place them in, and they are locking as well. We'll put the other one on the other side. Now we're ready to load up our gear and hit the road. That will finish up the look at the Rhino Rack Roof Rack on our 2016 Nissan Rogue.

Do you have a question about this Accessories and Part?
Info for this part was:
At etrailer.com we provide the best information available about the products we sell. We take the quality of our information seriously so that you can get the right part the first time. Let us know if anything is missing or if you have any questions.


Thank you! Your comment has been submitted successfully. You should be able to view your question/comment here within a few days.
Error submitting comment. Please try again momentarily.