

To see if this custom-fit item will work for you please tell us what vehicle you'll use it with.


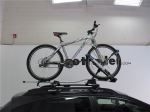
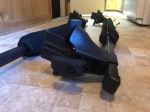
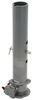
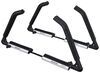
This Thule roof rack lets you carry cargo and gear on your vehicle. Aerodynamic crossbars with split rubber strips in top channels work with channel-mount and clamp-on accessories. Installs on your vehicle's naked roof.
Features:
Specs:
 Alternate Instructions
California residents: click here
Videos are provided as a guide only. Refer to manufacturer installation instructions and specs for complete information.
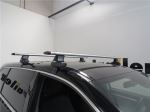
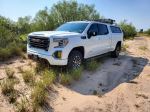
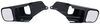
Hi everyone, I'm Evangeline right here at etrailer. Today we have our Thule roof rack right here on our 2021 Chevrolet Silverado 1500. So if you are looking to carry around, let's say a kayak or a long canoe or maybe your truck bed is already full or has a tonneau cover but you still wanna carry around gear for adventure, this is gonna be a really good option for you. This is a custom kit designed specifically for your Chevrolet Silverado. So here at etrailer, we combine all the different components you need for your truck. What we have here today are these 60" long WingBars.
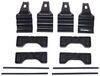
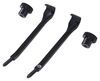
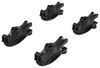
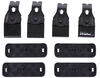
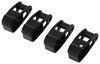
We have the Evo Towers. But most importantly we have the custom fit hooks. And those are a pretty interesting design, and I love how they fit. And I'll show you later in this video how to get it installed. But most importantly, making sure you get the right kit, we help you out with that process with our fit guide here on our site.
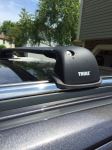
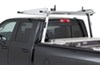
So make sure to put in your year, make and model and also the type of cab of your truck, and then you can select amongst all the different options of the different kits for you. By the way, this kit we have is in silver right now. We can also get this in a black version. With the 60" bars here, you do see there is a slight overhang, and overhang is measured from the tower to right before the end cap. That's 1 1/2", and it's just barely enough space if you have a smaller clamp to clamp something on this end.
I like this kit because of its look. However, if you find you need a little bit of extra overhang for that clamping purpose, you could upgrade to the next bar size up. You do have enough space. Now I could be easily convinced to get that longer bar if your truck is a little higher up or if you are a little shorter, like our situation here. A longer bar makes it slightly easier to reach from the ground, so that could be an option too.
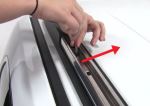
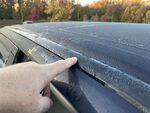
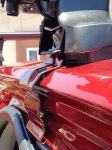
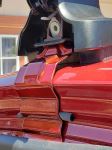
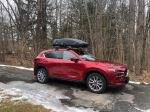
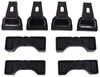
Now with this specific kit, Thule has designed it for a very specific spot on your truck. So you have a crossbar spread of 27 1/2" measured from one bar to another. That's pretty decent bar spread. This will fit most types of accessories. You can always double check, like some ski and snowboard carriers, some roof baskets, sometimes they require a very specific number there, and 27 1/2 will fit in most situations. Next thing I'd like to measure for is height. So for the height of your bar versus how much space do you have underneath for those clamps. Well, measuring will be a little different depending where you measure on the roof, but right here I see 3 1/4" of space, which is pretty average. That means most clamps will be able to fit around whether you have your larger ones or your sleek straps. Or you could also just T-track mount things into the channels. We'll talk about that one later. The next measurement's gonna be the height. Where does your cargo sit So from the roof to the top of the bar, I have it at around closer to 4 1/2". And this is actually helpful for those who may want to go the ladder rack route and have an even base from the roof to the ladder rack. You can adjust your ladder rack to match that height. Let's talk about those T-track mounted accessories. If you flip over the side of your end cap, you'll see this opening right here where you can slide your channel mounted accessory through these wind strips. Personally, and I have a Thule roof rack system, over time or with some of the bulky accessories, I find myself just pulling off these rubber strips. But in most situations you can just slide your accessory through. This is helpful if you wanna utilize the entire crossbar's length for mounting things or if you just want a sleeker look. So the owner of this truck actually has a tonneau cover that we had to take off in order to store some stuff in the truck bed. And now we have a roof rack which just expands our cargo area, and we wouldn't have had to take off the tonneau cover. And that's actually a common story for a lot of Silverado truck owners. If you want to expand your cargo area, utilize your truck for truck stuff, but still carry around a kayak or long canoe, this makes that happen. Now of the different options for roof racks for this truck, our Thule kit here is one of my favorites. They have a really sleek fit. They have two different color options. They look good, they work great, but most importantly, I love their Fit Kit. They have a very custom design that fits perfectly into the door side of your truck. In fact, check out the installation. We're about to get up on that if you're curious about that process. But everything works together as a solid, awesome base for our truck here. Definitely worth looking into. So if you wanna see how I got this installed, here we go. Getting your roof rack installed is pretty straightforward. Once you know what you're doing, yes, there's gonna be some different-looking hooks and different parts, but putting this all together is simple, and we're gonna do it together. Now I already have the rear crossbar installed, so we are gonna install the front crossbar. The very first thing I recommend doing is just unpacking everything, laying it out, and then we'll start with the crossbar. First, set up your crossbars with the wind strips. Now these arrive connected looking like that, so you do need to split them apart, switch them around and then push them into place on the bar. Something to note as you push him in place is the orientation. The flat strip is gonna go by your Thule logo, and then the arrowed strip is gonna face the front of the bar here on top. Flipping the cross bar over, you'll see underneath there is this channel, and you're gonna fit the measuring strip underneath. This is also an important step for if you notice wind noise, you'll wanna make sure that this is all covered up when you have everything installed. Now as for how far the measuring strip goes, you're gonna follow the instructions in your Fit Kit. There's gonna be different numbers depending on your bar and your vehicle. So for our truck today, the measurement number is gonna be 60. So we're gonna go to the numbers on the measuring strip that go to 60, and that's where it goes. Now we can install our towers. So the key part here is being able to press that lever on the tower, 'cause that will open up this tab up top. So pressing the lever, we're going to slide the tower onto the bar right up to where that measuring strip is right there. And then when we let go, that secures its spot so you can't move it. Do this on both sides. Next step is attach your rubber pads. Fortunately these have the same number stamped on them, so you don't really have to figure out which side goes where. You just have to put them on your tower. So these sometimes snap right into place. Other times you do have to work them onto the plastic tab of your tower. So just fit them on there until it looks like the pad has secured around the tabs. You also get these rubber strips and you can then cut to sides and fit on the end of the tower just to close all the gaps. And then you also have these end caps. So there's gonna be a left and a right end cap, watch for the shape as well as the tab. And then you're just gonna pop that on there the first time. They might be a bit of a tight fit, so just work away at them and now you can place your bars onto your roof. So the location of that rubber pad is very important just to make sure that that rubber is on there, that you will have a hook at the end. So just be careful as you place this onto your roof. I always recommend having a second person on the other side whenever possible. So where do you put your towers Well, there are gonna be some measurements in your instructions, and it's always best to start with the front tower because that's where instructions start. You measure from your windshield edge to the front of the tower. In our case here today, that measurement needs to be 13 3/4". Now this is easiest done with a soft tape measure. That way it follows the curve. Double check that measurement on both sides. The fun part is installing the hooks because this process is a little different compared to most other vehicles. Thule has it easy where you just have a clip in clamp. So what you need to do is you need to pull down the strip on your actual truck so that you can reveal this edge here. And then that way when you install the hook, and you may need to lift up for this to click into place. There we go. And if you find that it's a tight fit, you can always loosen this clamp with your tool. The important part here is that you get this hook to hook into your truck. And then what we're going to do is we're going to tighten down on this clamp just enough where it holds into place while making sure that our tower pads are up against the vehicle, but we're not going to tighten it up too much just yet. You want to evenly distribute how much you are tightening down each side. That way you're not pulling the whole system one way or the other. So what I like to do is when tightening down, I like to go right up til the hook touches and then the same thing on the other side and then continue on to maybe halfway tightened down, same on the other side, and then just go back and forth until we reach torque. By torque, did you know that the included tool is actually a torque tool So this is designed to secure those hooks to a very specific tension and you're not over-tightening or over-clamping on your truck. So keep turning that until it clicks, I like it to click a second time, just like a gas cap. And that's how I know we are secure. Make sure all four hooks are torqued down. You can finish off by putting the end caps on your towers. If you have extra Thule One-Key System metal lock cores, you can switch out your plastic lock cores for those metal cores. I just use the original ones that come with a kit because once I fit that end cap on there, I can then lock it in place with a screwdriver or a quarter. Make sure all four towers are secured. And that's gonna be it for the installation. My personal recommendation based off of experience is to keep that torque tool as well as maybe a flathead screwdriver, if you did not switch out the lock cores, in a bag somewhere safe in your glove box or in your truck so if you need to make adjustments to your roof rack, you can do so very easily with a single tool. And now you are ready to load up your truck roof with all kinds of fun things. If you're planning on carrying that long canoe, then this is gonna be the way to get you out onto the road. So if you have that experience or that story or you're just carrying something cool on your truck's roof, please send in a picture or review. I'd love to see what kind of adventures you get up to. This was a look at the installation of our Thule roof rack system here on our 2021 Chevrolet Silverado 1500.


Do you have a question about this Roof Rack?
Info for this part was:
At etrailer we provide the best information available about the products we sell. We take the quality of our information seriously so that you can get the right part the first time. Let us know if anything is missing or if you have any questions.


Thank you! Your comment has been submitted successfully. You should be able to view your question/comment here within a few days.
Error submitting comment. Please try again momentarily.