
Hopkins Plug-In Simple Vehicle Wiring Harness with 4-Pole Flat Trailer Connector


To see if this custom-fit item will work for you please tell us what vehicle you'll use it with.


Wiring a trailer doesn’t have to mean chasing wires or cutting into the factory harness. The Hopkins Plug-In Simple Vehicle Wiring Harness snaps right into the vehicle’s existing connectors to create a clean, ready-to-use 4-flat trailer plug. No wire taps or splices, just plug and go.
The built-in 4-flat connector provides all the standard trailer lighting functions—running lights, turn signals, and brake lights—so you can hook up most small and mid-size trailers without extra parts. It’s the common connection used on cargo, utility, and boat trailers.
Modern vehicles have sensitive wiring, and that’s where the powered converter helps out. It isolates the trailer wiring from the vehicle system to prevent overloads or feedback. That keeps the vehicle electronics safe while delivering consistent power to the trailer lights.
Once installed, the harness tucks neatly out of view behind trim panels or near the hitch area. The design keeps everything looking factory-clean and protected from road debris. When you’re done towing, just stow the connector until next time.
Videos are provided as a guide only. Refer to manufacturer installation instructions and specs for complete information.
Speaker 1: Today we're going to take a look the Hopkins plugin central vehicle wiring harness with the four way flat trailer connector. Now this is a custom fit part. It is designed to fit the 2008 and newer Subaru Impreza sedans. And on any custom fit part, I always like to recommend for you to go to our website, use our fit guide, put in your year and model vehicle, and it'll show you if this will work for your application. Now this harness will provide a four way flat trailer connector at the back of your vehicle to power your trailer signal lights. It is compatible with five pole, six pole, and seven pole adapters that we do sell separately on our website.
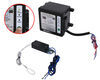
This does connect very quickly and easily.Basically just locate your connection points, which are in the trunk of the vehicle. Plug in your connectors, one on each side, driver's side and passenger's side. Ground your white wire and then you'll run this power wire, this red power wire up to the vehicle's battery. Now this harness does include this taillight converter, which is this black box right here. This is to ensure that your vehicle's wiring will match that of your trailer.
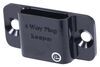
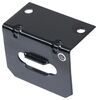
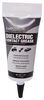
It is a powered module, that's why it'll connect to the vehicle's battery. So it helps avoid overloading your vehicle's electrical system.They do use protective connection terminals on these to help resist corrosion. It comes with everything here on the table, it even has a nice dust cover for the four ways so when you're not plugged in or using it, you can just put the cover on it. And that cover will help protect the terminals from any damage or from the elements. It also comes with a pack of dielectric grease so when you make all your electrical connections, when you go to plug them in you always want to put some grease on there to help resist corrosion.
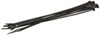
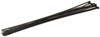
But briefly, how to go installing this is they do give you a nice set of detailed instructions.Basically what you'll do again is go to the rear of the vehicle and access behind the taillights in your trunk of your vehicle. And you'll want to start on the driver's side, and you'll take this T-connector here that has the red and yellow wire in it, take this connector, plug it into the wiring harness and the taillight behind on the driver's side. And then you'll take the T-connector here that has a green wire, a long length of green wire, that goes over to the passenger side, and you'll want to go ahead and plug that in on that side.And then what you'll want to do is this convertor box here, you do want to attach that to a good flat surface if you can so they do include some cable ties to attach that down with. And then you'll have the two wires remaining here. Again, the white wire is a ground wire, has an eyelet on it.
You'll want to connect that to a good clean ground if there's one nearby. If there's not you can drill a hole and they do include a grounding screw that you can make your own ground. And again, the last connection is the red power wire. It has a butt connector on it. That will need to run up to the vehicles' battery. They do give you this extra length of wire.You'll connect one end to the butt connector on the power wire, run this all of the way up to the front, once you get to the front you don't want to connect that to the battery right away. You want to run it through this inline fuse holder first. So connect that wire to one side of the fuse holder. The other side you'll see has an eyelet on it, that's what'll connect to the battery. Once they're connected, just pop open the fuse holder, take the included 15 amp fuse, install it, put your cap back on, and your system will be all ready to go. And as I mentioned I got the dielectric grease that you'll want to put on all of your connections. And they do even give you some extra cable ties to take up any slack in the wiring. That should do it for the review on the Hopkins plugin simple vehicle wiring harness with the four way flat trailer connector.
Ratings & Reviews

Info for this part was:
At etrailer we provide the best information available about the products we sell. We take the quality of our information seriously so that you can get the right part the first time. Let us know if anything is missing or if you have any questions.














Thank you! Your comment has been submitted successfully. You should be able to view your question/comment here within a few days.
Error submitting comment. Please try again momentarily.