
Best 2012 Toyota Camry Trailer Hitches
change vehicle# 1
Draw-Tite Trailer Hitch Receiver - Custom Fit - Class II - 1-1/4"

- view all Trailer Hitch
- Custom Fit Hitch
- Class II
- 300 lbs TW
- 3500 lbs GTW
- 1-1/4 Inch Hitch
- Visible Cross Tube
- Draw-Tite
More Information >
by: bobby reid02/22/20072000 Toyota Camry
PERFECT FIT AND FAST...... i ordered a draw-tite class ll trailer hitch, t-one wiring harness and drawbar for my 2000 toyota camry..i had planned to have someone install it, but after seeing the instructions i did it myself in 30 minutes. great products.
View More
View Less
by: Bill03/05/2017 2012 Toyota Camry
2012 Toyota CamryGot a very good price on a trailer hitch for my '95 Camry. It was fairly simple to install (after watching etrailer.coms video). I use it to haul around my little utility trailer (Harbor Freight) and my 12 ft kayak (BassPro).
View More
View Less
# 2
Draw-Tite Trailer Hitch Receiver - Custom Fit - Class II - 1-1/4"

- view all Trailer Hitch
- Custom Fit Hitch
- Class II
- 300 lbs TW
- 3500 lbs GTW
- 1-1/4 Inch Hitch
- Concealed Cross Tube
- Draw-Tite
More Information >
by: Don F05/08/20192011 Toyota Camry
The hitch was exactly as ordered and fit perfectly. It is sturdy and a great value. It arrived quickly to CA. I really liked the videos and reviews on the site which gave me ideas and a sense of knowing I was installing everything correctly. I, like most of us, do not have access to a lift, but I used the ramps I have for oil changes on our cars. I just backed up on them and and chocked the front wheels. I also do not have lifting help and I am 71 so I set the hitch on a floor jack and my wife raised it up as I guided it in behind the bumper cover. I read a review that said he was able to install without dropping the muffler, and I did the same. Thanks for that tip, it was easy. Our Camry had weld nuts on both sides, maybe because it is one of the early 2011 models, which made it very easy. Let me say that I can see the muffler drop if you are using power tools. But if you are using good old had tools it really is not necessary. Another comment about the reviews. One review expressed concern over ware on the spare from the added bolts and the fact of permanently removing a factory bracket. This must have been a brother of mine as I had the same thoughts when I viewed the installation video before ordering. If you have a "donut" spare, like most, with it in the well look through the center hub with a flash light, the added bolts and plates are inside the rim area and never contact the actual tire. The second concern of the bracket removal, after looking at what it was bolted to, and where the added hitch, which is much stronger, is secured, I have no concerns the the bracket is now needed. After clearing the trunk, getting the tools together, and backing on the ramps. From start to final torque down of the bolts it was right at an hour. Note: My wife was very pleased with the hidden appearance of this hitch on "her" car. Always a success when the wife is happy. I recommend this model hitch and ETrailer and will refer friends.


View More
View Less
by: Joshua F.06/11/20172011 Toyota Camry
2011 Toyota CamryExcellent product. Came with good instructions for install, does require a jack, wheel chocks, possibly jack stands, wrenches and ratchet and sockets, and a drill for bracketing thru trunk basin. Does take some time and patience especially dropping the muffler to get up and under it. The hitch itself is great. I use it for my bicycle rack. Once installed it is hidden other than the receiver. Very satisfied and glad I was able to install myself with the good instructions.

View More
View Less
# 3
Curt Trailer Hitch Receiver - Custom Fit - Class II - 1-1/4"

- view all Trailer Hitch
- Custom Fit Hitch
- Class II
- 350 lbs TW
- 3500 lbs GTW
- 1-1/4 Inch Hitch
- Visible Cross Tube
- CURT
More Information >
by: James11/25/20222009 Toyota Camry
My Iowa 2009 Camry has been in a garage it's whole life, so, that helped a lot. Used [online] etrailer video for ease of work. I took longer than they did as I had to work a bit to de-rust a couple of female bolt threads enough to get a bolt on easily.


View More
View Less
by: Tim 01/24/2024Toyota Camry
Toyota CamryWe bought this 1.25" reciver hitch last year to accommodate a Kuat bike rack. The install was easy, the mounting holes lined up perfectly on our Camry, and the black painted hitch finish still looks new. We are very happy with this purchase.
View More
View Less
# 4
Curt Trailer Hitch Receiver - Custom Fit - Class II - 1-1/4"

- view all Trailer Hitch
- Custom Fit Hitch
- Class II
- 350 lbs TW
- 3500 lbs GTW
- 1-1/4 Inch Hitch
- Visible Cross Tube
- CURT
More Information >

by: Phillip12/08/20202012 Toyota Camry
I didn't cut off any underbody panel pieces. I just made a slit for the hitch to slide through. Also didn't cut off any heat shield. I drilled a hole for the 1/2" screw and torqued it to xx ftlb as instructed. Every thing worked fine. Hard to believe the video instructed to cut off that much. A bit crazy IMO. Also.. super snug fit. So snug I had trouble getting the M12 bolts to line up with the thread in the subframe. Pain the ass, but eventually got it in.


View More
View Less
by: James p10/13/20182012 Toyota Camry
Fast delivery and everything fit perfect. Easy installation after watching etrailers videos. Lowest price I found on the internet for this hitch. Thanks for the great service.


View More
View Less
# 5
Curt Trailer Hitch Receiver - Custom Fit - Class II - 1-1/4"

- view all Trailer Hitch
- Custom Fit Hitch
- Class II
- 300 lbs TW
- 3500 lbs GTW
- 1-1/4 Inch Hitch
- Visible Cross Tube
- CURT
More Information >
by: Nathan_LMD10/17/20212003 Toyota Camry
Last Friday evening (right in the middle of October) I finally installed this Curt Trailer Hitch Receiver into my 2003 Toyota Camry. This is a Class II hitch but seems like a Class III one, very sturdy, and the installation was a success. I spend a lot of time cleaning the two holes on the driver side which were exposed to the elements for the last 18 years, and then I actually drove in three old bolts which I took off from the passenger side's muffler mount, and that was preparing for the actual installation of the hitch. I just worked by myself, as my young son is not too mechanically inclined and not interested in such a thing, so I used my own technique, just tied a pleated electrical cable (3/16" diam) to the rear bumper and then I lifted up and suspended the hitch to around the middle part of the bumper. Then I screwed in one bold on passenger end first, then tightening then cable, the screwed in a bolt into the middle hole on the driver side. I used two more bolts on the passenger side, and one more on the driver side. But I have an extra hole on the driver side so I reused one old bolt for the previously never-exposed hole and then tightening all bolts properly. Then on the next day I test drive my car with this hitch and Allen bicycle carrier rack which I loaded two bikes. On thing I noticed is that the lower hanging part of the hitch around the muffler tend to hit the asphalt when came out from a parking lot due to a dip in height (difference) from sidewalk to the main road, may be I was moving a little bit fast for the shock absorber to respond sufficiently. (BTW, our bikes' tires are low in air pressure or just flat because these were not used for a very long while, since COVID-19 pandemic began, and we avoided activities at any public parks and other places, and because we live in a condominium-type of apartments, we were not as "busy bees" except to stay put in the "hive".)


View More
View Less
by: J.D. Gregory05/26/20221997 Toyota Camry
20 minutes install time. 1997 Toyota Camry LE V6. The car frame holes in back(4) were already threaded to accept supplied bolts. No need for nuts or U bolts. I recommend cleaning bolt holes to clear years of dirt/grime. The bolt fitment into threaded holes will be tight but bolts are correct. Makita rechargeable impact driver made install a snap. Use anti seize if you plan on removing at a later date.


View More
View Less
# 6
Draw-Tite Trailer Hitch Receiver - Custom Fit - Class II - 1-1/4"

- view all Trailer Hitch
- Custom Fit Hitch
- Class II
- 350 lbs TW
- 3500 lbs GTW
- 1-1/4 Inch Hitch
- Visible Cross Tube
- Draw-Tite
More Information >
by: Brett04/08/20232023 Toyota Camry
Finally got the chance to install this hitch. The written instructions are marginal. They did not cover my hybrid version. The installation videos on etrailer were more helpful. The hitch was a bit off and contacts the tire well on one side. Installation by loosening the exhaust did not work for me. Mine was too tight and I could not move it out of the way to drill. I had to remove the muffler. The instructions for trimming are a bit aggressive. I was able to get the under cover installed with about 25% of the suggested cutting. One thing the instructions left out is a rear edge trim (however, the video did mention this). I also added a strip from (the heat shield scrap) to tie the cover back together and prevent flutter noise while driving. Installed, this hitch appears sturdy. I am sure it will last. Too bad it did not come with a pin or cover.


View More
View Less
by: Glenn02/06/20212018 Toyota Camry
This is a quality product. It’s designed to fit the car perfectly. Please not though that you’ll need special tools to disconnect/drop the muffler system to install the hitch. I did not have tools to disconnect the muffler/exhaust hangers, so I wound up taking it to a mechanic that installed it for about $100.


View More
View Less
# 7
Curt Trailer Hitch Receiver - Custom Fit - Class I - 1-1/4"

- view all Trailer Hitch
- Custom Fit Hitch
- Class I
- 200 lbs TW
- 2000 lbs GTW
- 1-1/4 Inch Hitch
- CURT
More Information >
by: Charles 03/10/2024Toyota Camry
Toyota CamryNice hitch I use it for bike racks still looks good after a year mounted on a 2023 Camry XSE which sits low. I’ve only scraped it once when I was going up the steep incline in the Pittsburgh area.
View More
View Less
by: Gary 03/26/2024Toyota Camry
I'm very pleased with the Curt Trailer Hitch Receiver-Custom Fit for my Camry. It's well made and was delivered in a timely manner. Highly recommend!
View More
View Less
# 8
Curt Trailer Hitch Receiver with Standard Drawbar - Custom Fit - Class II - 1-1/4"

- view all Trailer Hitch
- Custom Fit Hitch
- Class II
- 300 lbs TW
- 3500 lbs GTW
- 1-1/4 Inch Hitch
- Visible Cross Tube
- CURT
More Information >
by: Glenn C.09/20/2014
Unbelievable fast delivery and securely packaged. Great price also. I was worried about purchasing something over the internet but the trailer hitch and wiring kit arrived securely packaged so there were no scratched, dents, or issues of any kind. I can't say enough positive things about my purchases. I definitely will be back to etrailer.com for more purchases.
View More
View Less
by: Richard04/20/2015
Trailer hitch and wiring arrived as scheduled. Product fits the Toyota Camry perfectly. Installation was easy. Excellent service.
View More
View Less
# 9
Curt Trailer Hitch Receiver with Standard Drawbar - Custom Fit - Class II - 1-1/4"

- view all Trailer Hitch
- Custom Fit Hitch
- Class II
- 350 lbs TW
- 3500 lbs GTW
- 1-1/4 Inch Hitch
- Visible Cross Tube
- CURT
More Information >
by: chuck08/01/2014
outstanding easy and just what I needed great product and price plus the wiring I ordered went in easy as pie
View More
View Less
by: Matt08/13/2019
A difficult installation. But, that was not because of the hitch. Once the car was apart, the hitch fit perfectly and bolted right up.
View More
View Less
# 10
Curt Trailer Hitch Receiver - Custom Fit - Class I - 1-1/4"

- view all Trailer Hitch
- Custom Fit Hitch
- Class I
- 200 lbs TW
- 2000 lbs GTW
- 1-1/4 Inch Hitch
- Visible Cross Tube
- CURT
More Information >
by: Ezekiel A.10/13/20152014 Toyota Prius
I purchase two different products and installed both, back to back. I did not use a jack or a lift, so it took about 45 minutes to finesse this one into/onto my Toyota Prius. I needed a helper (wife) which made it much easier. This is for a bike rack. Ordered Friday and delivered Monday, fast, fast. Thank you.


View More
View Less
by: A. W.05/23/2020
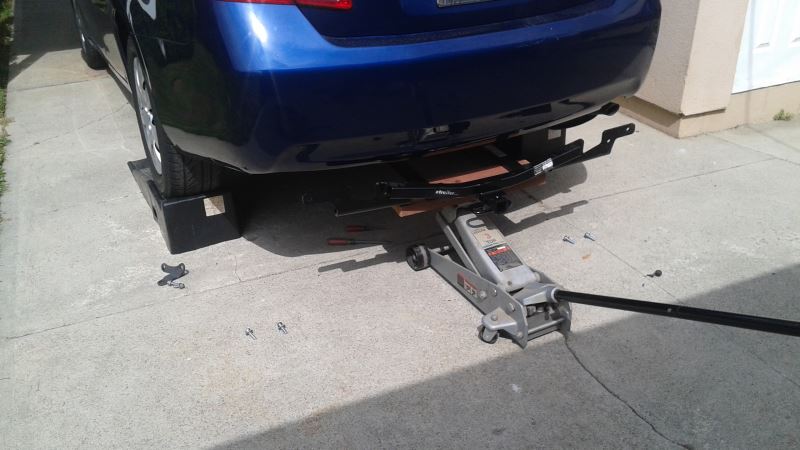
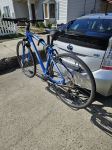
I bought this hitch after watching the online videos by etrailer detailing the installation. They make it look a lot easier to install than my experience, but i was not using a lift and had never done it before. The price on this hitch was very good and it was shipped very quickly. It beat the tools that I ordered from another online retailer to do the install, in fact. The packaging was good as well, and protected the hitch. I included a picture of my installation, which admittedly does not show very much, but its a win for me. The hardest part of installation was dealing with the exhaust bracket. I plan on purchasing a bike rack and a cargo rack in the near future, maybe even a small trailer.


View More
View Less
# 11
Curt Trailer Hitch Receiver - Custom Fit - Class III - 2"

- view all Trailer Hitch
- Custom Fit Hitch
- Class III
- 350 lbs TW
- 3500 lbs GTW
- 5000 lbs WD GTW
- 2 Inch Hitch
- 500 lbs WD TW
- Visible Cross Tube
- CURT
More Information >
by: Bryon 02/10/2024
This also worked
View More
View Less
by: Michael08/15/2023
Very easy install and works perfectly
View More
View Less
# 12
Draw-Tite Sportframe Trailer Hitch Receiver - Custom Fit - Class I - 1-1/4"

- view all Trailer Hitch
- Custom Fit Hitch
- Class I
- 200 lbs TW
- 2000 lbs GTW
- 1-1/4 Inch Hitch
- Visible Cross Tube
- Draw-Tite
More Information >
by: Rick Z09/17/20122012 Toyota Prius
My son-in-law and I installed this hitch on a 2012 Toyota Prius V. The video for the install on a Prius is accurate for a Prius V with the exception that a Prius V does not have cosmetic cowling on the underbody that has to be removed. The install was straightforward and we had the hitch on in about 45 minutes. Other than the receiver on the hitch, you can't see the hitch without bending down and looking under the bumper. I personally like the aesthetics. We're using the hitch with the Swagman XTC-2 bike carrier and the combination is ideal for transporting our two bicycles. The fit between the hitch and bike carrier is tight and the Swagman allows us to drop the middle bar down for access to open the rear hatch of the vehicle when the bikes are not in the carrier but leaving the bike carrier attached. We bought the Prius V so we could carry passengers, gear and two bicycles on trips. The draw-tite hitch and Swagman XTC-2 give us the flexibility to do that. Here's some pictures to demonstrate as I've had a difficult time finding photos on the web showing a Prius V with hitch and bicycle carrier installed. I have a cover on the hitch receiver in some photos, sorry I took the photos at night with a flash, but hey, I did the review! Good luck. Oh, by the way, like others have written, E Trailer was on top of things from the get go and I received numerous e-mails about the status of my order and follow-up after my receipt. Only took three business days between the date of my order and delivery to my home. The hitch and bike carrier were boxed and then inserted into another heavy duty shipping box. There were a few small tears in the outer box (assume from rough handling by the delivery carrier) but the contents were not damaged in any way. I would definitely order again from etrailer.com.


View More
View Less
by: Thomas04/15/2024
Perfect fit and super simple installation (45 mins from opening box to torquing last bolt). Perfect for my bike rack and other attachments. Incredibly secure!Bought from etrailer 3x never dissapointed ?? Excellent instructions + customer service


View More
View Less
# 13
Curt Trailer Hitch Receiver with Standard Drawbar - Custom Fit - Class II - 1-1/4"

- view all Trailer Hitch
- Custom Fit Hitch
- Class II
- 350 lbs TW
- 3500 lbs GTW
- 1-1/4 Inch Hitch
- Visible Cross Tube
- CURT
More Information >
by: Will06/18/2018
These are some of the best trailer hitches I know for the Toyota camry. Easy to install. I did order the wrong ball, had to buy another, to large of a bolt size.
View More
View Less
by: Fengxiang01/27/2018
Quality product. Worth every penny!
View More
View Less
# 14
Curt Trailer Hitch Receiver - Custom Fit - Class III - 2"

- view all Trailer Hitch
- Custom Fit Hitch
- Class III
- 500 lbs TW
- 5000 lbs GTW
- 5500 lbs WD GTW
- 2 Inch Hitch
- 500 lbs WD TW
- Visible Cross Tube
- CURT
More Information >
by: Tyler- 2008 Toyota 4Runner04/28/20232008 Toyota 4Runner
Very happy with purchase of this trailer hitch. Installed onto my 2008 Toyota 4Runner 2wd SR5 4.0 with no difficulties at all by myself. I recommend a second person to help lift the other side and to speed up the installation time but it’s possible with one man. 8 bolts, half inch drive, 19mm and 13mm sockets are all that is needed. Estimated novice time is 50 minutes and that is exactly what it took me. No cutting of fascia necessary. However, I did have to unhook the rubber latch on the tail pipe to get the passenger side bolts in (super easy and no problem to do). Two day shipping as promised straight to the front door. Highly recommend etrailer and this hitch receiver.


View More
View Less
by: Tyler04/12/2019
Arrived in a very timely manner in good shape. Easy install with instructions. I chose not to drop the exhaust as you can get the bolts in easy enough with it on. For the factory seven way plug and bracket i just bent it back and it works great. I have ordered through etrailer before and will do it again in the future ! thanks guys Tyler


View More
View Less
# 15
Curt Trailer Hitch Receiver w/ Euro Drawbar - 1-7/8" Ball - Custom Fit - Class II - 1-1/4"

- view all Trailer Hitch
- Custom Fit Hitch
- Class II
- 350 lbs TW
- 3500 lbs GTW
- 1-1/4 Inch Hitch
- Visible Cross Tube
- CURT
More Information >
# 16
Curt Trailer Hitch Receiver - Custom Fit - Class III - 2"

- view all Trailer Hitch
- Custom Fit Hitch
- Class III
- 350 lbs TW
- 3500 lbs GTW
- 5000 lbs WD GTW
- 2 Inch Hitch
- 500 lbs WD TW
- Visible Cross Tube
- CURT
More Information >
by: Chuck07/30/20182018 Toyota Sienna
I installed this trailer hitch on my 2018 Toyota Sienna. It is very well-built, and fit perfectly. Customer service was very responsive when I had some questions, and responded right away, both by phone and email. The instructions were very good, but could benefit from additional information regarding cutting the car’s rear trim panel. In addition to the cut that needs to be made for the trailer hitch bolting plate to go through on the driver’s side , it also needs to be cut around the main bar / receiver area. Instead of cutting a big slot for the main bar, I cut out around the receiver plates, and put drain holes in the ends that would otherwise collect water. One shortcut that I found was that I was able to move the exhaust out of the way far enough by just removing the rearmost hanger, rather than removing the two hangers as shown in the video.


View More
View Less
by: Mike L01/07/20122011 Toyota Sienna
2012 Sienna LE FWD. Watch the 2011 installation video before you start. This 13105 hitch tucks in even prettier than I expected, and now my brother is jealous. Note I made the cutout in the underbody panel narrower, starting 1.75 inches from the hole (see photo), for a closer fit, and there is still room for torque wrench. I also cut a slit out to the front edge, so I could slip it on with the hitch in place, and for better access to my air hoses inside the left fender. I decided to add Airlift after reading reviews, since on trips I carry a maximum load. Installed single-handed, raised on jack stands.


View More
View Less
# 17
Draw-Tite Max-Frame Trailer Hitch Receiver - Custom Fit - Class III - 2"

- view all Trailer Hitch
- Custom Fit Hitch
- Class III
- 750 lbs TW
- 5000 lbs GTW
- 8000 lbs WD GTW
- 2 Inch Hitch
- 800 lbs WD TW
- Concealed Cross Tube
- Draw-Tite
More Information >
by: William01/15/20242023 Nissan Frontier
This receiver hitch is heavy duty and very well made. The welds are all smooth and uniform, and the powder coating was great. The bolts and mounting hardware were shipped safely in a sealed plastic bag tucked inside the receiver tube. Install on my Nissan Truck was easy. I would recommend running the threads on the truck frame before attempting to bolt the receiver hitch in place as the factory bolt holes can get filled with dirt and grime.


View More
View Less
by: Mark02/21/2024
Excellent fit and finish. Welds are great. Bolted right up - super easy with no problems - I bet it took only 20 minutes to install it to my 22 Frontier, using only a floor jack to support out and a 19mm socket. Shipping was super fast, 2 days. Both the product and etrailer are highly recommended.


View More
View Less
# 18
Draw-Tite Max-Frame Trailer Hitch Receiver - Custom Fit - Class III - 2"

- view all Trailer Hitch
- Custom Fit Hitch
- Class III
- 675 lbs TW
- 4500 lbs GTW
- 5000 lbs WD GTW
- 2 Inch Hitch
- 675 lbs WD TW
- Visible Cross Tube
- Draw-Tite
More Information >
by: Jarrett (eastern nc)03/10/2015
I cannot grade the towing capability yet, but this review is on installation. Less than one hour from start till I was putting tools away on the same day of arrival. One man job with the assistance of a rolling floor jack. Put rear up on ramps, hit holes with wd40, used one bolt to test run all threads, did not unhook tailpipe, simply insert the plate in, over, and let it rest on on exhaust (majority of weight still supported by jack). Start with left side, place 1 bolt loosely and then continue to switch sides with two at a time. Used torque wrench at 68 lbs to finish securing. Done. Looks great too! Up next: electrical and trans cooler. Thank you etrailer for the product and videos. Bought the hitch bc of such great reviews.

View More
View Less
by: Dirty diaper duty daddy06/05/2013
This can be a one man job if you have ramps and a short step stool. The thing that made the install take longer than 30 minutes was that the bolts on the passenger side would not line up if the drivers side bolts were on. I had to remove all the bolts on the driver side and set the hitch on a step stool 12 inches high so that the driver side was about 3 inches away from the mounting location. This was the only way i could get all three passenger side bolts to line up. Torqued to 69 pound-feet and i was done. Three stars for those three bolts.


View More
View Less
# 19
Draw-Tite Max-Frame Trailer Hitch Receiver - Custom Fit - Class III - 2"

- view all Trailer Hitch
- Custom Fit Hitch
- Class III
- 400 lbs TW
- 4000 lbs GTW
- 5000 lbs WD GTW
- 2 Inch Hitch
- 500 lbs WD TW
- Concealed Cross Tube
- Draw-Tite
More Information >
by: Leland04/30/20182011 Dodge Grand Caravan
I have been looking for a hitch for awhile now and then I came across your web page. I have seen Draw-Tite hitches on quite a few vehicles. So I went on to do a little research and to read quite a few of the reviews on this hitch here. After reading the reviews and the price of the hitch at that time I decided that I had found the hitch for my 2011 Dodge Grand Caravan Crew. I placed the order and the next day received a message that my order had shipped. The box arrived very quickly after I placed my order which was a pleasant surprise. One side of the box was really tore up and the hitch had come free of the strapping inside the box. The only thing inside the box was the hitch with the tongue/receiver wrapped in plastic wrap and the two pieces of cardboard that had come free. I search the inside of the box for some instructions but did not find any at this point so I would know exactly which bolts to take out. The first thing I did was to jack up the back of my van so I had a little more room to work underneath where the hitch was to go. Then I took off the passenger side rear tire to give me better access to the bolts that had to come out for the hitch and for the exhaust system to be lowered. I then took out the five bolts for the hitch and had to take out the three bolts holding up the exhaust to give me room to install the hitch. Then came the hardest part of the whole process and that was getting the hitch up to a point where I could get a bolt started. I tried using the exhaust system to help me but was still having a problem. So I got a cinder block I had in the garage and put it under one end of the hitch which was a better platform and really helped me getting the other side started. From that point on it went really well getting the other side started and then all five bolts in and tightened down. I then stepped back to see what it looked like and at this time I saw something white deep in the hitch receiver/tongue. When I pulled it out I noticed it was the instruction I had looked for earlier. It would have been nice to have these when I first started. A suggestion would be to put a notice on the plastic wrap that is wrapped around the receiver/tongue of the hitch that states "Instruction Enclosed" or "Packing Slip Enclosed" or just tape them to the inside of the box, not hidden inside a wrapped receiver/tongue of the hitch. I then went back and torqued the five bolts to what it stated on the sheet I found. I then put the three bolts back in the exhaust system to get it back in place which basically completed the installation of my Draw-Tite Max-Frame Trailer Hitch.


View More
View Less
by: Chris03/04/20242012 Dodge Grand Caravan
2012 Dodge Grand CaravanWent on like a charm. This is my 3rd rodeo with Etrailer. Two receiver, hitches, and a weight distribution camlock. All of them were exactly as promised.
View More
View Less
# 20
Curt Trailer Hitch Receiver - Custom Fit - Class III - 2"

- view all Trailer Hitch
- Custom Fit Hitch
- Class III
- 900 lbs TW
- 6000 lbs GTW
- 8000 lbs WD GTW
- 2 Inch Hitch
- 900 lbs WD TW
- Visible Cross Tube
- CURT
More Information >
by: ATYakker12/11/2023
This was installed on a 2016 highlander le plus. As advertised it fits perfectly and looks great. As a DIY-er, I was able to successfully install this hitch alone and make the correct cuts in under an hour. The hitch weights about 50lbs and once you set it into position (with help from jack stands), the screws go right in. It really is as simple as the video available online. Highly suggest this hitch. If negative things happens I will post a follow-up review. I don't expect it. Worth the price!


View More
View Less
by: Daniel09/04/2019
I received the hitch on time and no damage to the box and no scratches on the hitch. The directions were easy to follow and had the hitch installed in about 1.5 hours, I didn't have to jack up my vehicle (2016 Toyota Highlander), the hitch was light enough that I was able to lay it on my lap and start a bold on each side then work my way back installing the remaining 4 bolts. I torqued the bolts to specifications as stated in the directions then installed the wiring harness, that only took 15 min start to finish. I towed a 5' x 8' [rental] trailer with furniture on a 8 hour trip with no issues. Buying the hitch was cheaper that renting a truck to move my daughter into an apartment for her Junior year of college. Thanks again for a great product at a great price.


View More
View Less
Trailer Hitch Videos
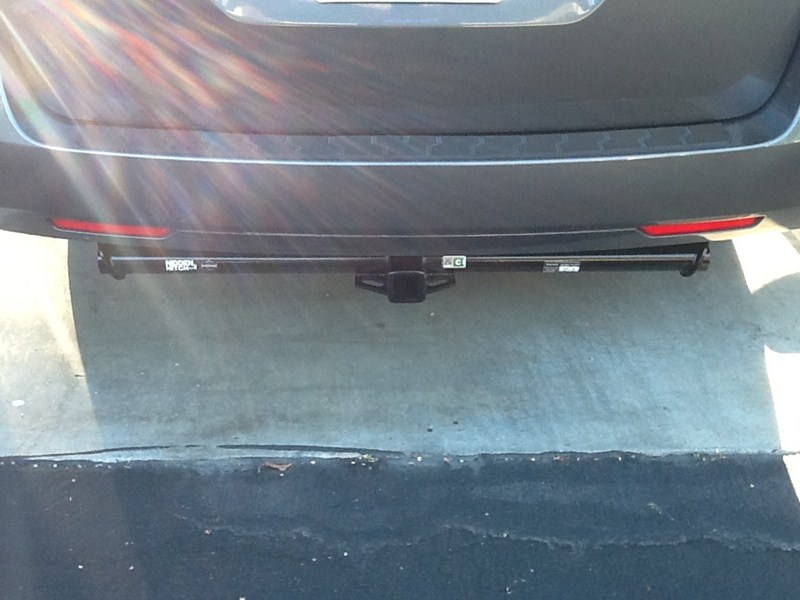
Best 2012 Toyota Camry Hitch Options

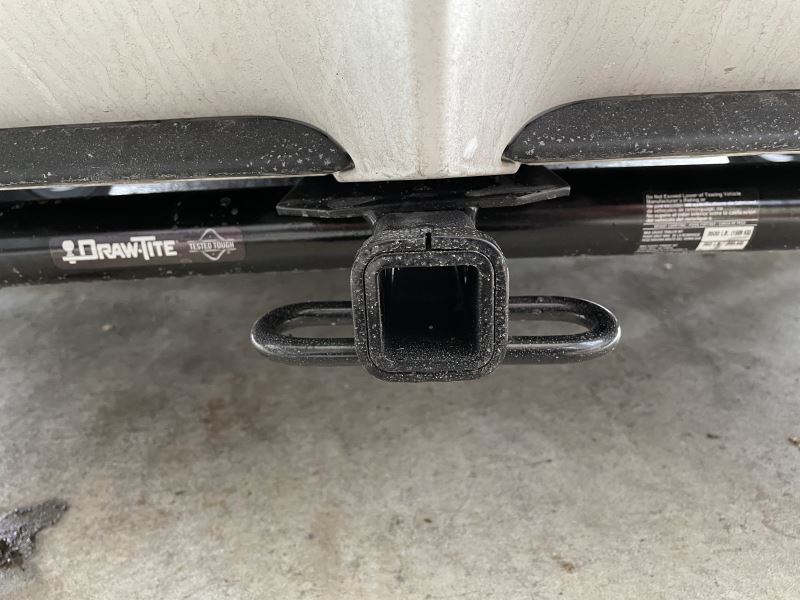
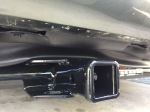
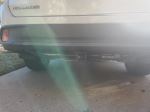
Today on our 2012 Toyota Camry we will be looking at the most popular hitch options. From the top we have a Draw-Tite Class II, part number 36540. On the bottom we also have a Curt Class II, part number C12107. Both these hitches share the same basic construction. The main difference is the Draw-Tite on the top here has a square bodied frame, whereas the Curt on the bottom here has got a round tubular construction. They both have a durable black powdercoat finish.
Trailer Hitch Installation - 2012 Toyota Camry - Curt
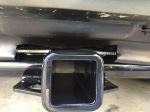
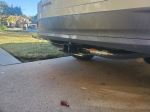
Today on our 2012 Toyota Camry, we're going to take a look at and show you how to install the Curt custom fit class two trailer hitch receiver. This has the inch and a quarter opening. Its part number is C12107. Now, here's what our hitch is going to look like once we get it installed. The end of our receiver tube might be about a quarter inch past the end of the bumper here. Not too much that you can see it's a pretty narrow hitch.
Trailer Hitch Installation - 2012 Toyota Camry - Hidden Hitch
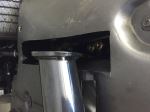
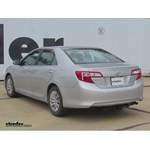
Today on our 2012 Toyota Camry we'll be installing Hidden Hitch, part number 90079. This is what our hitch will look like once its installed. Next we'll go ahead and give you a couple of measurements to assist your selecting accessories for your new hitch such as a ball mount, bike rack or cargo carrier.From the center of the hitch pin hole to the outermost edge of the bumper is 2 inches. From the top of the receiver tube opening to the ground is 11-3/4 inches. Now let's go ahead with installation. To begin our install we'll first need to lower the exhaust.
Trailer Hitch Installation - 2012 Toyota Camry - Curt c12082

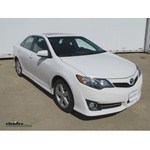
Today, on our 2012 Toyota Camry Hybrid, we'll be installing the CURT hitch, part number C12082. This is what our hitch will look like once its installed. Next, we'll go ahead and give you a couple of measurements to assist you in selecting accessories for your new hitch. From the center of the hitch pin hole to the outermost edge of the bumper is two and a half inches. From the top of the receiver tube opening to the ground is eleven and a quarter inches.This will assist you selecting accessories such as a ball mount, a bike rack, or a cargo carrier. To begin our install, we'll first need to remove the under body trim panel and its multiple fasteners that secure it.
2012 Toyota Camry Trailer Hitch Questions
- Yes, our hitches like the Curt hitch part # C12107 fit both the hybrid and non-hybrid models of the 2013 Toyota Camry.
view full answer... - The Draw-Tite Class II # 36520 is designed to fit a Honda CR-V from 2012-2016. Unfortunately, it will not fit your 2012 Toyota Camry. For your Camry you will need the Draw-Tite Class II # 36540.
For a 4-way trailer wiring harness the Tekonsha # 118405 is a plug in adapter that installs into the Camry's existing harness inside the trunk, behind the tail lights.
For a ball mount the Draw-Tite # 36071 will give you either 2-5/8 inch rise or 3-1/4 inch drop. It also includes...
view full answer... - The Draw-Tite Trailer Hitch Receiver part # 36540 which is a fit for a 2012 Toyota Camry has a 1-1/4" receiver tube opening . If you have a bike rack with a 2" shank then you'll need to use a 1-1/4" to 2" hitch adapter, the Brophy Trailer Hitch Receiver Adapter part # HTAD. Please note, adapters do reduce the hitch capacity by 50%.
view full answer... - I have a solution for you, but unfortunately there are no motorcycle carriers that will work in a 1-1/4" hitch receiver. Additionally, trying to use a hitch adapter reduces the tongue weight capacity of the hitch by 50%, so even that isn't going to be an option since it would reduce it down to around 175-lbs.
Your best bet to carry a motorcycle is going to be to use a small utility trailer like the Detail K2 # K2MMT4X6. To put together a complete towing package you'll also...
view full answer... - Curt hitches like the Class II designed for the Toyota Camry, part # C12107 require the stability strap, part # 18050 as part of the warranty. Beyond that, the stability strap is one of the easiest ways to improve the performance of any non-trailer load by helping it become far more stable. I've included a video of our team installing a strap behind a 2014 Toyota Prius on a bike rack and a cargo carrier to better illustrate how it works.
Draw-Tite does not have this requirement,...
view full answer... - I do have a solution for you but using just a hitch-mounted carrier will not work. In order to carry a scooter on a trailer hitch mounted carrier both the trailer hitch and the vehicle would have to have a tongue weight capacity greater than the combined weight of the scooter and the carrier.
The trailer hitch with the highest tongue weight capacity that fits your 2012 Toyota Camry is # C12107. This hitch tops out at 350 pounds tongue weight so you would have to carry the...
view full answer... - For a trailer hitch confirmed to fit your 2012 Toyota Camry Hybrid you would want the Curt hitch part # C12107 that has been confirmed as a fit for the vehicle. This hitch has a 350 lb tongue weight capacity and a 3,500 lb total trailer weight capacity. You would need to also check with Toyota to see what they recommend as towing capacities and be sure not to exceed the lower rating between the two.
For a ball use # 19256 for a 1-7/8 inch diameter or # 19258 for a 2 inch...
view full answer... - The Curt Hitch # C12107 that you referenced will fit the 2012 Toyota Camry Hybrid models. You will need to remove the underbody panel and trim the heat shield to install this hitch. The lack of the under body panel will not significantly protect the undercarriage of your vehicle from winter road conditions as that panel does not seal the undercarriage so salt and road grime would still find its way in there.
As for finding a shop to install the hitch, pretty much any qualified...
view full answer... - We do have a Curt trailer hitch that does fit your 2012 Toyota Camry but the # 13569 is not a fit and instead you'd want the part # C12107 which is a Class II.
I attached an install video for this hitch as well.
view full answer... - First, that under body panel you mentioned on your 2012 Toyota Camry will either need to be removed or trimmed to install the hitch, # 36540. If the car is leased then I recommend removing it and storing it some place safe so you can put it back on later.
This trailer hitch is an excellent choice for carrying bikes. Class II trailer hitches like this one are more capable and you do not have the limitations that you would with a Class I trailer hitch. You will need to make sure...
view full answer... - First, if the owners manual states that you cannot tow with the vehicle, then I cannot recommend going against that. If the owners manual is unclear, you will need to contact your Toyota dealer or Toyota directly to determine if the car can be used for towing and, if so, what the capacity is.
The Draw-Tite trailer hitch, # 36540, is listed as a fit for all models of the 2012 Toyota Camry, including the SE. It also fits hybrid models. I have included a link to the installation...
view full answer... - I have a solution for you to use a bike rack with both of your vehicles but since the only hitch that is designed to fit your 2012 Toyota Camry Hybrid is the Curt Trailer Hitch Receiver # C12107 with the 1-1/4" receiver you'll need to use a different bike rack. The only other solution would be to have a shop fabricate a hitch with a 2" receiver to fit your vehicle.
For a bike rack that fits both 1-1/4" and 2" receiver sizes I recommend checking out the Kuat Transfer V2 # KU74FR...
view full answer... - I have a couple of trailer hitches that are custom fits for your 2012 Toyota Camry, but they do require a couple holes to be drilled for installation.
The Draw-Tite, part # 36540 and the Curt Hitch, part # C12107 will require two holes to be drilled on your vehicles frame. The Curt hitch will also require a couple of holes to be enlarged. They will also require some trimming or removal of an under-body panel.
I am including links to the installation instructions of the...
view full answer... - Since you are just using the hitch to carry bikes, you will not need a ball mount that is used when towing a trailer. Because of that reason the hitch I would recommend for your 2012 Toyota Camry Non-Hybrid model would be the Draw-Tite Class II 1-1/4 Inch Hitch, part # 36540. This hitch does not include a ball mount.
For a bike rack, it will depend on how many bikes you plan to carry and the styles of those bikes. A couple of recommendations for bike racks on a Class II hitch...
view full answer... - For your 2012 Toyota Camry, you can use the Draw-Tite Trailer Hitch Receiver # 36540 along with the 48" long Curt Cargo Carrier # C18110. This is the best options to allow you to carry your Honda Ruckus moped. I also recommend tie downs # EM05710 and soft loops # 06303.
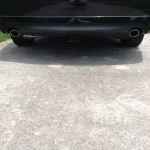
view full answer... - Yes, Draw-Tite Trailer Hitch Receiver - Custom Fit - Class II - 1-1/4" Item # 36540 will fit your 2012 Toyota Camry with dual exhaust. You will just follow any instructions pertaining to exhaust for both sides of the vehicle. The hitch was designed so that it could work with either exhaust configuration.
If you plan on doing some towing the recommended ball mount is # 36071. For a compatible 1-7/8 inch ball use # 19256 and for a compatible 2 inch ball use # 19258.
And for...
view full answer... - Though I am not familiar with the ECOTRIC brand as it is not one that we carry, it does look to need a hitch to be able to install on your 2012 Toyota Camry. With that said, we do have a few hitch options available for your car and the Curt # C12107 is a good one. This is American made and I included an install video for you to check out. However, this, as well as the Draw-Tite # 36540, are Class II hitches which means they have a 1-1/4" receiver.
This is due to your 2012 Camry...
view full answer... - Yes, you can remove and leave off the underbody panel on your 2012 Toyota Camry when installing a trailer hitch. It does not have to go back on. But if you want it to then it does have to be trimmed.
For a trailer hitch I actually recommend Draw-Tite hitch # 36540. The reason is that the Curt hitch is going to require the use of a stabilization strap, # 18050, when using the hitch for anything other than a trailer per Curt's warranty requirements. The Draw-Tite hitch costs...
view full answer... - Basically for all of the hitches available for the 2012 Toyota Camry you will have to do the same modifications. You will need to temporarily lower the exhaust, modify the heat shield possibly and trim or remove the underbody panel. I attached installation instructions for the Curt Trailer Hitch # C12107 for you to check out to give you an idea what the install will be like.
If all of the modification is not something you are interested in doing you could also just get a trunk...
view full answer... - Class III 2 inch trailer hitches are only available for heavier duty vehicles like trucks and SUVs which have higher towing capacities. For your 2012 Toyota Camry we only have Class II hitches like the Draw Tite part # 36540 which has a 1-1/4 inch hitch opening.
You'd either have to look into a small trailer to tow with your Camry or look into a larger vehicle.
For trailer wiring for the Camry you'd want the Tekonsha # 118405. For a ball mount # 3593 and hitch balls # 19256...
view full answer...
What our customers are saying:
"Excellent deal for the trailer hitch with accessories. Best deal on the web. Free shipping was the bomb!"