How to Install Prodigy P2 Brake Controller # 90885 in 2013 Dodge Durango Without Under-Dash Port
Question:
Hello, How do I wire this brake controller to my 2013 Dodge Durango that did not come factory equipped with a brake controller port under the dash board. Thanks.
asked by: Terri C
Expert Reply:
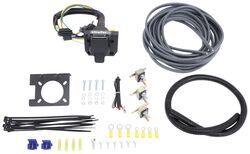
If your 2013 Dodge Durango lacks a 7-way trailer connector and the under-dash connection port for a brake controller (which would allow you to use the quick-connect harness # 3045-P) you can still do a hard-wired installation. To do this you can use our # ETBC7, which is a complete brake controller installation kit that includes a 7-way connector, wiring, circuit breakers, connectors and circuit tester.
If your Durango does not have a 4-pole trailer connector already you will also need a wiring harness to provide the 4-pole, which you will then connect to the 7-way included in the # ETBC7.
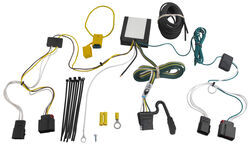
I recommend harness # 118552 as this includes a powered converter. A powered converter will provide a direct 12V feed from your tow vehicle battery to power the lights on your trailer; this avoids the risk of the current demand from the trailer lighting overloading the Durango tail light wiring. This Curt harness simply plugs in to the tail light connectors on your Durango without need to cut or splice into the new vehicle wiring. Once you plug the connectors in to the tail light wiring you will need only to attach the white ground wire ring terminal to a clean bare metal surface and run a length of 10-gauge wire (included in the ETBC7) to the included fuse and on to the positive terminal of your battery.
The install instructions for the Curt harness are attached for your reference along with a helpful article that covers all the steps for brake controller installation. I have also included a video showing installation of the
ETBC7 in a Dodge vehicle.
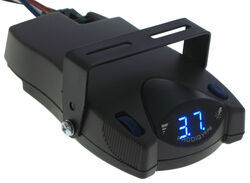
The Tekonsha P2 includes a 4-wire pigtail lead. The 4 wires connect as follows: the white ground wire attaches either to the battery negative terminal or to a clean bare metal surface; the black wire provides 12V power input to the controller and this connects through the circuit breaker (included in the ETBC7) to the positive terminal on your battery. The blue wire carries the controller output signal for your trailer brakes and this connects to the second wire (supplied in the ETBC7) and on to the 7-way connector. This brake output wire connects to the pin at the 5-o-clock position (please refer to the photo provided). The red wire brings the brake signal to the controller from the cold side of the brake light switch located at the brake pedal. You will use the included tester to find the terminal on the brake switch that carries a signal only when the brake pedal is pressed.
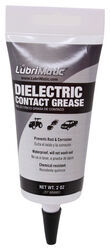
When making your plug-in connections at the tail lights and trailer connector your installation can be protected by an application of dielectric grease, such as # 11755, which helps prevent corrosion of the contacts to protect proper operation.

Products Referenced in This Question
Dielectric Grease for Electrical Connectors, 2 oz.
- Accessories and Parts
- Trailer Wiring
- Wiring
- Dielectric Grease
- LubriMatic
more information >
T-One Vehicle Wiring Harness with 4-Pole Flat Trailer Connector
- Custom Fit Vehicle Wiring
- Trailer Hitch Wiring
- Powered Converter
- Custom Fit
- 4 Flat
- Tekonsha
more information >
Universal Installation Kit for Trailer Brake Controller - 7-Way RV and 4-Way Flat - 10 Gauge Wires
- Accessories and Parts
- Trailer Brake Controller
- Installation Kits
- etrailer
more information >
Product Page this Question was Asked From
Tekonsha Prodigy P2 Trailer Brake Controller - 1 to 4 Axles - Proportional
- Trailer Brake Controller
- Proportional Controller
- Electric
- Electric over Hydraulic
- Automatic Leveling
- Under-Dash Box
- Dash Mount
- Up to 4 Axles
- LED Display
- Up to 360 Degrees
- Tekonsha
more information >
Featured Help Information
Instructions
Miscellaneous Media

Continue Researching
- Article: Brake Controller 7- and 4-Way Installation Kit (ETBC7)
- Article: Brake Controller Installation: Starting from Scratch
- Article: Towing a Trailer? Let's Talk About Brake Controllers
- Article: Trailer Wiring Diagrams
- Article: Wiring Trailer Lights with a 7-Way Plug (It's Easier Than You Think)
- Article: 5 Things to Know About Weight Distribution Hitches
- Article: How to Install a Brake Controller on Chevrolet / GMC 1999-2006 Pickups
- Q&A: Brake Controller Recommendation for a Truck with Air Brakes and a Trailer with Electric Brakes
- Q&A: Compatibility of LED Hitch Cover FHG72VR with Wiring Harness 118384 on 2012 Chevy Colorado
- Q&A: Lift Kit Options For A 2015 Winnebago Micro Minnie 1706FB
- Q&A: What is the Difference Between a 4-Way and 7-Way Trailer Connector
- Q&A: Should I Get a Proportional or Time-Delayed Brake Controller
- Q&A: Lug Nut Torque Chart for Trailer Wheels
- Q&A: How do I Tell if the Brake Controller is Bad


